This post has been updated (Sept 2019) with a revised version being posted here.
Let me start by saying that I appreciate what the IBA do, and how they are run. They are a volunteer based organisation who charge the absolute bear minimum to cover their fixed operating costs, and rely heavily upon volunteer time and energy to operate.
Ride verifications are charged, but only when they pass an initial level of scrutiny; by paying for a verification effort you are not paying for the result, you are contributing towards the overall costs of the organisation.
As such, I believe that when you submit a ride for verification you really ought to make sure you’ve read the requirements fully, you know what the reviewers will be looking for, and that it’s laid out well enough, and clearly enough for it to become a hopefully-trivial-task for them to know that you have proved your ride sufficiently.
Understanding their process:
It is up to the rider, through reasonably common means to prove that the ride conformed to the requirements laid out by the IBA – In simplistic terms, this means that you rode the required mileage, within the required maximum timeframes. Simply put, you’ve only got two things to prove, where you went, and when you did it.
This has been historically achieved using computer generated time/dated receipts, an assumption that you would take the shortest distance between those points, and further corroborated by a start and end witness. The distance was established using mapping tools, and plotting the shortest route between the receipted points. There was an expectation that you would refuel at least every 350miles, and that if you were doing an ‘out and back’, or ‘square / circular’ route – that the points which you chose to stop would prove that you did the whole thing and couldn’t have done shorter, by being placed at the outer extremities of your route.
That’s how it used to work, for years.
The introduction of new technologies
With the introduction of new technologies, such as on board GPS units, SPOT tracking devices, cellphone etc; new possibilities have been opened up, and have presented both the chance for simplification, but also challenges to the organisation in terms of their use and management.
An onboard GPS for example generates a local track of the route which you take, but it can be manipulated after it’s been downloaded. You can in-fact create a track from scratch, based on a route in planning software. It’s not considered ‘proof’ of the ride. – It can however help, as additional supporting content, but it’s not considered to be evidence.
There are some services which the IBA have currently deemed to be sufficiently ‘tamper proof’ for them to provide a good and trusted basis of your route; SPOT tracks uploaded in real time to a central service, such as SPOTWALLA are currently trusted. These show your location every 5-10-15 minutes along your route and the location is stored centrally in a way which can then be presented to the IBA.
SPOT (like) tracks can also be generated by the cellphone apps, SWConnect (iOS) and Bubbler GPS (Android). These can also be contributed up to SPOTWALLA in real time, and so far (as of Mar 2018) these have been accepted and trusted as truthful respresentations by the IBA (proof of route).
SPOT also provides supporting evidence of the time and date stamp of each logged point. – This can be combined nicely with receipts, and can at times, potentially help to overcome some inaccurate computer timestamps (not all GAS station’s checkouts are synched with a decent internet time source, or may even still be using Daylight Savings or Standard time – all of which may require an explanation when submitting your ride, especially if it’s a start or finish receipt!..).
SPOT has the ability for you to push a custom message, even from the cellphone apps. This can be useful to mark special checkpoints and out-and-back turn-around points, especially if there is no receipt stop there. It can also be used to mark rest stops, and starting times; you can push custom messages to show when you stopped and when you re-started your ride (if needed).
While SPOT tracks prove route, they do not prove distance. – This still needs to be evaluated, worked out and proven.
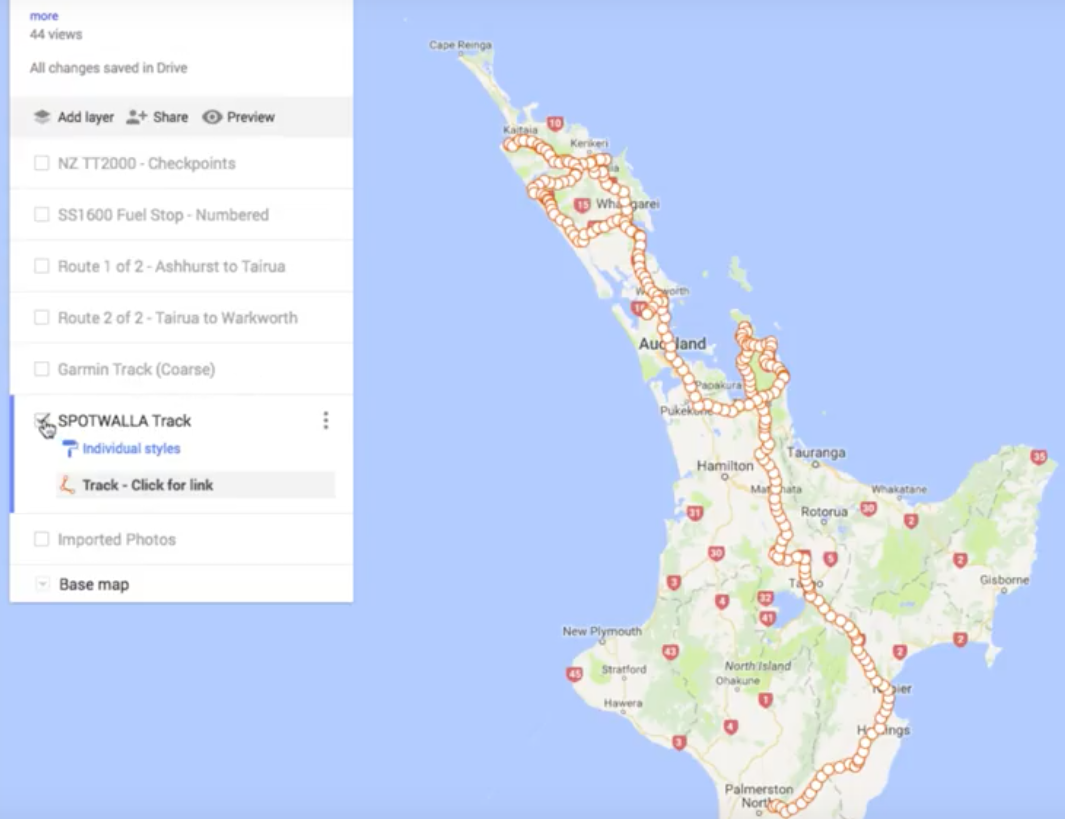
SPOT tracks can be viewed directly from the SPOTWALLA website using Trips – this is the only source which will be trusted. However, it can also be exported from SPOTWALLA. It’s reasonably trivial for a reviewer to have two windows open, side by side to check that the ‘imported version into google maps matches, exactly the SPOT track shown on the SPOTWALLA website’. – This is reasonable simple, it takes a few minutes to review them side by side.
If you do import your SPOT track into Google maps, then it can subsequently be used to show your route in more detail. You may at this point want to import your GPS track (just as supplemental content) into your GoogleMap, also provide your raw track file to the IBA so that they can eyeball it’s raw contents – there is enough stuff in a GPS generated track (if you know what you’re looking for) to know if it’s been generated on a GPS device, or whether it has come from route mapping software.
I do not rely upon the GPS track from my device, but it does help me to make sure that the next step is accurate (for my own benefit)… Once you’ve imported all of these into Google maps, you’ll need to create some routes – I say ‘some’ because the chances are good that Googlemaps won’t support enough waypoints for you to do the whole thing in one go. Googlemaps only supports up to 10 places in each route. I break my route up into as many segments as a need – using the fuel stops / GPS coordinates from my route planning, as the major waypoints.
Once you have the barebones of the route laid out in Googlemaps, you can apply fine adjustment points to the route as needed to ensure that the new routing element over-lay your GPS track exactly. You can also check that the SPOT track also confirms your route, with every SPOT ‘dot’ laying over the newly added layer.
Once you have this routing layer accurate, you can view the ‘Step by Step directions’ – which, at the top of it will contain a summary of the end to end distance of that leg. – It is rounded to the nearest km, or mile; but should be good enough if you built in a small margin to your planning.
Add up the kms / miles from each leg – and you have a verifiable distance for your ride.
Known issues
Sharing this with the IBA can create some problems. – Often getting this to them in a way which they can properly view is hard if you’ve used ‘mymaps’ in google.
This is the current stumbling block which I am having with the iba premier certification team. – As a result, I have been prompted to create a video of all of this, showing how it comes together.
– You’ll want to open that in a new window, and make sure the Quality Settings are as high as possible (720p).
It seems to me, that as soon as the ‘method of sharing’ has been sorted out, that this way of laying out all of the details which they need to see, could become a pretty good, and standard method of giving them everything they need.
These are my own independent views and have not been written in conjunction with the IBA, or with their authority. I simply provide the video as a reference to show how you can lay all of this out. I welcome feedback and comments on this method.
Thanks, and regards, Chris.