Download links for the finished windows basecamp file, and garmin map files are at the bottom of this post – you don’t need to work through what I had to…
By custom building our own, routable OSM based maps for NZ, we can do things like set speed adjustments for road routing – which is in-built into the maps. This is always used locally by the GPS unit, it’s the stuff which is cooked into your GPS map files which is referenced, not custom settings in basecamp. – If you want your GPS based arrival estimates to match what you’ve got custom set in Basecamp, then building this into your own map files is the only way to get them aligned.
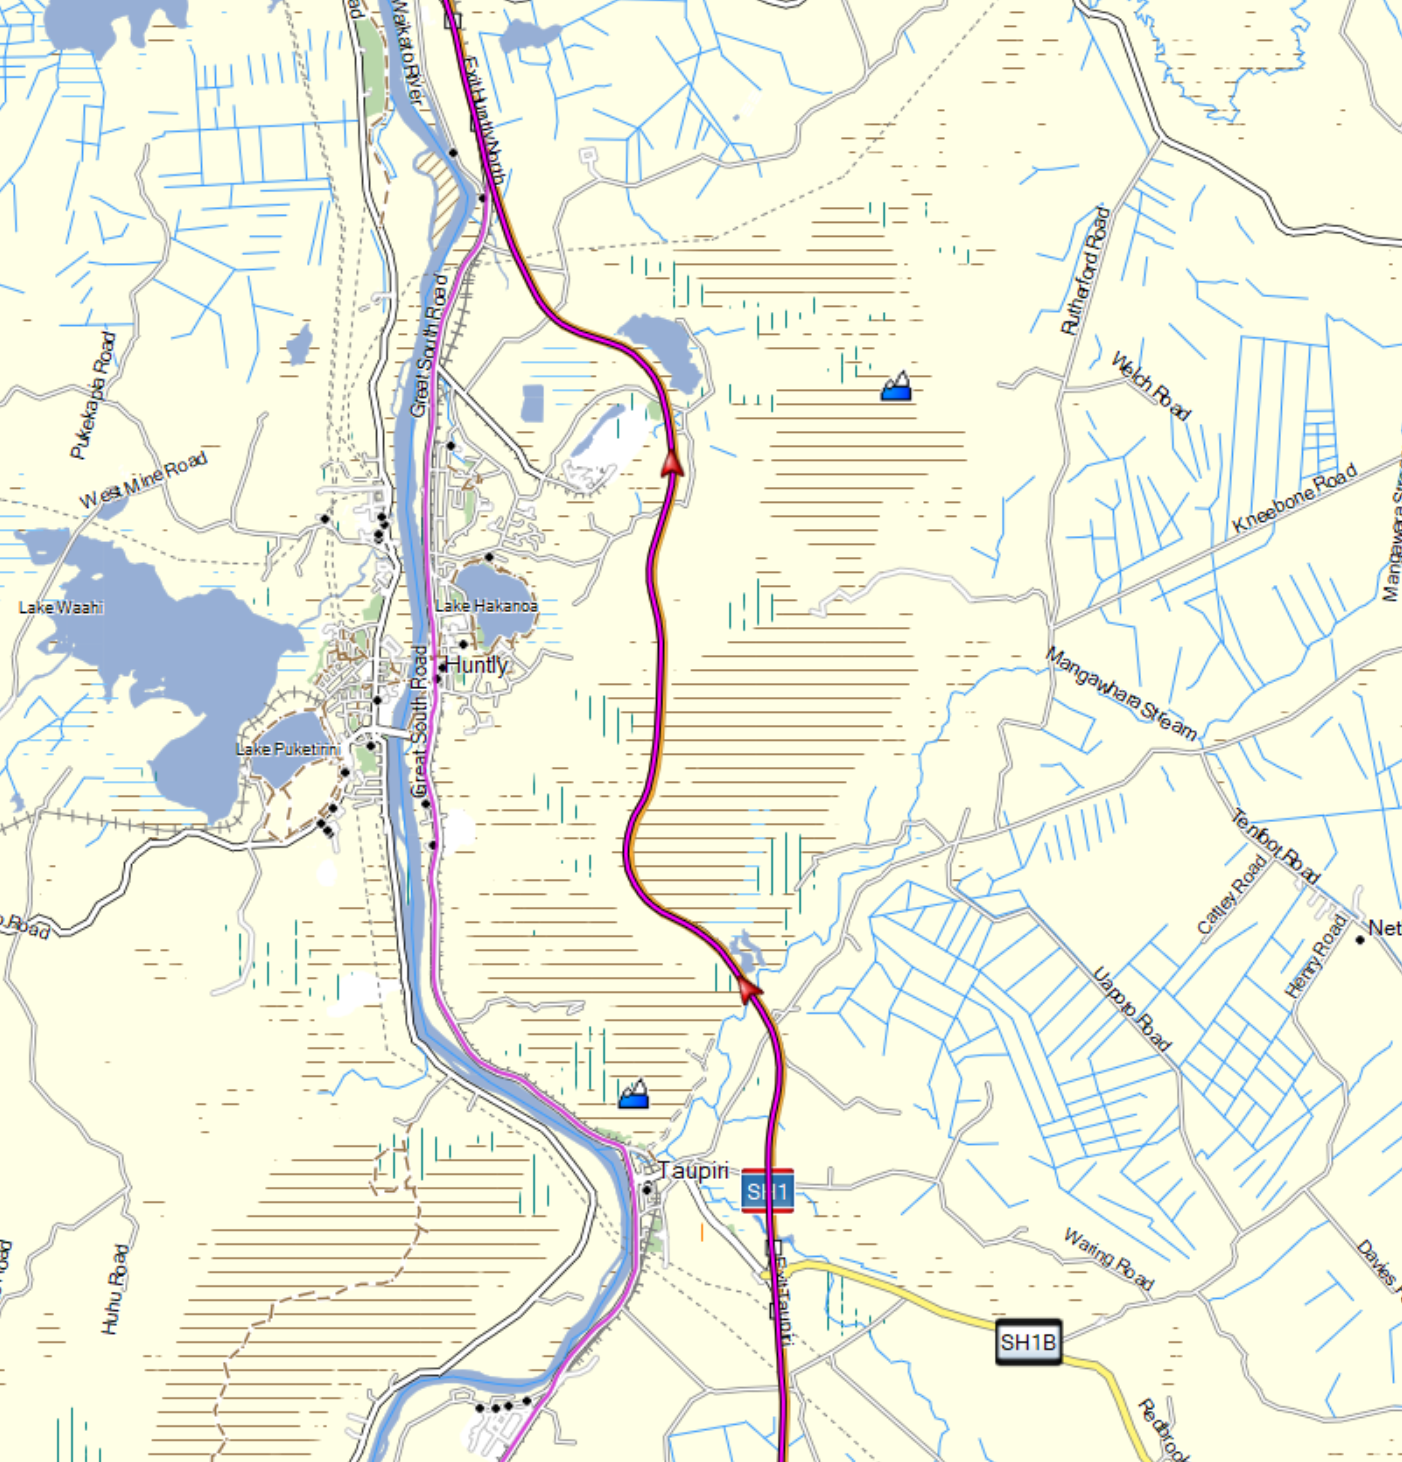
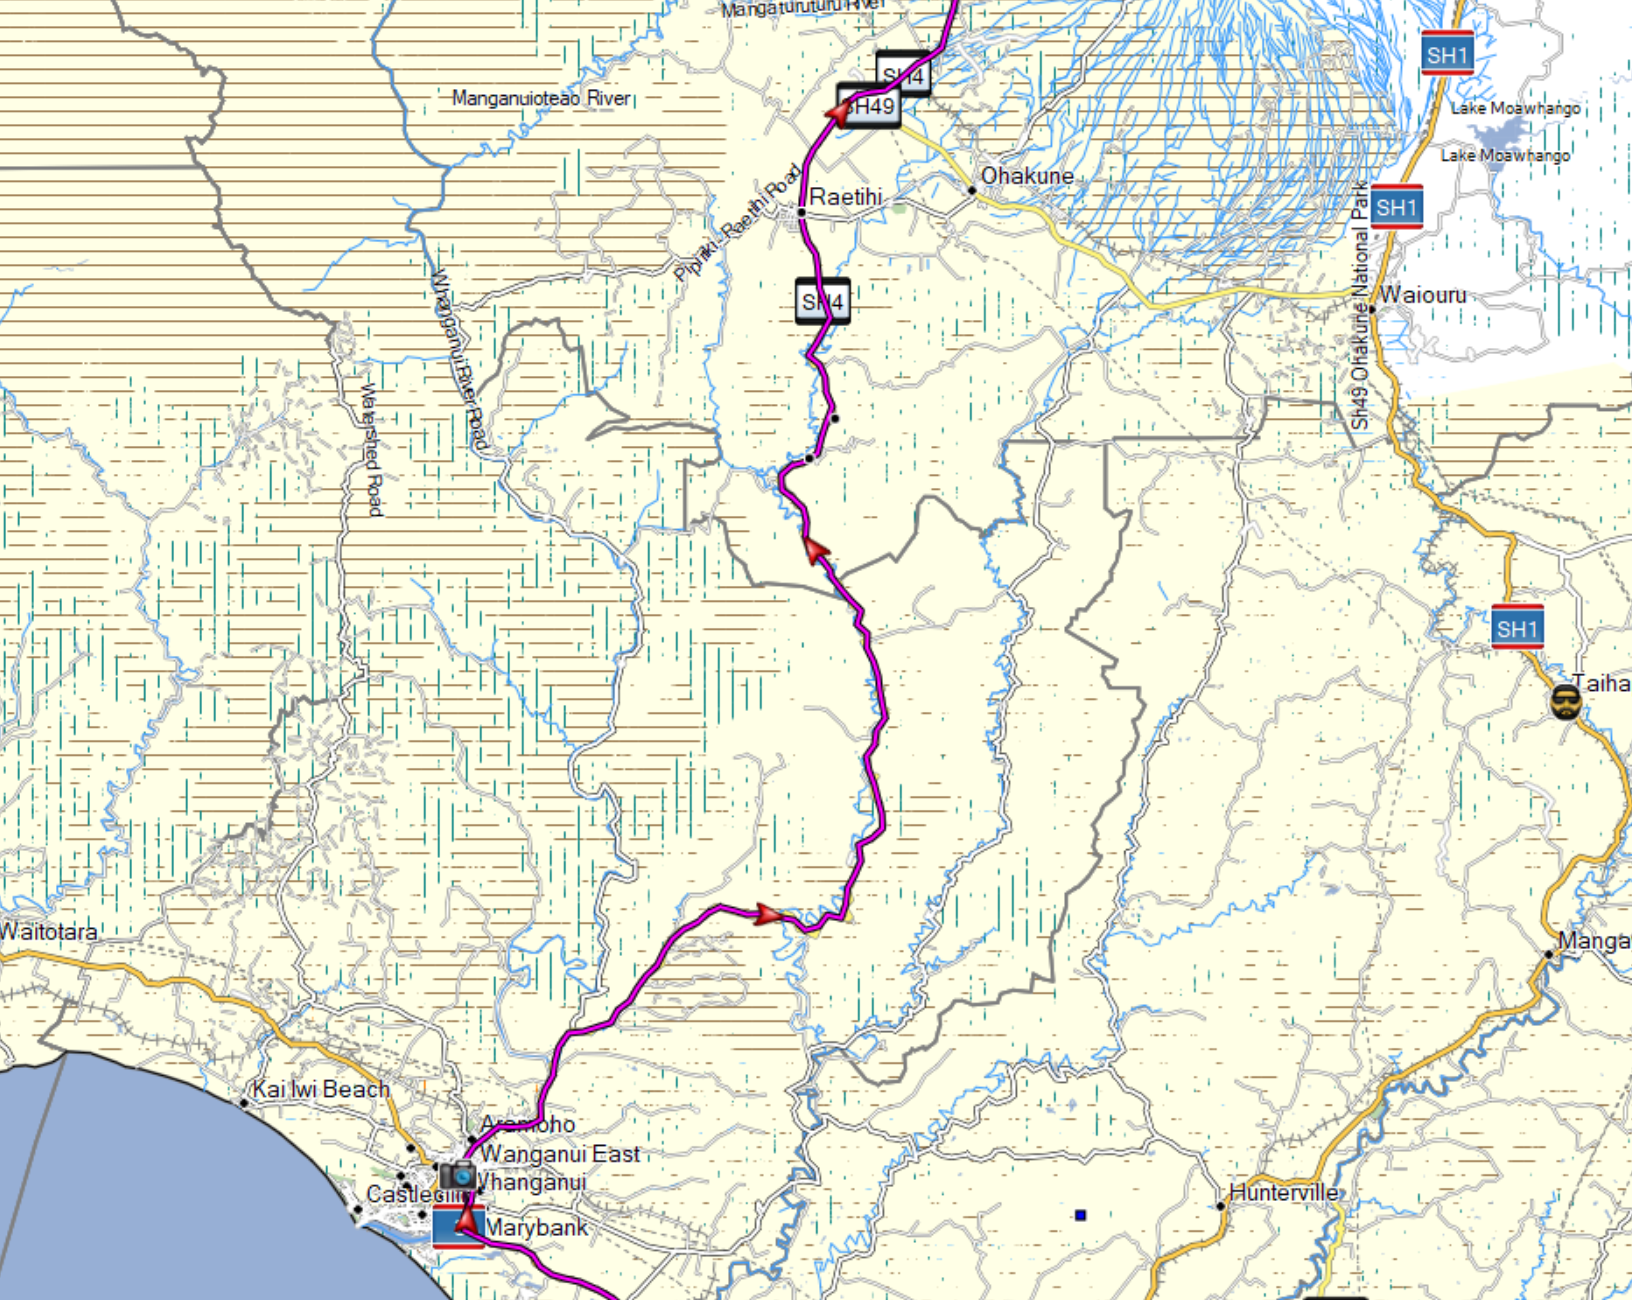
In my case, I’ve been prompted into doing this because the Parapara Road (near Whanganui) was still marked as closed in the latest OSM map download, I was able to appeal to the community of OSM editors to mark it as re-opened, (they were very quick to respond, took less than 8 ours of waiting for that change to be applied to the master build). – But then, there are lags in getting hold of updates through the major OSM based map builders and distributors.
If you want one of those updates quicker than their (normally weekly) release cycle would allow, then you can download regional or country OSM extracts which are far more recently created, and then work your way through building your own Garmin Routable map files. If you want to use these maps inside of Basecamp, then there is an extra step which you need to take, beyond building it just for the GPS. – And, if you want to avoid that otherwise annoying ‘We had to rebuild your route as it was created using a different map’ when you transfer routes to your GPS, then their versioning and family names etc will need to match, and to do that, you will need to cook up both versions of these files yourself, or download a package which already has all of these things done for you.
If you want that level of granular control over what’s included in your maps, what speeds are applied to roads by your GPS etc, then building this yourself is the way to go…
What I learnt when working through this for the first time:
- There are a number of excellent quality resources online.
- You may need a mixture of environments (including a linux machine) to make this easy.
- This is detailed and quite complex.
- Some of the steps involved can take quite a while.
- Some of the files you need to download are quite large.
- This could be quite hit-and-miss, so if you end up with a working process, and a good set of config files (including modified styles), then make sure you save them off, so that when you try to do this again, it’s as repeatable as possible. – To be honest, that’s why I’m writing this up, so that I have a degree of step by step (for my own local environment) which I can reference.
My main reference for working through this has been: https://wiki.openstreetmap.org/wiki/Mkgmap/help/How_to_create_a_map – this includes step by step instructions to work through, including the steps required to build the basecamp installer.
Some steps which I had performed before starting the process today:
- Created a reasonable file structure on my hard disk for all of this. I went for ~/Downloads/OSM Maps/
- Created a sub-folder in there for a splitter java app, and a mkgmap java app. – Reference the above reference page for details on those apps and how to get Java and them running in your environment.
- Created a sub-folder in there called ./maps/ into which I could place a ./NZ20200310/ folder, to hold the downloaded and extracted content from the next step.
- Created a sub-folder of that called ./nzsplittertempfile – to hold the temp files created by the following steps.
- Downloaded BOUNDS and SEA files, and unzipped them into sub-folders of the ./maps/ sub-folder. – Find details for that here: http://www.mkgmap.org.uk/download/mkgmap.html
- Downloaded a cities definition file (cities15000.txt) and placed it into the ./maps/ sub-folder. – The cities file was available as a zip file from here: http://download.geonames.org/export/dump/
- Created symbolic links from within the ./maps/ subfolder, out to my specific versions of my java apps – splitter and mkgmap.
-
maps$ ln -s ../splitter-r597/splitter.jar splitter.jar
-
maps$ ln -s ../mkgmap-r4465/mkgmap.jar mkgmap.jar
-
- Find an up to date source to download a regional or country based file – an OSM Extract which was recent enough to contain the fixes which I needed built into my maps.
- http://download.geofabrik.de/australia-oceania.html – contained a continent and a country based option for NZ. The NZ only option was much smaller and reasonable for my purposes.
- From here, I downloaded the new-zealand-latest.osm.pbf file and saved it to my disk.
- Following the secondary set of instructions on the main reference page, I then ran the splitter java app across the NZ .osm.pbf file.
-
NZ-20200310$ java -jar ../splitter.jar new-zealand-latest.osm.pbf –output=o5m –output-dir=nzsplittertempfile –max-areas=4096 –max-nodes=3000000 –wanted-admin-level=8 –geonames-file=../cities15000.txt > nzsplitter.log
-
- I then edited the default style files, to exclude POIs which just don’t interest me for my purposes, the idea being that you can reduce the complexity and number of unused POIs, and the file sizes by doing this.
- I then ran the mkgmap java app across the collection of files – This creates the output file for the GPS, and also the script files needed to create the installer.
-
NZ-20200310$ java -jar ../mkgmap.jar –max-jobs –gmapsupp –tdbfile –nsis –mapname=6420200312 –country-name=”NZ” –family-id=6324 –family-name=”OSM_light_NZ_202003” –series-name=”OSM NZ map” –area-name=”NZ” –country-abbr=”NZL” –style-file=../styles/road_only –precomp-sea=../sea –generate-sea –route –drive-on=detect,left –process-destination –product-version=101 –process-exits –index –bounds=../bounds –location-autofill=is_in,nearest –x-split-name-index –housenumbers –remove-ovm-work-files –verbose -c ./nzsplittertempfile/template.args
-
- Finally you can run /Downloads/OSM Maps/maps/NZ-20200310# makensis osmmap.nsi – to build the windows installer needed for Basecamp to use the map package you’ve just created. – I had to switch to my ubuntu image at this point to run the makensis application. – Installed into that environment using (sudo apt-get install nsis), as outlined on this page: (https://wiki.openstreetmap.org/wiki/Mkgmap/help/How_to_create_a_map)
As a separate step, you need to:
- Install the map file onto your GPS
- Install the map package into Basecamp.
- Test it all thoroughly before you rely on it for a rally or important ride. 🙂
As a quick summary, this appears to have worked well, the routing of my existing routes came up with the same results and distances as previous versions of the maps, except for the expected differences. It is SO up to date that my route now goes through the Northern section of the Waikato Expressway which bypasses Huntly, and the Parapara Road is now open. 🙂
These new files, the .img file for the GPS, and the installer for the Windows version of basecamp are available here:
- 2020-03 version (1.00): https://drive.google.com/open?id=17reJUUZUh1UmkNoAjkH_Y8E5xSYELs9t
- 2020-09 version (1.01): https://drive.google.com/file/d/17w0f-JEr83-slO2NYlVDvyE8-IWrb1xK – Uninstall the previous version before installing this. Otherwise, currently the newer one will not show up in basecamp. I have something wrong with my versioning details which I’ve not figured out yet.
If you do download them, let me know how you get on. – I’m hoping that now I’ve worked through this process, and have all of the parts I need on my machine, that re-generating these from time to time will be easy and repeatable… So if you need an update before one of our major rally’s or LD rides, let me know.