So it’s been a couple of weeks since I first assembled my 3d printer and I have to say, it’s been a heck of a lot of fun, it has the capacity to become slightly obsessive. 🙂 It’s so captivating watching something new being formed.
I have ended up thinking that if the printer wasn’t being ‘productive’ that it was a waste – and a crying shame.
I use quotes around ‘productive’ because in all honesty the majority of the things which I’ve created have either been printer upgrades, calibration prints or testing trinkets, or things with comedy value and no real use. To think that you’d get one of these things ‘because it might be useful’ would be kidding yourself. However, having said that, I did surprise myself this week by making my first truely useful things – toaster ‘lift’ handles to replace those which had become old and broken off our toaster.
Anyway, I digress. The main point of this post was to tell you all about this fantastic printer control and monitoring software which I’ve found and have been really enjoying. It’s called OctoPrint, and it comes packaged for the Raspberry Pi in an ISO bundle called OctoPi. Since they’ve packaged it for us it couldn’t be easier to download unpack onto an SD card and start running it.
I had a spare RPi unit kicking around at home so it was no big deal for me to devote it to this new purpose. Prior to this, each time I wanted to print something I would need to physically be there to power it on, remove the micro SD card from the printer. Use a slicer tool on my computer to prepare a printing file from the design, then copy the printing file onto card, replace it, mount it, use the printer menus and buttons to warm things up, select the printer file and commence printing.
Using OctoPi I am able to login to a web based interface, view the printer’s status remotely, watch the printer over webcam remotely, upload and slice a design file, and start it printing. It now emails me notification when it’s finished and self-powers-down when idle.
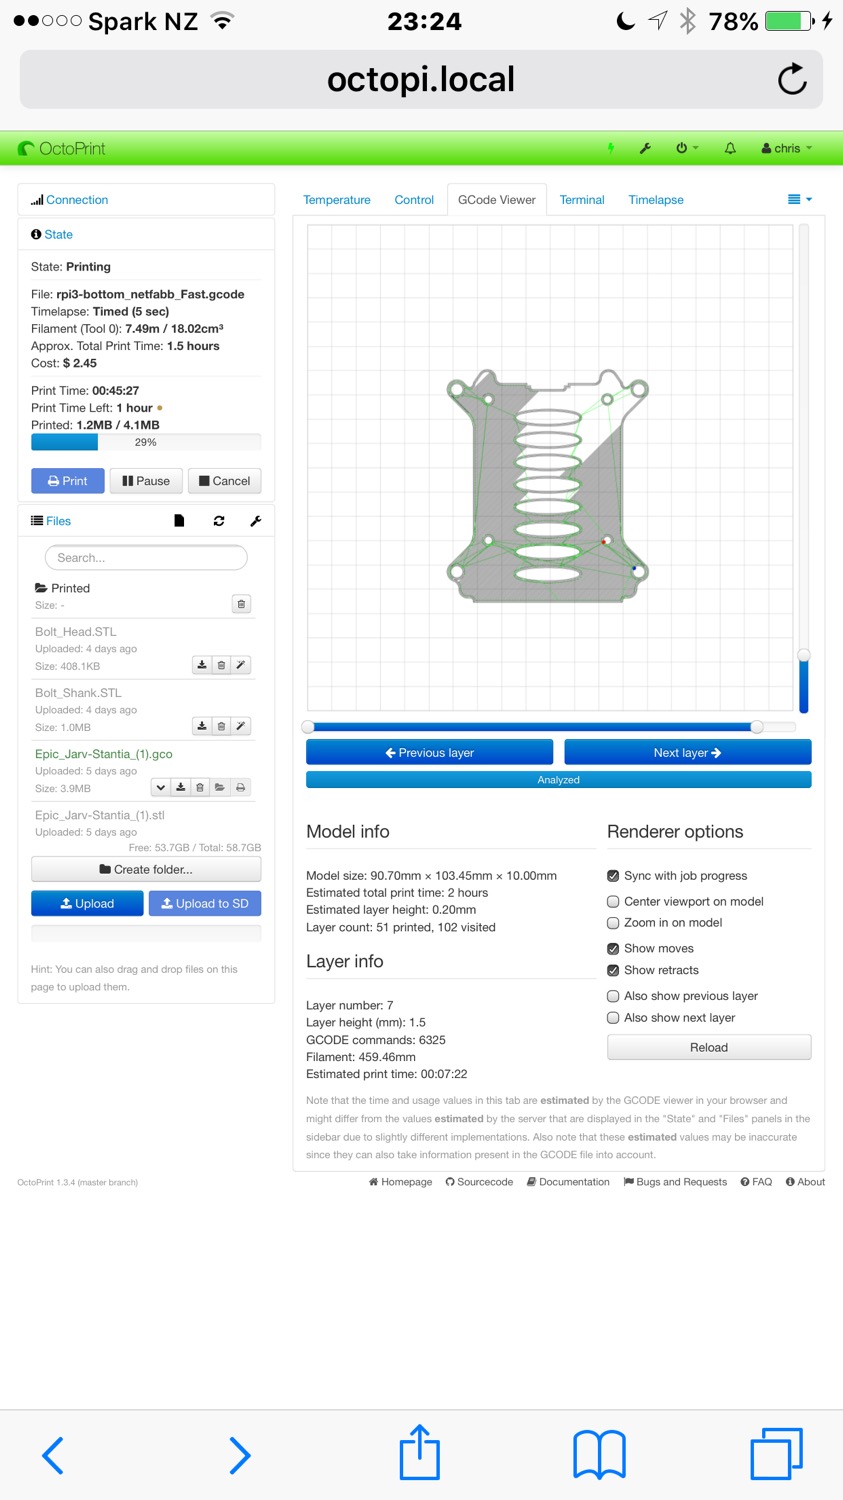
I’ve really enjoyed the printer itself, but having this interface to it has made it much much more enjoyable.
So… what was involved?
- Download and install OctoPi. http://octoprint.org/download/
- Buy a suitable webcam. The Logitech C270 is ideal, it’s 720p in resolution and low power, also compatible with the OctoPi software. https://www.playtech.co.nz/logitech-c270-hd-webcam-720-resolution.html
- Plug the printer into the Pi’s USB port, fire it up and you’re almost ready to go.
- Install the Cura slicing engine and upload your best slicing profile to it.
I did three more things to my printer setup in the mean time which were all power related:
- I swapped in my new 30A supply which arrived from Amazon. It works well but doesn’t have compatible mounting holes to the original and so it’s not mounted to my printer frame.
- Installed a MOSFET to switch the heavy load of the heated bed (~12A) which is best not going directly through the control board if it can be avoided. http://m.ebay.com/itm/3D-Printer-Heated-Bed-Power-Expansion-Module-Upgrade-For-High-DC-Load-A6K8-/253019739861?txnId=2082163482015
- Installed a power switching unit infront of the power supply and connected it to the GPIO ports on the raspberry pi to allow me to remotely turn on / off the printer unit. http://m.ebay.com/itm/NEW-5V-One-1-Channel-Relay-Module-Board-Shield-For-PIC-AVR-DSP-ARM-MCU-Arduino-/112130033844 – there is a PSU control plugin for OctoPi which provides the necessary controls and options to get this running from within the web interface.
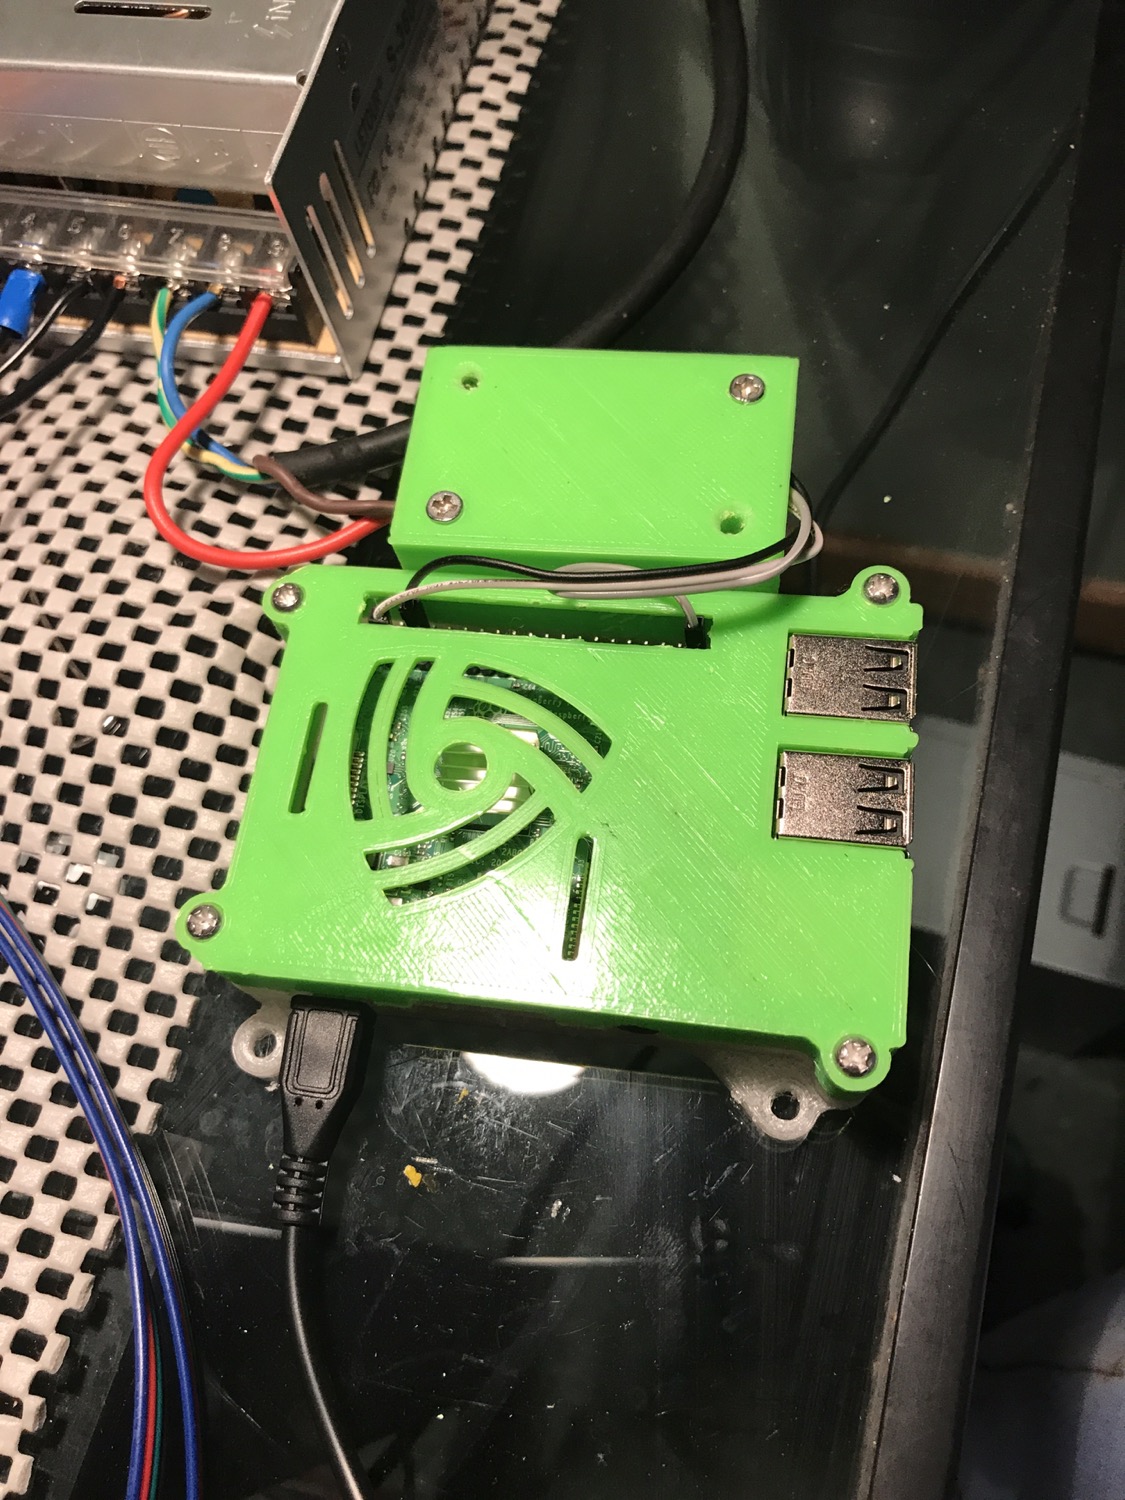
- This left some mains voltage pins on that switching board exposed, so I printed a new, combined raspberry pi and switch unit box and cover to neatly house these two things together. 🙂
Anyway, this system really works well and has taken my printing to the next level. 😉