Riding for the puppies – SS1600 for Aran Animal Rescue.
Chris and Jon's mammoth, fundraising motorcycle ride: Mar 6th, 2017, New Zealand.Contents
One of the things which they mentioned however attracted my interest; that, while they are not officially affiliated with the Iron Butt Association (IBA), they would assist with providing log and witness details for a SS1600 certification from their ride.
This was my introduction to the IBA and the notion of the SS1600. I read and read through the content on the IBA site and immediately appreciated the simplicity and the elegance of the post-ride certification approach; the need for quality, independent planning and execution is right up my alley. Something to work on, aim for and then, ultimately get on and do.
The timing of this (let’s call it an ‘ear worm’) was perfect; this was over the Christmas break, 2016, I’ll come back to this a little later…
My Riding History
I started riding in the U.K. when I was 17, (this is the legal riding age there). I first owned a Honda NSR-125, then a VFR-400 (NC24), then a Yamaha YZF600 (1997), then a Yamaha R6 (1999) (I raced the R6 in the New Zealand National Championships for a few years, along with NZ’s Battle of the Streets (legal, organised, street racing [Google video content for ‘Paeroa Battle of the Streets’ for a feel of this]).
A few years on from all of this, and for a couple of reasons, we took a break from the bikes on the roads; partly because once you’ve started racing, it becomes harder and harder to enjoy yourself appropriately on road-rides, also because we live overseas from our parents, and in their retired years they’ve enjoyed visiting us during, what often was, the majority of our summer months. Over a number of years this made it near impossible for us to get any time on the roads with our bikes, making the registration and other on-road costs unreasonable. – Instead we took the bikes off the road for the past 7 years. We held on to them and never gave up on the notion that one day when our situation allowed, we would return to two wheels, bikes have always been a big part of our lives.
So last year we were reminiscing with an old friend about our ‘good old days on the bikes’ and we all realised that the time had come to start sorting things out.
My new bike
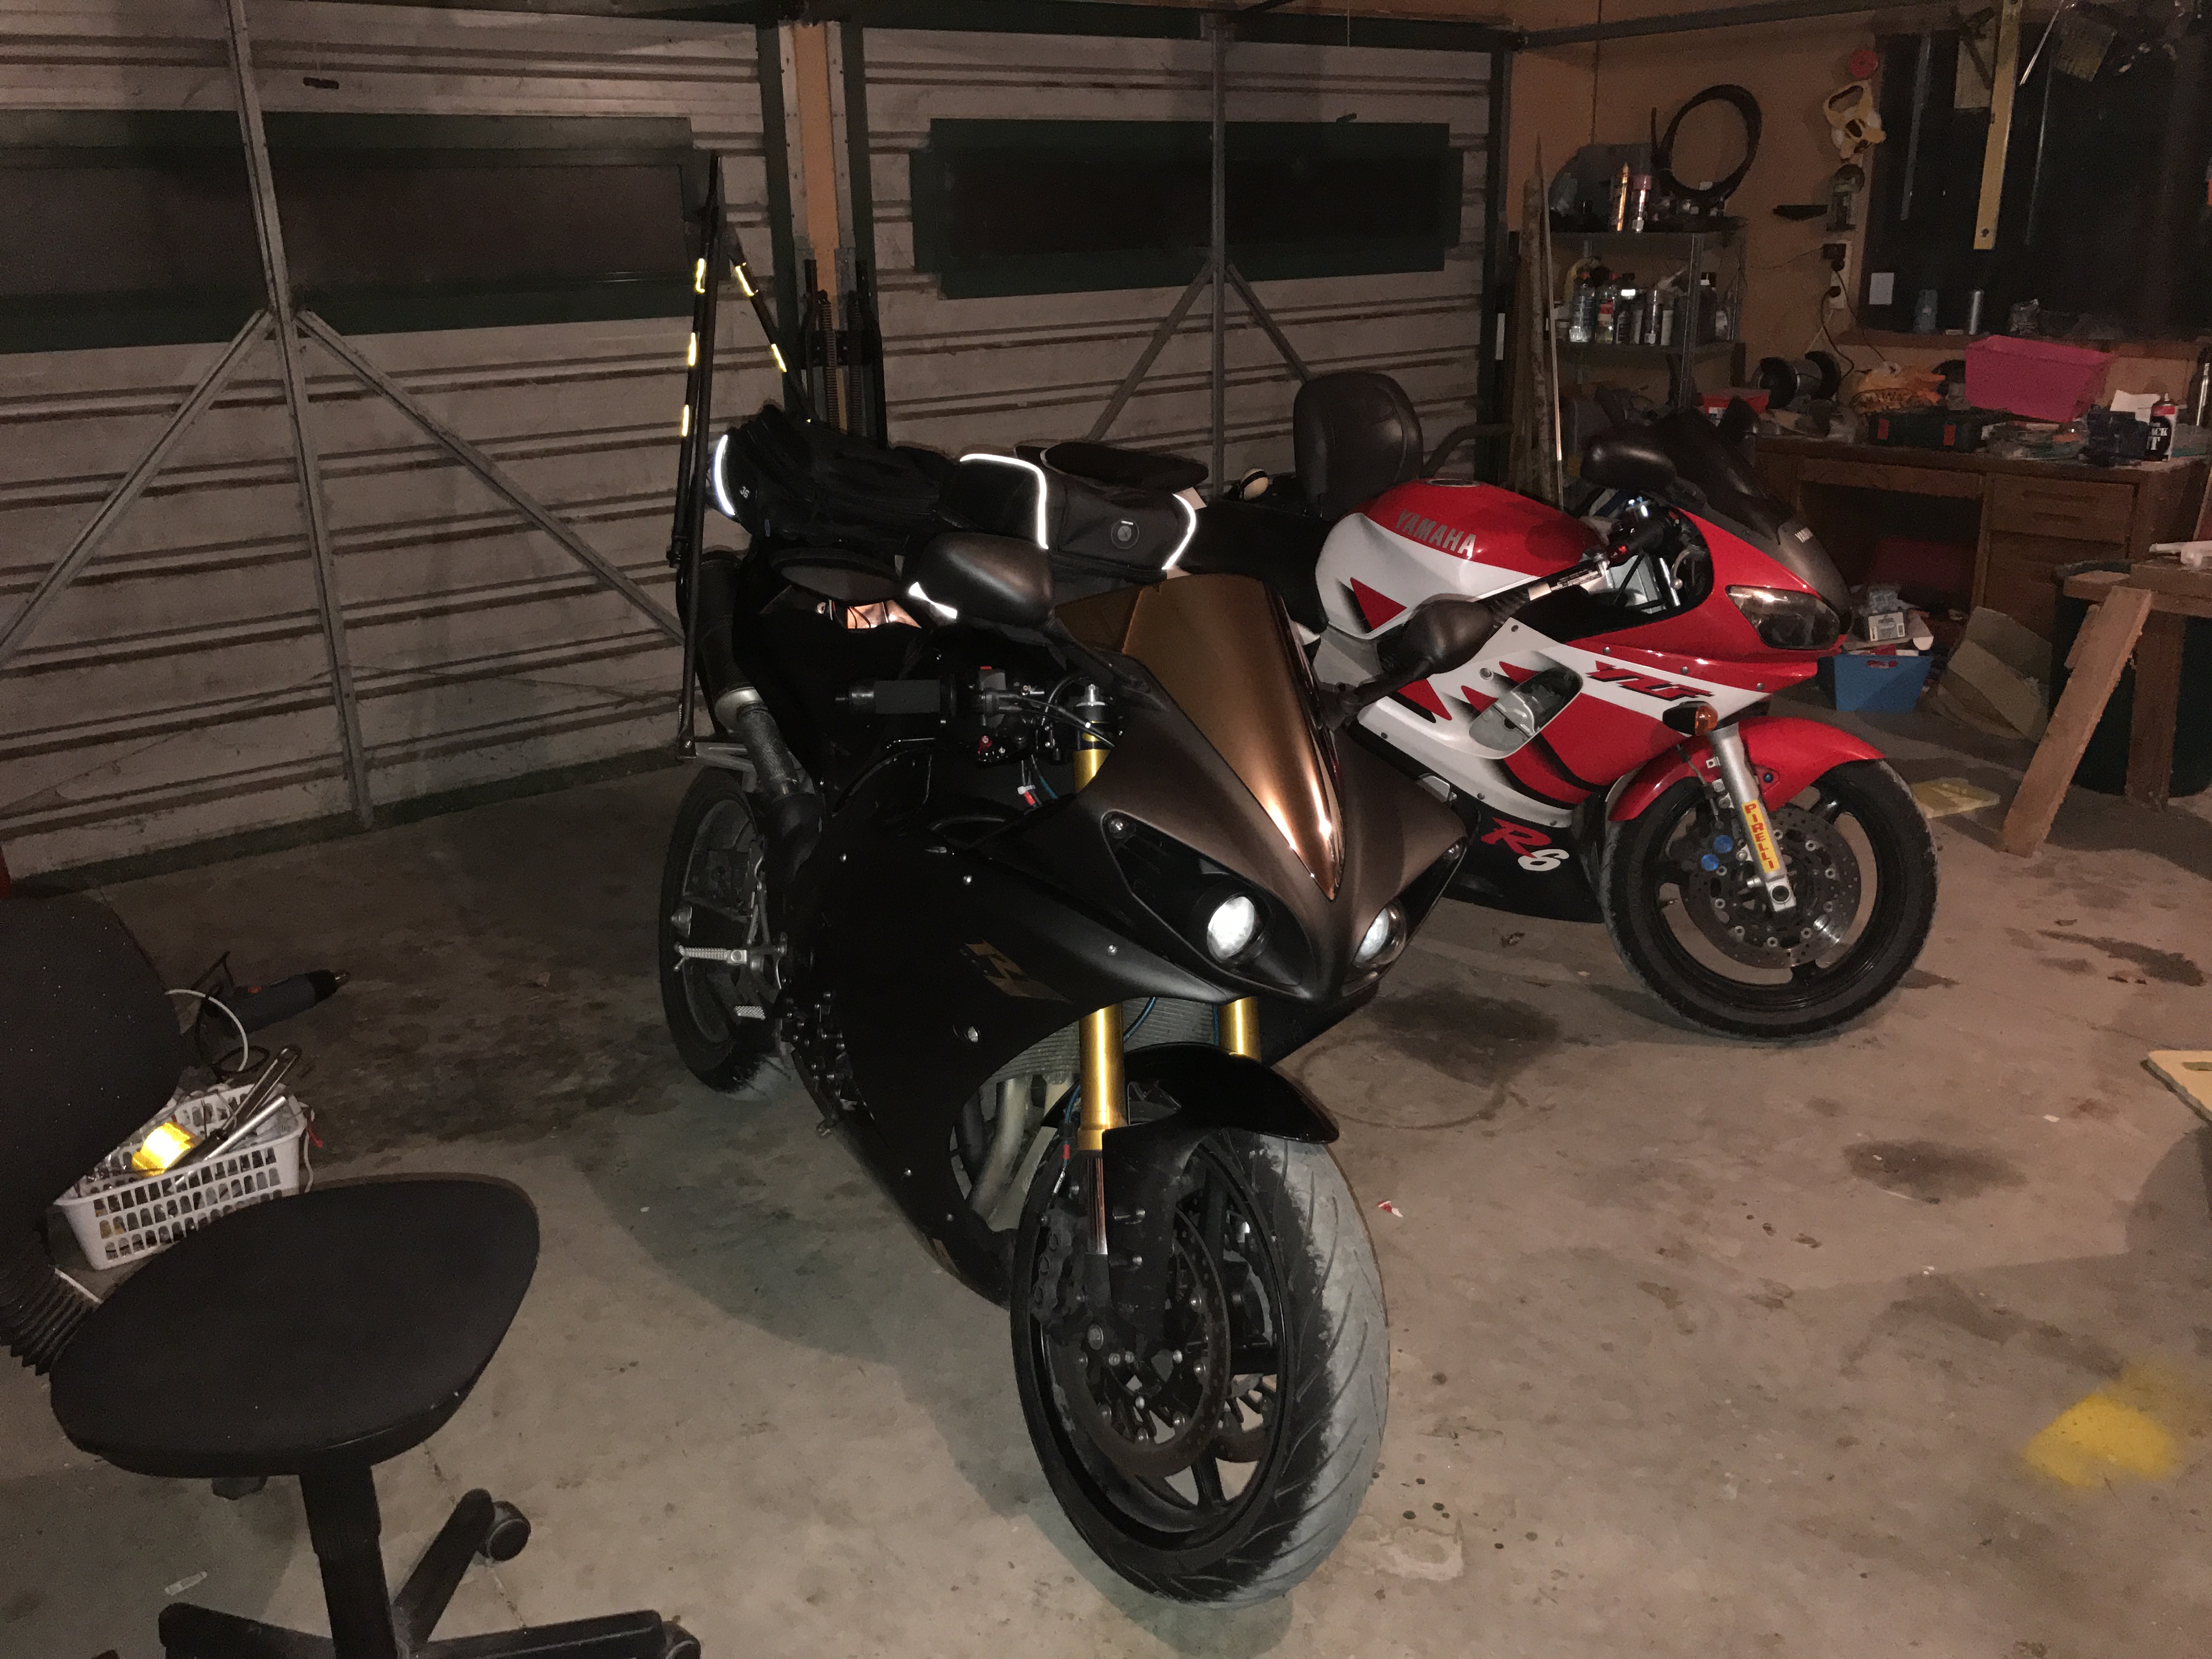
My wife still owns her FZR400RR (bought in 1997), but I had a better idea. Combined with buying larger leathers to cater for my more impressively sized modern-day-gut, I felt that the time had come to step up from my previous 600cc capacity. I had always loved, and intended to get an R1 and in that interim period there have been some stunning models released. So in early December 2016, I found myself a very clean example of an all-black, 2011 Yamaha R1, the cross-plane crank version which sounds like a twin and has a heap of really usable low rev’ing torque, it’s a lovely bike. This also meant that the R6 was then available for me to donate to my wife, which solved a few issues with getting the 400 running reliably again.
While settling in on the R1 through December and into January, there were a few things that I felt needed a little work: my hands got numb almost instantly, my left thumb got strained and felt sore and weak through my first few weeks of riding, my calves broke out in a rash (turned out to be heat rash from the catalytic converter), my clocks had shown some signs of melting (from sunlight being focussed onto them by the double bubble screen). There were a few other ‘outstanding’ things which I like to do to my bikes such as braided brake hoses, shorty levers etc…
The previous owner had thrown into the sale of the bike, a Ventura rear pack-rack and Oxford top-bag which I enjoyed fitting to the bike over my Christmas break. I then set about seeing what I could do to address the vibration and comfort issues of the riding position. I’ve done a fair amount of touring in my younger years in Europe and so I had a fair idea of what I could do to take some of the weight off my wrists. In researching options for the R1 I came across a video on YouTube showing an ‘Touring R1 Setup’ – https://www.youtube.com/watch?v=dbYUWi4lOrM – and felt quite inspired by some of the gear I found in there, particularly the Apex riser clip on bars. http://www.apexmfg.com/all-products/apex-clip-ons/apex-3-riser-clip-on-set
Responding to the heat issue, I wrapped the exhausts first, and then posted my efforts into an R1 owners group on facebook where I was told that the heat issue is a common problem for that model and that the only solution is to remove the ceramic catalytic converter situated between my legs. – This made sense, so I ordered a Y pipe conversion kit from the USA and so the customisations continued. http://www.shop.mjsperformance.com/product.sc?productId=162&categoryId=55
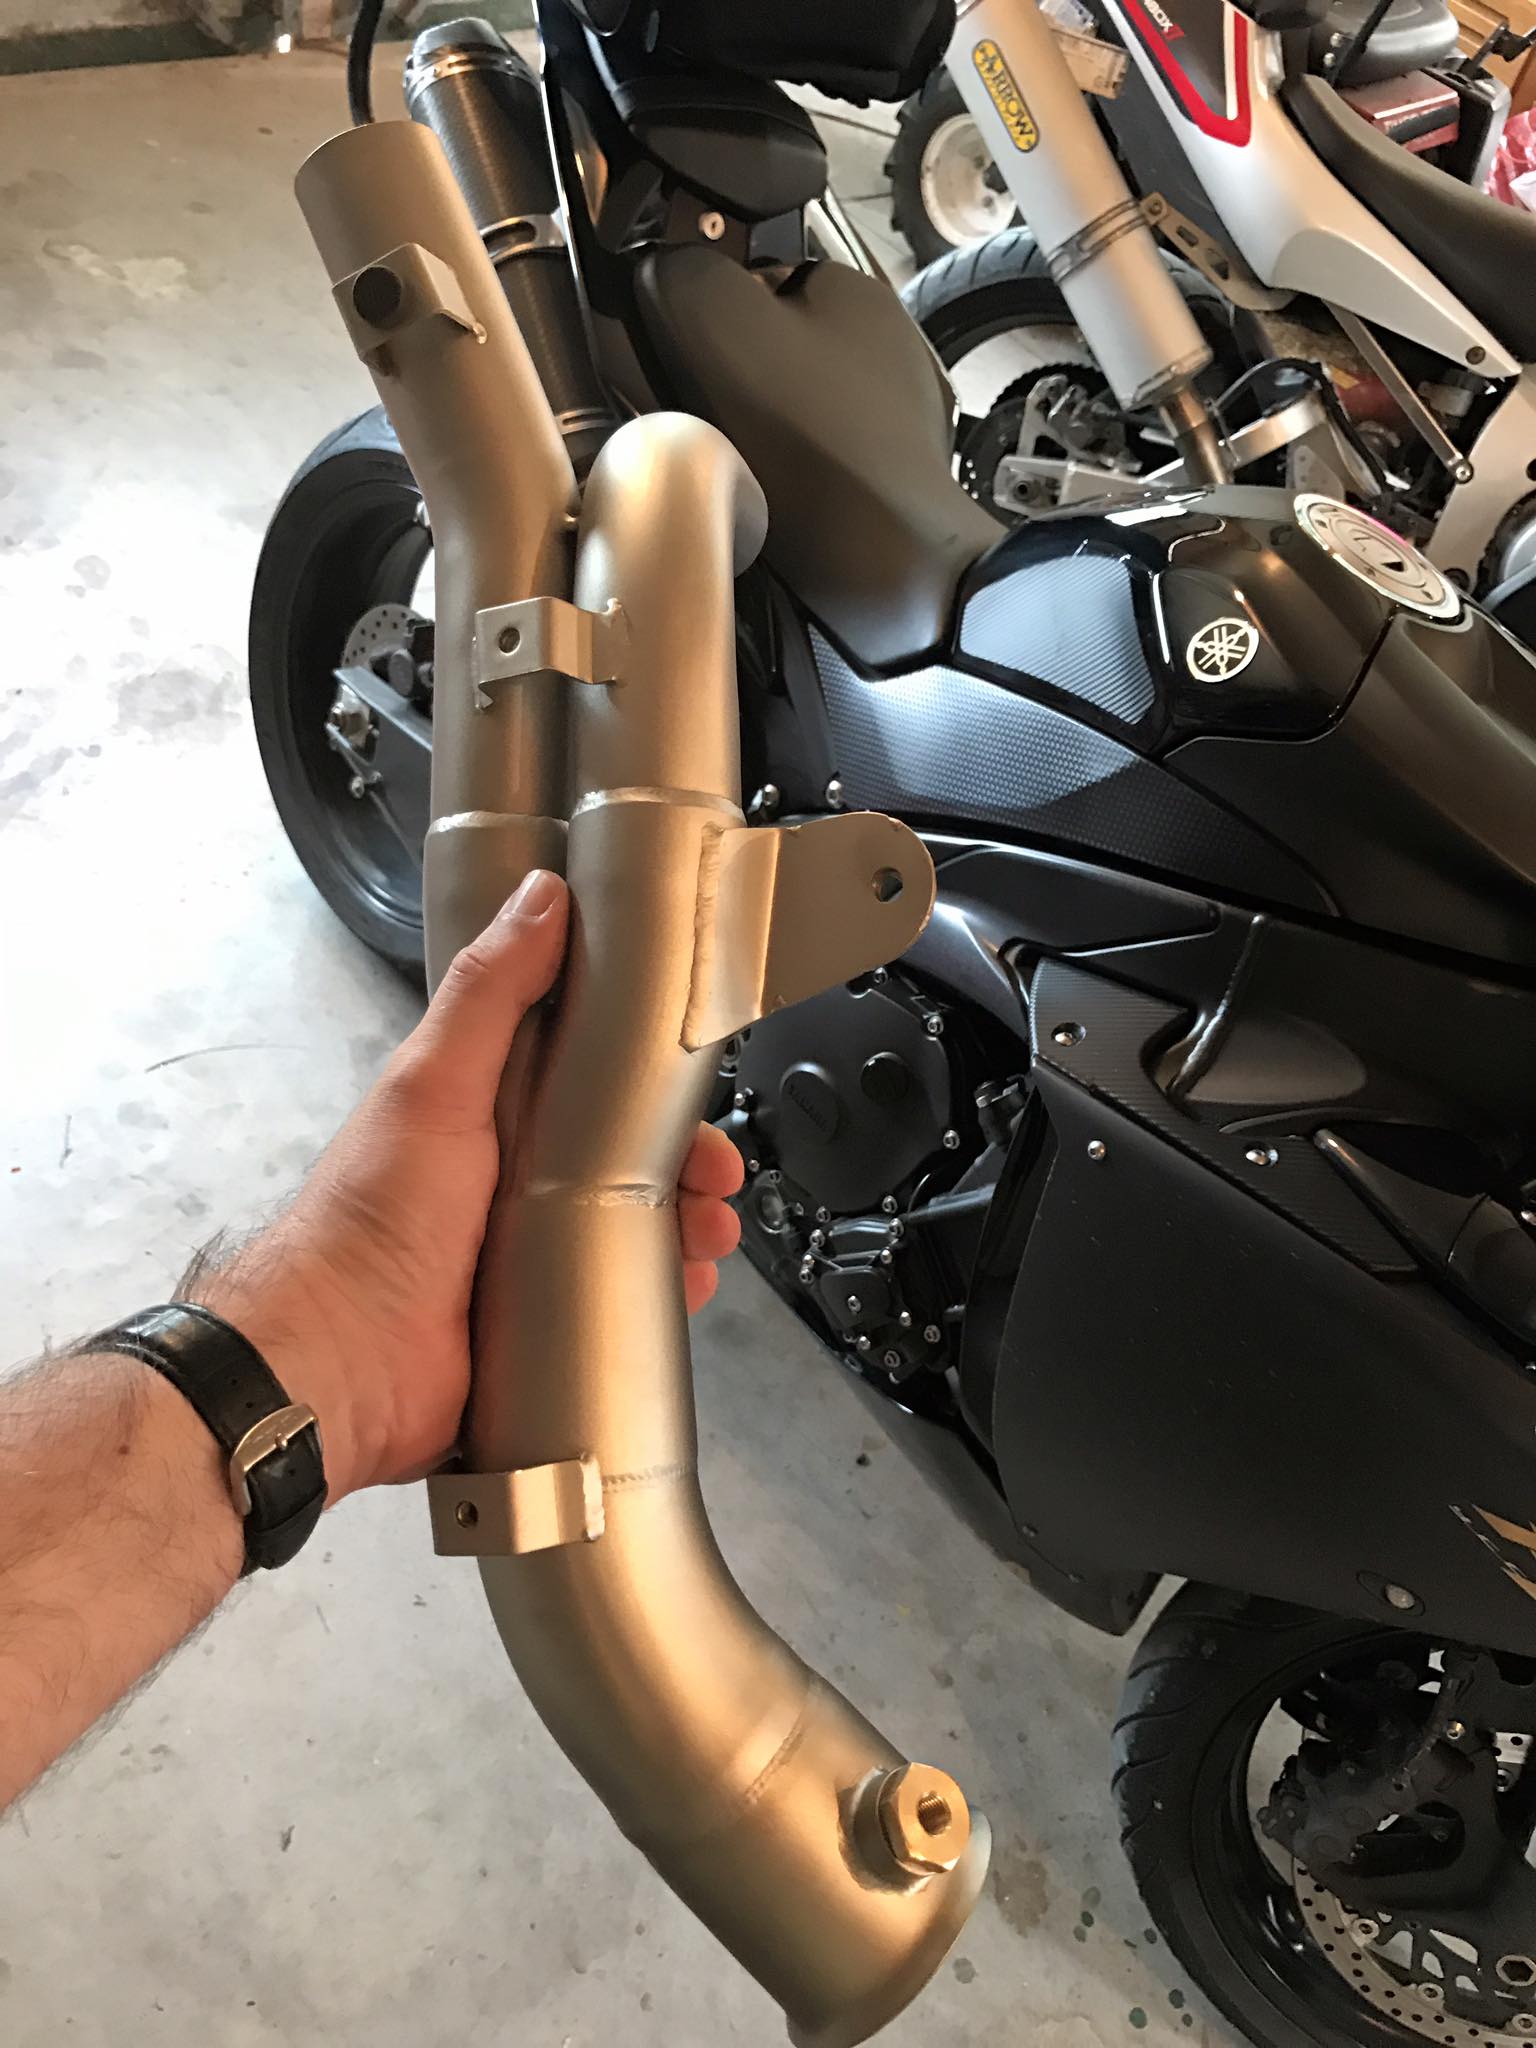
MJS Performance Y-piece decat
All in all, I embarked upon a few modifications for this bike and it was during this period that I stumbled across the NZ Long Distance Rider’s site and the IBA for the first time. This helped in an odd way to add purpose and potentially justify all of the modifications I was making. It’s always useful to have a perverse means to justify expenses I find.
Earlier days – the seed had been sown a long time ago
About 15 or so years ago a friend of mine had asked me if I would want to do a ‘1000 mile, in 24 hours’ ride, in NZ, for fun. I saw this as too big of a challenge for me at that time, it wasn’t the type of thing which I felt I could be whole heartedly motivated enough to do. At that point I thought about it briefly and then said ‘no thanks, not for me’. But it stayed with me. It’s been there, I guess, niggling in the back of my mind, priming me for this; the chance for me to do it, but on my own terms.
The current opportunity presented itself
So there I was on my own, reading, thinking, day-dreaming, exploring my thoughts. I knew I wanted to do something useful from all of these modifications on the R1. I knew I wanted to do something significant with this bike and given my recent history, it wasn’t going to be racing.
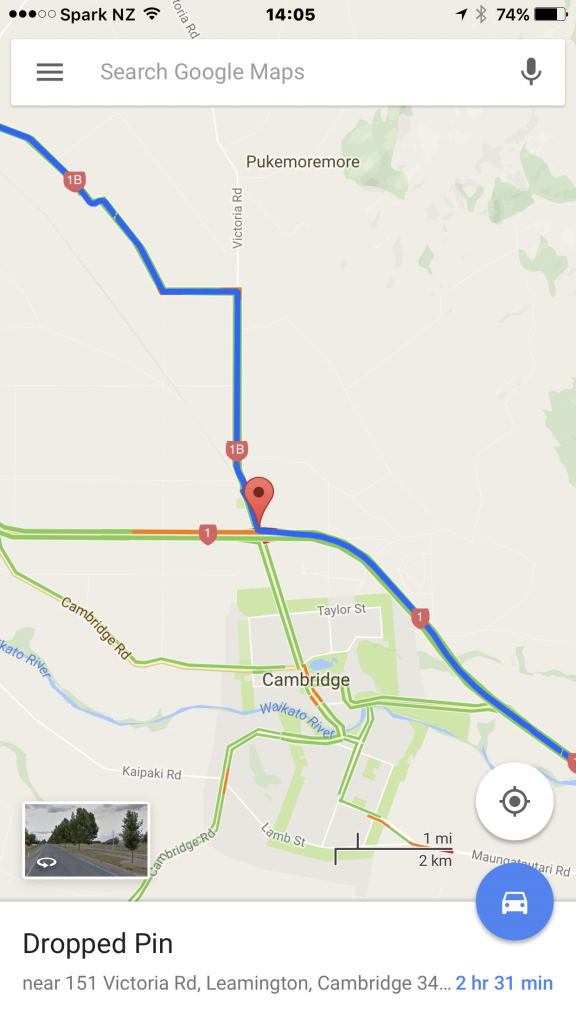
This LD / touring angle sounded like something I thought I could do. This is something I could work at, work towards, plan and enjoy getting into the details of it all. I re-read the IBA’s SS1600 rules. 1600km… ok, well, from the previous conversation I’d had years ago, I knew it was do-able in the North Island of NZ (I live near Auckland, towards the upper end of the North Island). So I jumped on Google Maps and tried my first, very coarsely planned route. Sure enough, it was pretty close to being 1600km, it just needed some work.
Fancy a Ride Anyone?
I put out a shout on Facebook to my friends about my crazy idea, and (half-heartedly) asked to see if anyone would want to do it with me:

Much to my surprise a good friend of ours had seen this post, she’d thought for a split second about not mentioning this to her husband Jon, who I had ridden with extensively years before. He too had been ‘off his bike’ for about 6 years and doesn’t currently own a bike. You’ll see Teri’s response below:

To my surprise my casual enquiry to find a riding partner had found me one!
And so that was it, I had turned a private thought and musing into a publicly expressed idea, with a throw-away request for someone to join in and so there we were, we had two committed riders embarking upon ‘an adventure of a life-time’. – It was the 3rd January, 2017.
Ride Preparation
Bike modifications and planning for the eventI ordered my Apex clip-ons as they were an absolute must, I had to get the weight off my wrists for this ride. I made a list of other things I would need to sort out; it was close to 2 pages long of bullet points (I like making lists), these weren’t all jobs or things to fix, it included packing lists, tasks to perform, people to organise, route planning, GPS loading, power supply creation for the bikes etc, etc. And it wasn’t just the one bike I had to sort out, all of a sudden I’m had the responsibility for sorting out the R6 for Jon too.
The R1 needed a new rear tyre before our ride and the front had a heap of vibration coming through the bars too, it was out of balance. I didn’t need HyperSports tyres on the bike for this, so I planned to change to sport tourers and to bed them in well before hand to make sure I was happy with them: Dunlop SportsMax RoadSmart II – wow, what an all-rounder of a tyre, I’ve done ~7,500km on these since I put them on and they’re still going strong and they grip much better than most people would imagine. I’m going to get some more after they finally wear out.
The R6 would need a new front at least, its rear was already a harder-wearing road tyre, but the front on the R6 was a softer one from my previous racing days, it was well worn…
The heat issue on the R1 needed some attention so I started that exhaust work and shortly after ordered the Y-piece. I had those two major items, the bars and the exhaust part coming in from the USA. In terms of considering a date I needed to allow enough time for these to arrive but I also had to aim to plan for time off work with a ‘rain date’, and also to attempt this soon enough so that we could hope for reasonable end of summer weather. To allow us enough time to get the various bike modifications performed, we set an initial date of the 21st Feb, 2017.
The early stages of planning, and fundraising…
There was no real pressure on us at this point as it was still very much just a concept. We were both committed to the idea, and were keen to work towards it but Jon had family / holiday commitments in early-mid January and so he was somewhat unavailable to have detailed planning discussions with, in the meantime I continued with my own preparatory work on the bike and route planning. I considered the idea of incorporating an element of fund-raising into my ride.
I looked at the various fund-raising websites to find a local one where the commission and handling charges were reasonable and I selected a charity which I was already somewhat involved with – Aran Animal rescue. They save ~200 dogs each year from destruction after the regional pounds give up attempting to re-house them. It’s an organisation run by a handful of ladies, who with the help of their wider support network re-locate these dogs from the mid-lower parts of the North Island into centres where they stand a better chance of re-homing them with new families. I set myself a goal, to raise NZ$1 per km of the ride which we’re attempting.
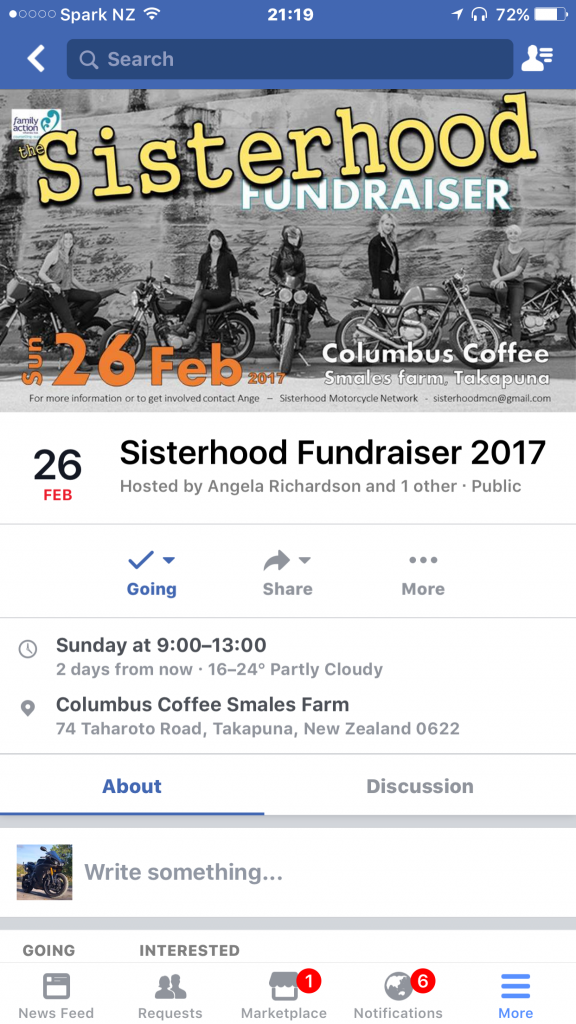
On the 18th January, I setup a Facebook Event page along with a give-a-little fund-raising page and posted content onto it showing the initially planned route along with blurb about what the IBA is and the requirements for a Saddle Sore 1600. I was particular to stress that it was not a race. These two pages are still available and serve as an additional account / reference of this ride – they were used to communicate updates out to those who were interested and who had supported us throughout the preparation and during the event. (Take a look if you have any further interest to see the amount of effort which went into this all).
I used my various online networks, such as LinkedIn, Facebook, email footers, and also my local (rural community) mailing list which I run, to advertise our fundraising efforts. By the 27th of January we had raised NZ$1,000.
The local paper picked it up from the local mailing list and ran our story on the 15th Feb.
A month after hitting our $1,000 milestone on the 27th Feb we hit our fund-raising goal of NZ$1,600.
The FaceBook Event page is actually a blog of the prep work, along with content posted to our supporters (and fundraising sponsors), and is still available here (it is in it’s own way, a ride report): https://www.facebook.com/events/1840698712811863/?active_tab=discussion
In terms of the route and the planned date there were a few things to consider and work out. Thinking of the timing of the ride and the distance to cover it was clear to me that the planned route would need to avoid a lot of the larger city centres as all of our ‘highways’ go *through* the centres they do not avoid them and this would drop your average speed too much.
There are also some significant stretches of road where the speed limit is 80km/h for many, many miles; through one of the governments initiatives as a ‘safer speed zone’. These too would all kill our average speed and needed avoiding.
Choosing the right starting point, at a local 24/hr service station was a hard choice for me too as I live rurally and wherever I chose, we’d have to ride back from after we’d finished our ride. I planned, re-planned, and re-planned that ride to ensure we had safe margins on the required 1609km distance. I quickly hit GoogleMap’s 10 or 11 point route planning limitation which was a frustration.
Then I embarked upon moving the initial planning from GoogleMaps over and to Garmin’s basecamp software. After so many crashes on my computer I ended up with exportable drafts which I could then put back into GoogleMaps for sharing, discussion etc.
Preparation work on the bike
While I’ve outlined some of the work which was planned, the preparation work on the bike actually needed to be done, naturally this was all in parallel with the planning work.
I knew I wanted braided hoses adding to the bike, and I had a suspicion from reading some other posts that the standard hoses were quite tight when it came to making the most out of some of the available riser-clip on bars. So, I took an educated guess when I ordered them and added an additional 2 inches to the front-set, and an additional 1 inch on the rear just to be safe. I ordered these before the Apex bars had arrived.
Apex riser clip-on bars were to shift the grips higher and further back. The aim was to help to take a fair amount of weight off my wrists. I’d seen the results achieved by others from that youtube clip above. I had a rough idea what I was aiming for but quite how this was going to come together with standard brake hoses on the bike I didn’t know until I started fitting them.
I spent about 3 hours on my first attempt and ran out of time so had to back out. Things never go quite as smoothly as you hope, I had to postpone that work until the following weekend. It took a further 5 hours to get these setup properly but the results were well worth it. With the standard brake hoses it was tight and I couldn’t put them exactly where I wanted to.There was a very small amount of fairing bashing going on with the various levers while on full lock, so I knew I had more work to do to re-position them when the longer braided hoses arrived. Meanwhile, check out the results (these are all as comparable before-after shots as I could get):

The Apex Riser clipons – before and after – They made such a huge difference

These were so much fun to ride with, I was giggling on my first test ride
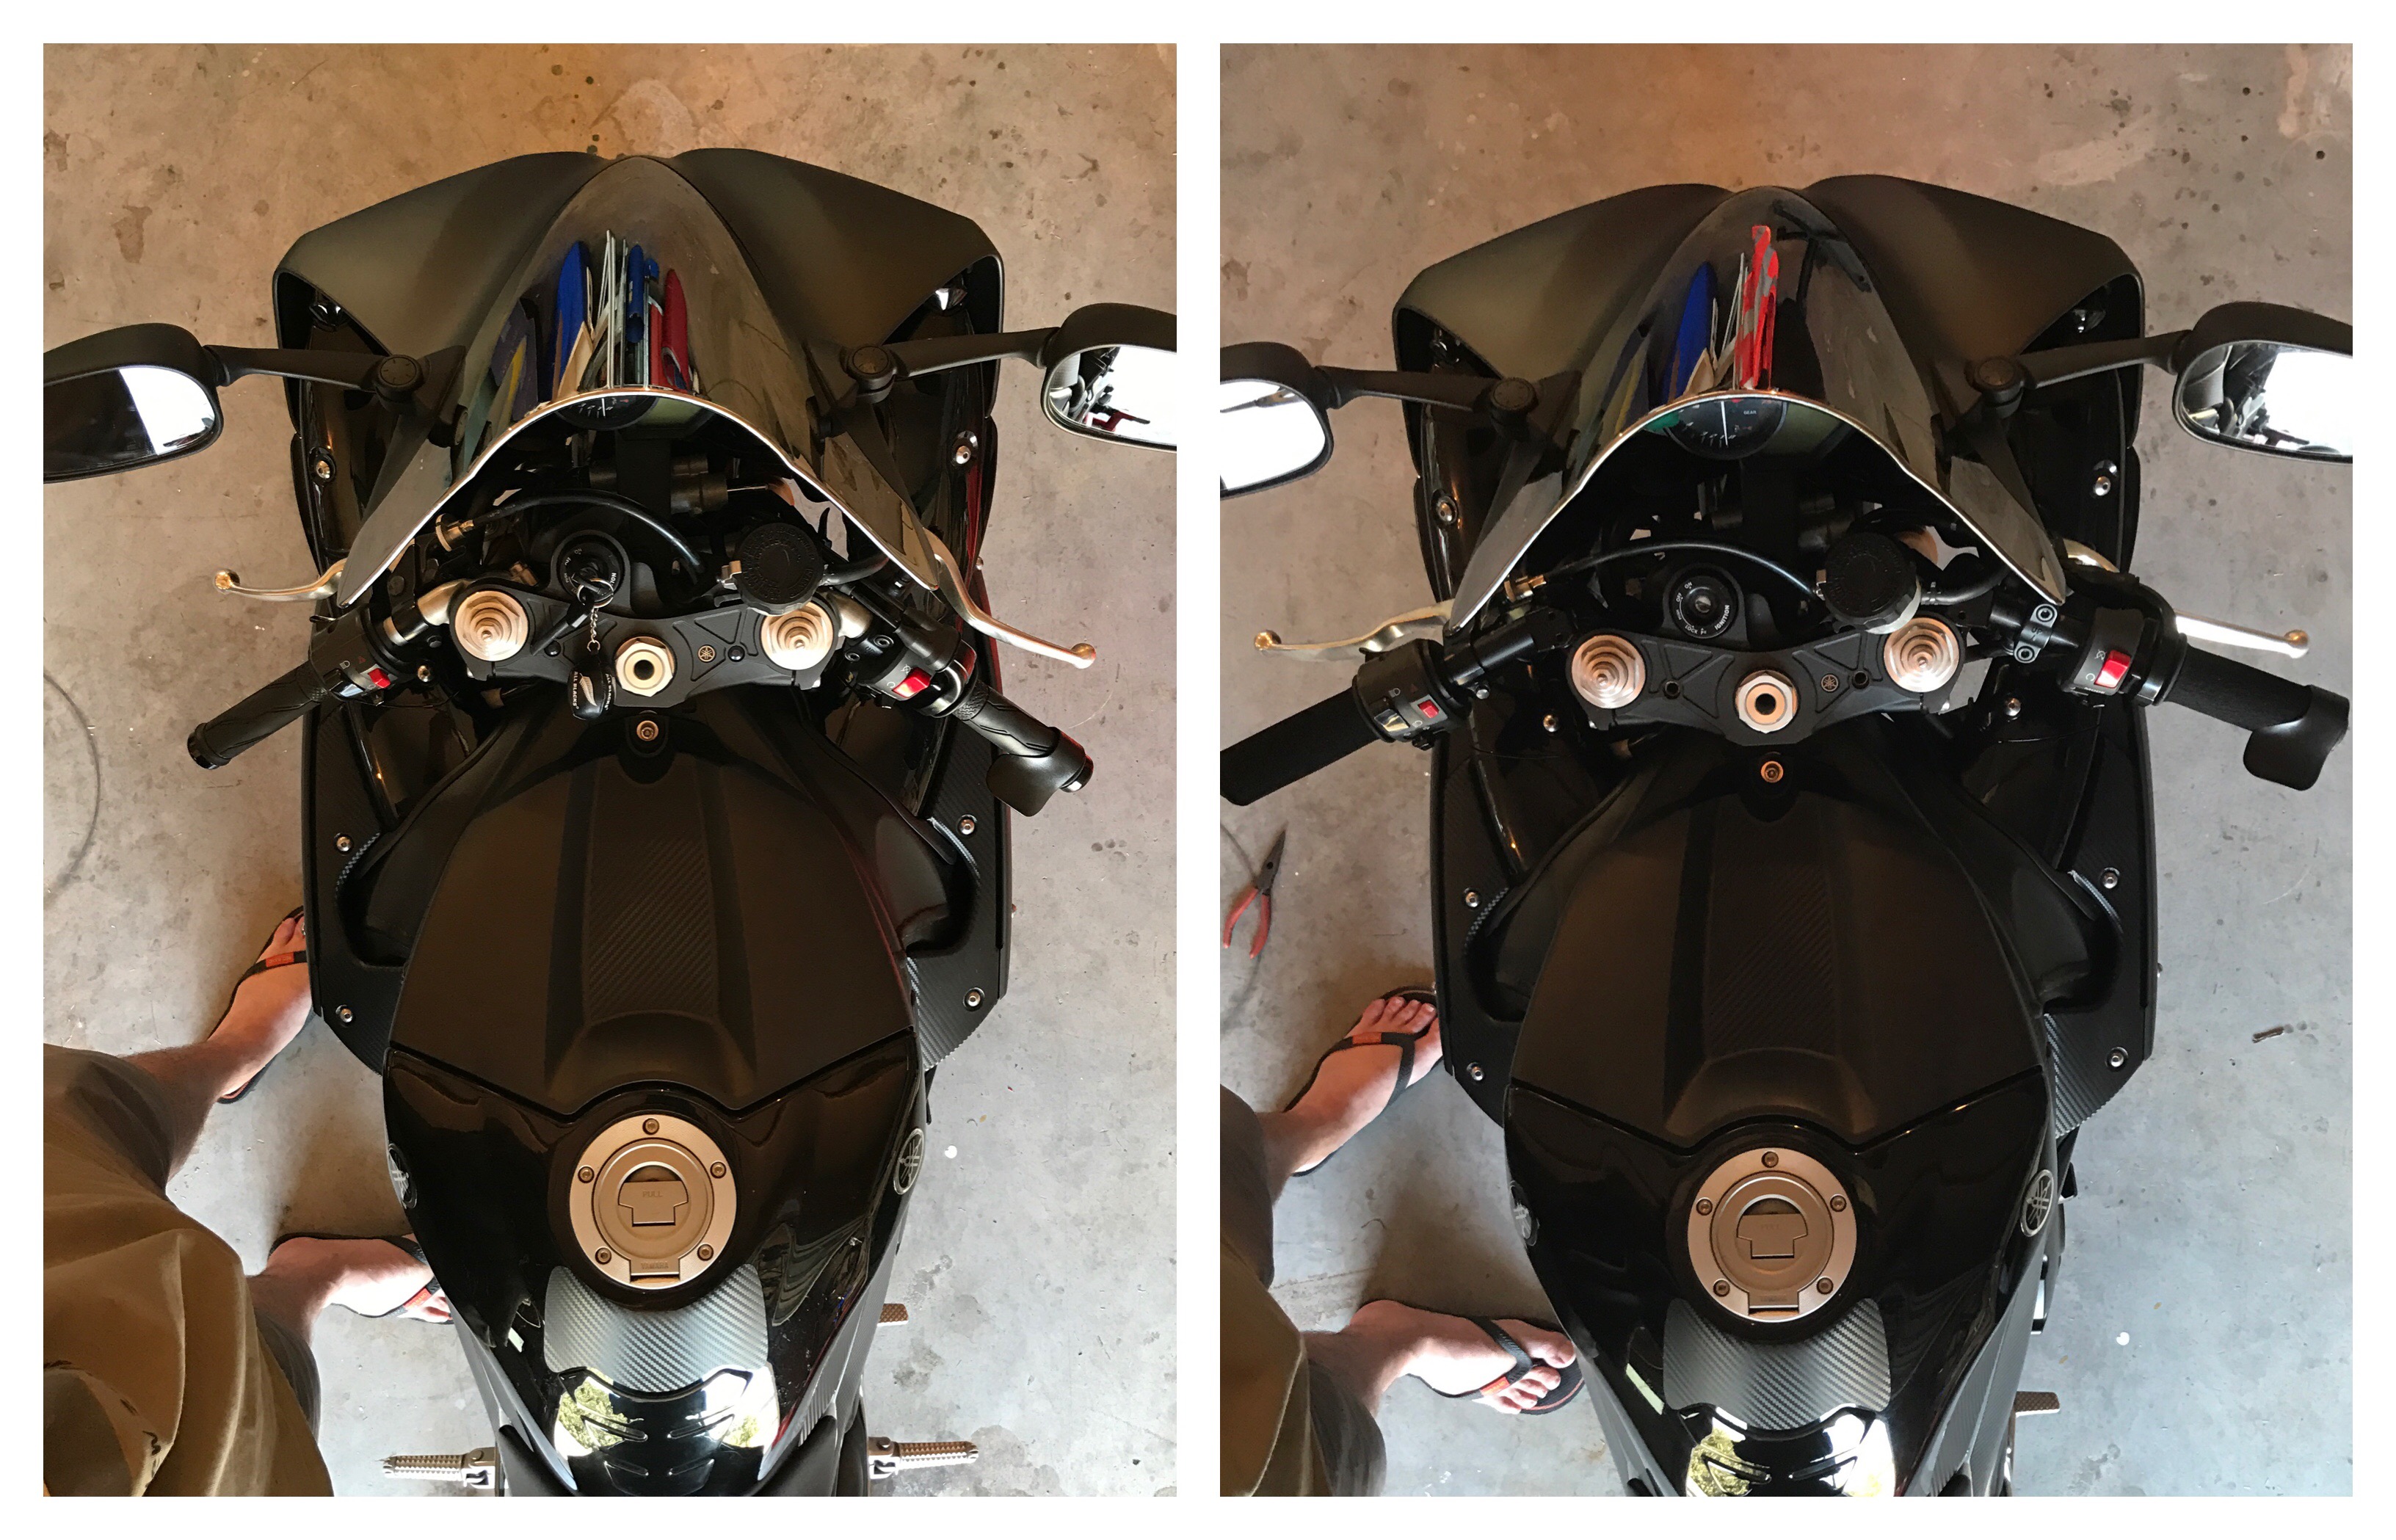 These were the bars in their interim positions before the longer hoses. I don’t have any final position photos (sorry), but I managed to position them even further back with the longer hoses fitted. I also managed to shorten the bars back to a similar length to the standard ones.
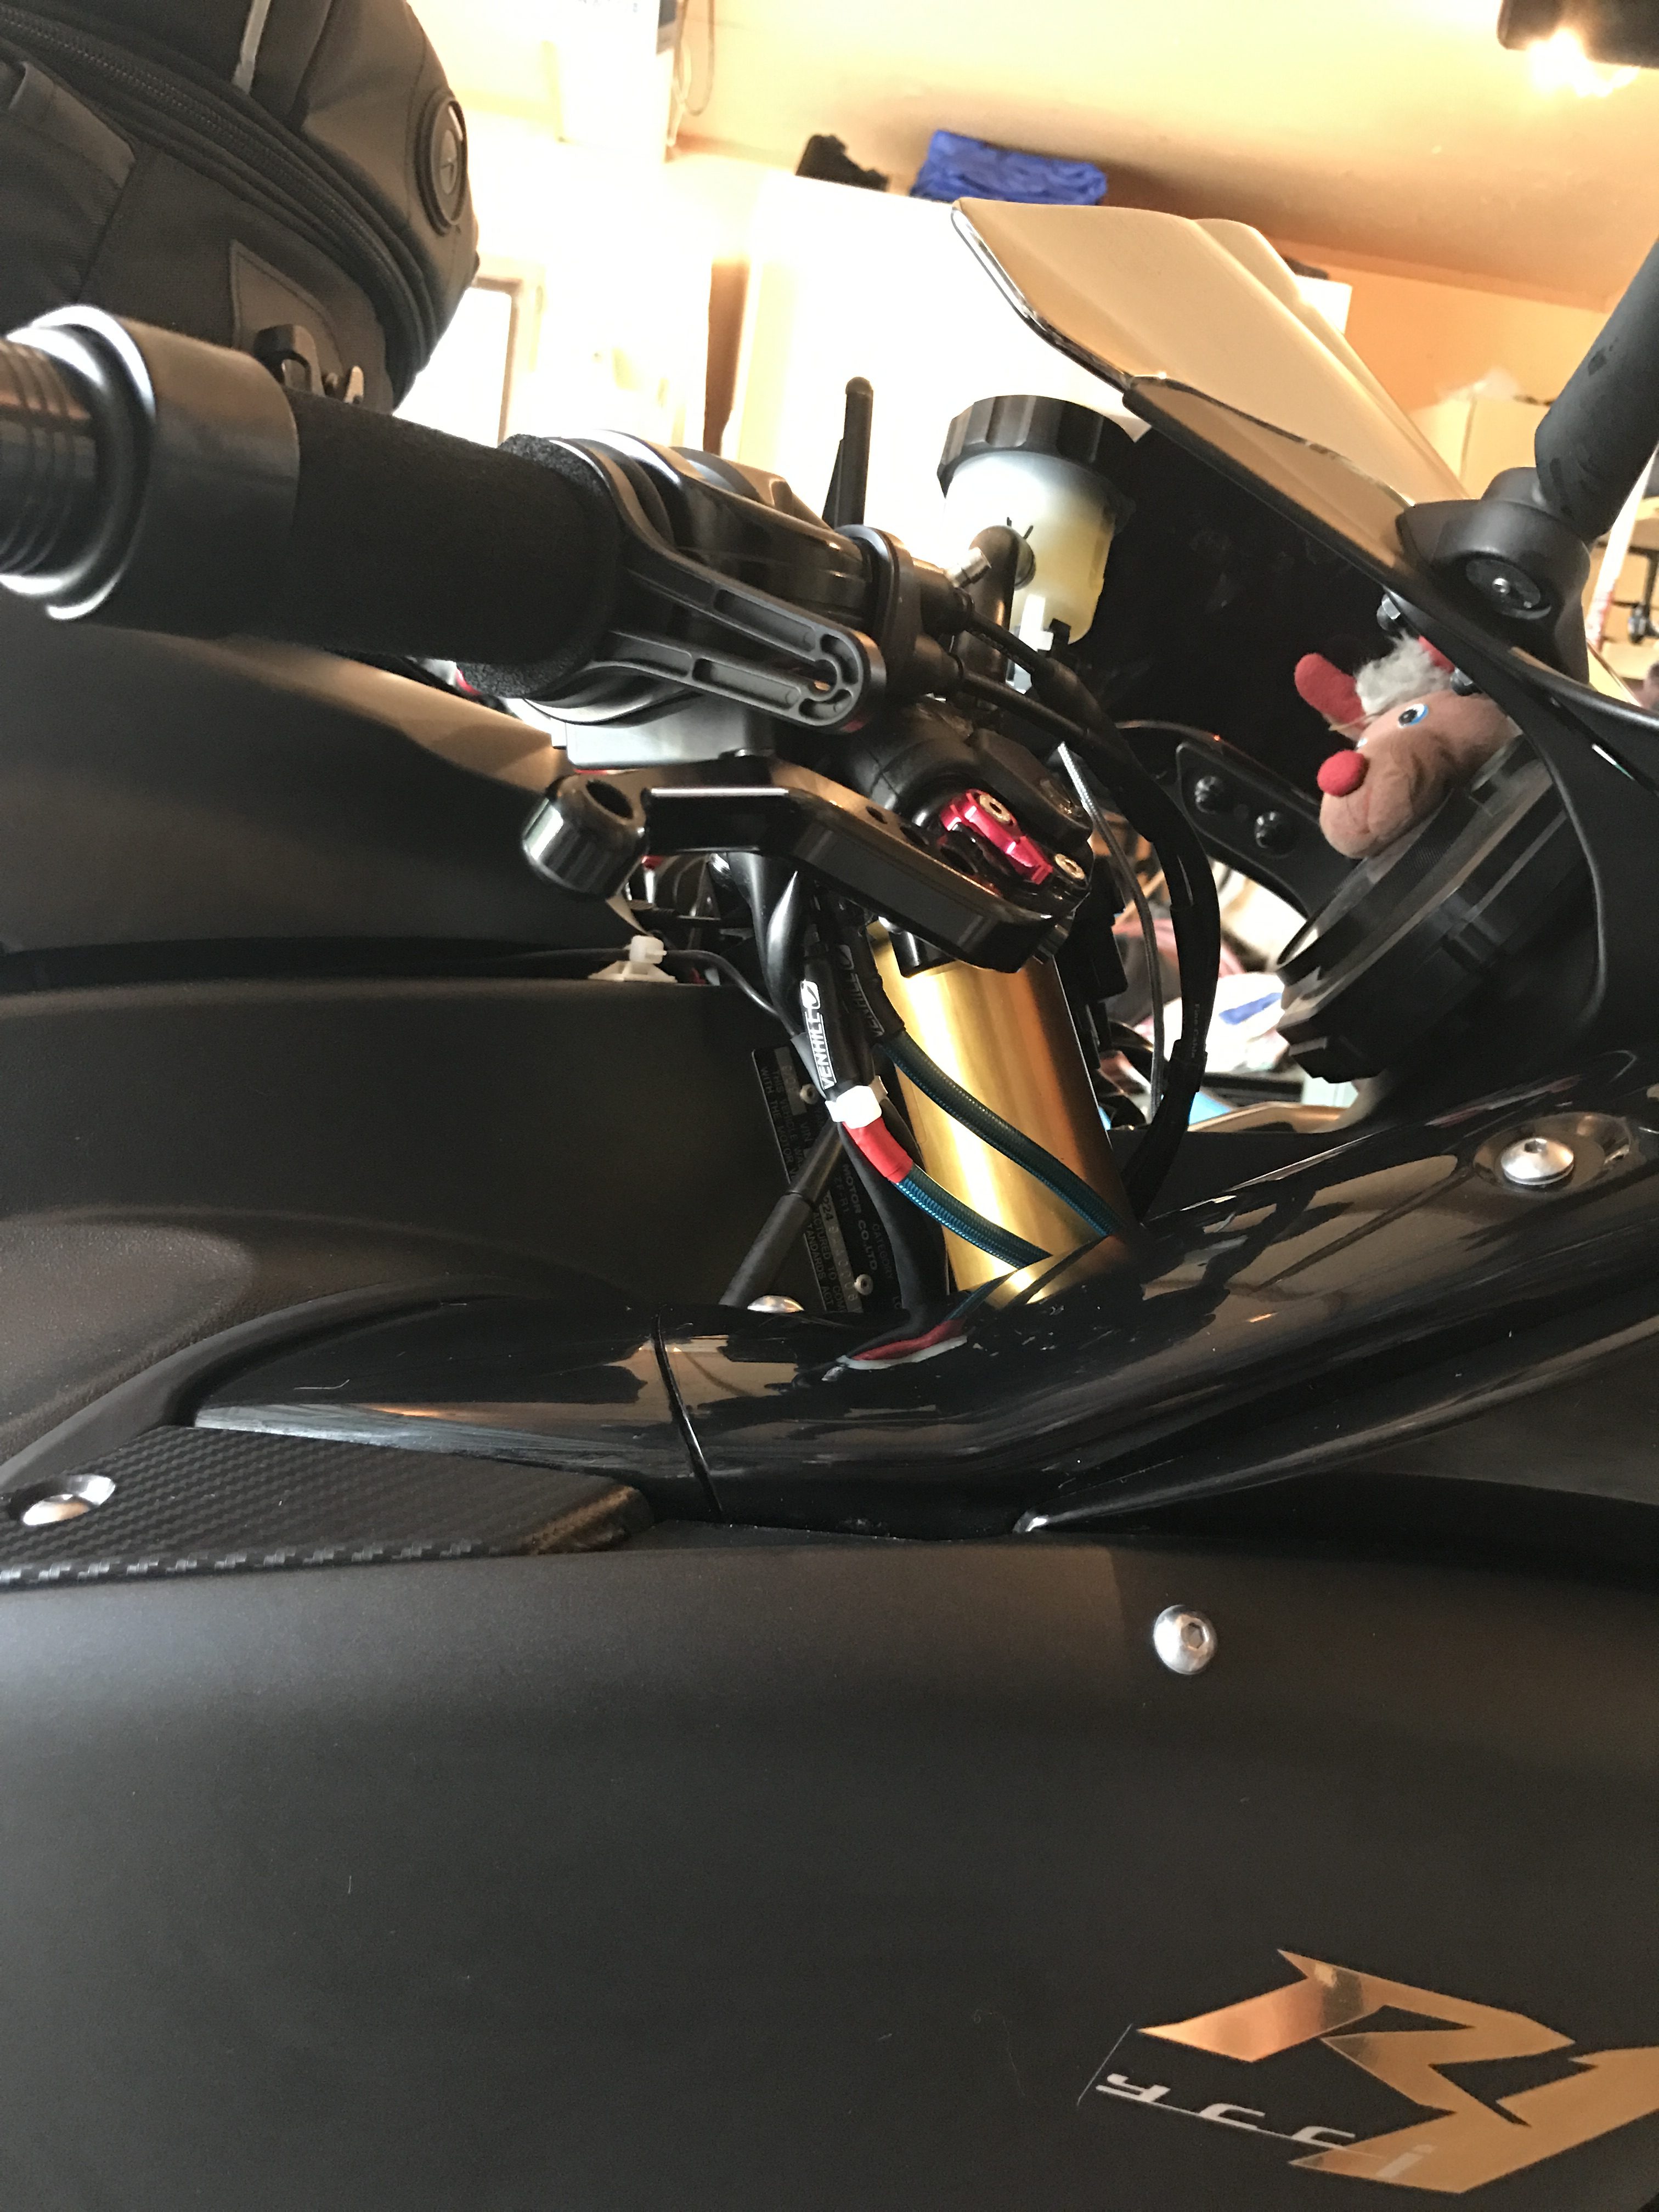
I bought Venhill braided hoses, and used this as a good opportunity to flush the old brake fluid out entirely, while I did this I also added both my Cramp Buster and my Throttle lock (I highly recommended both of these together).
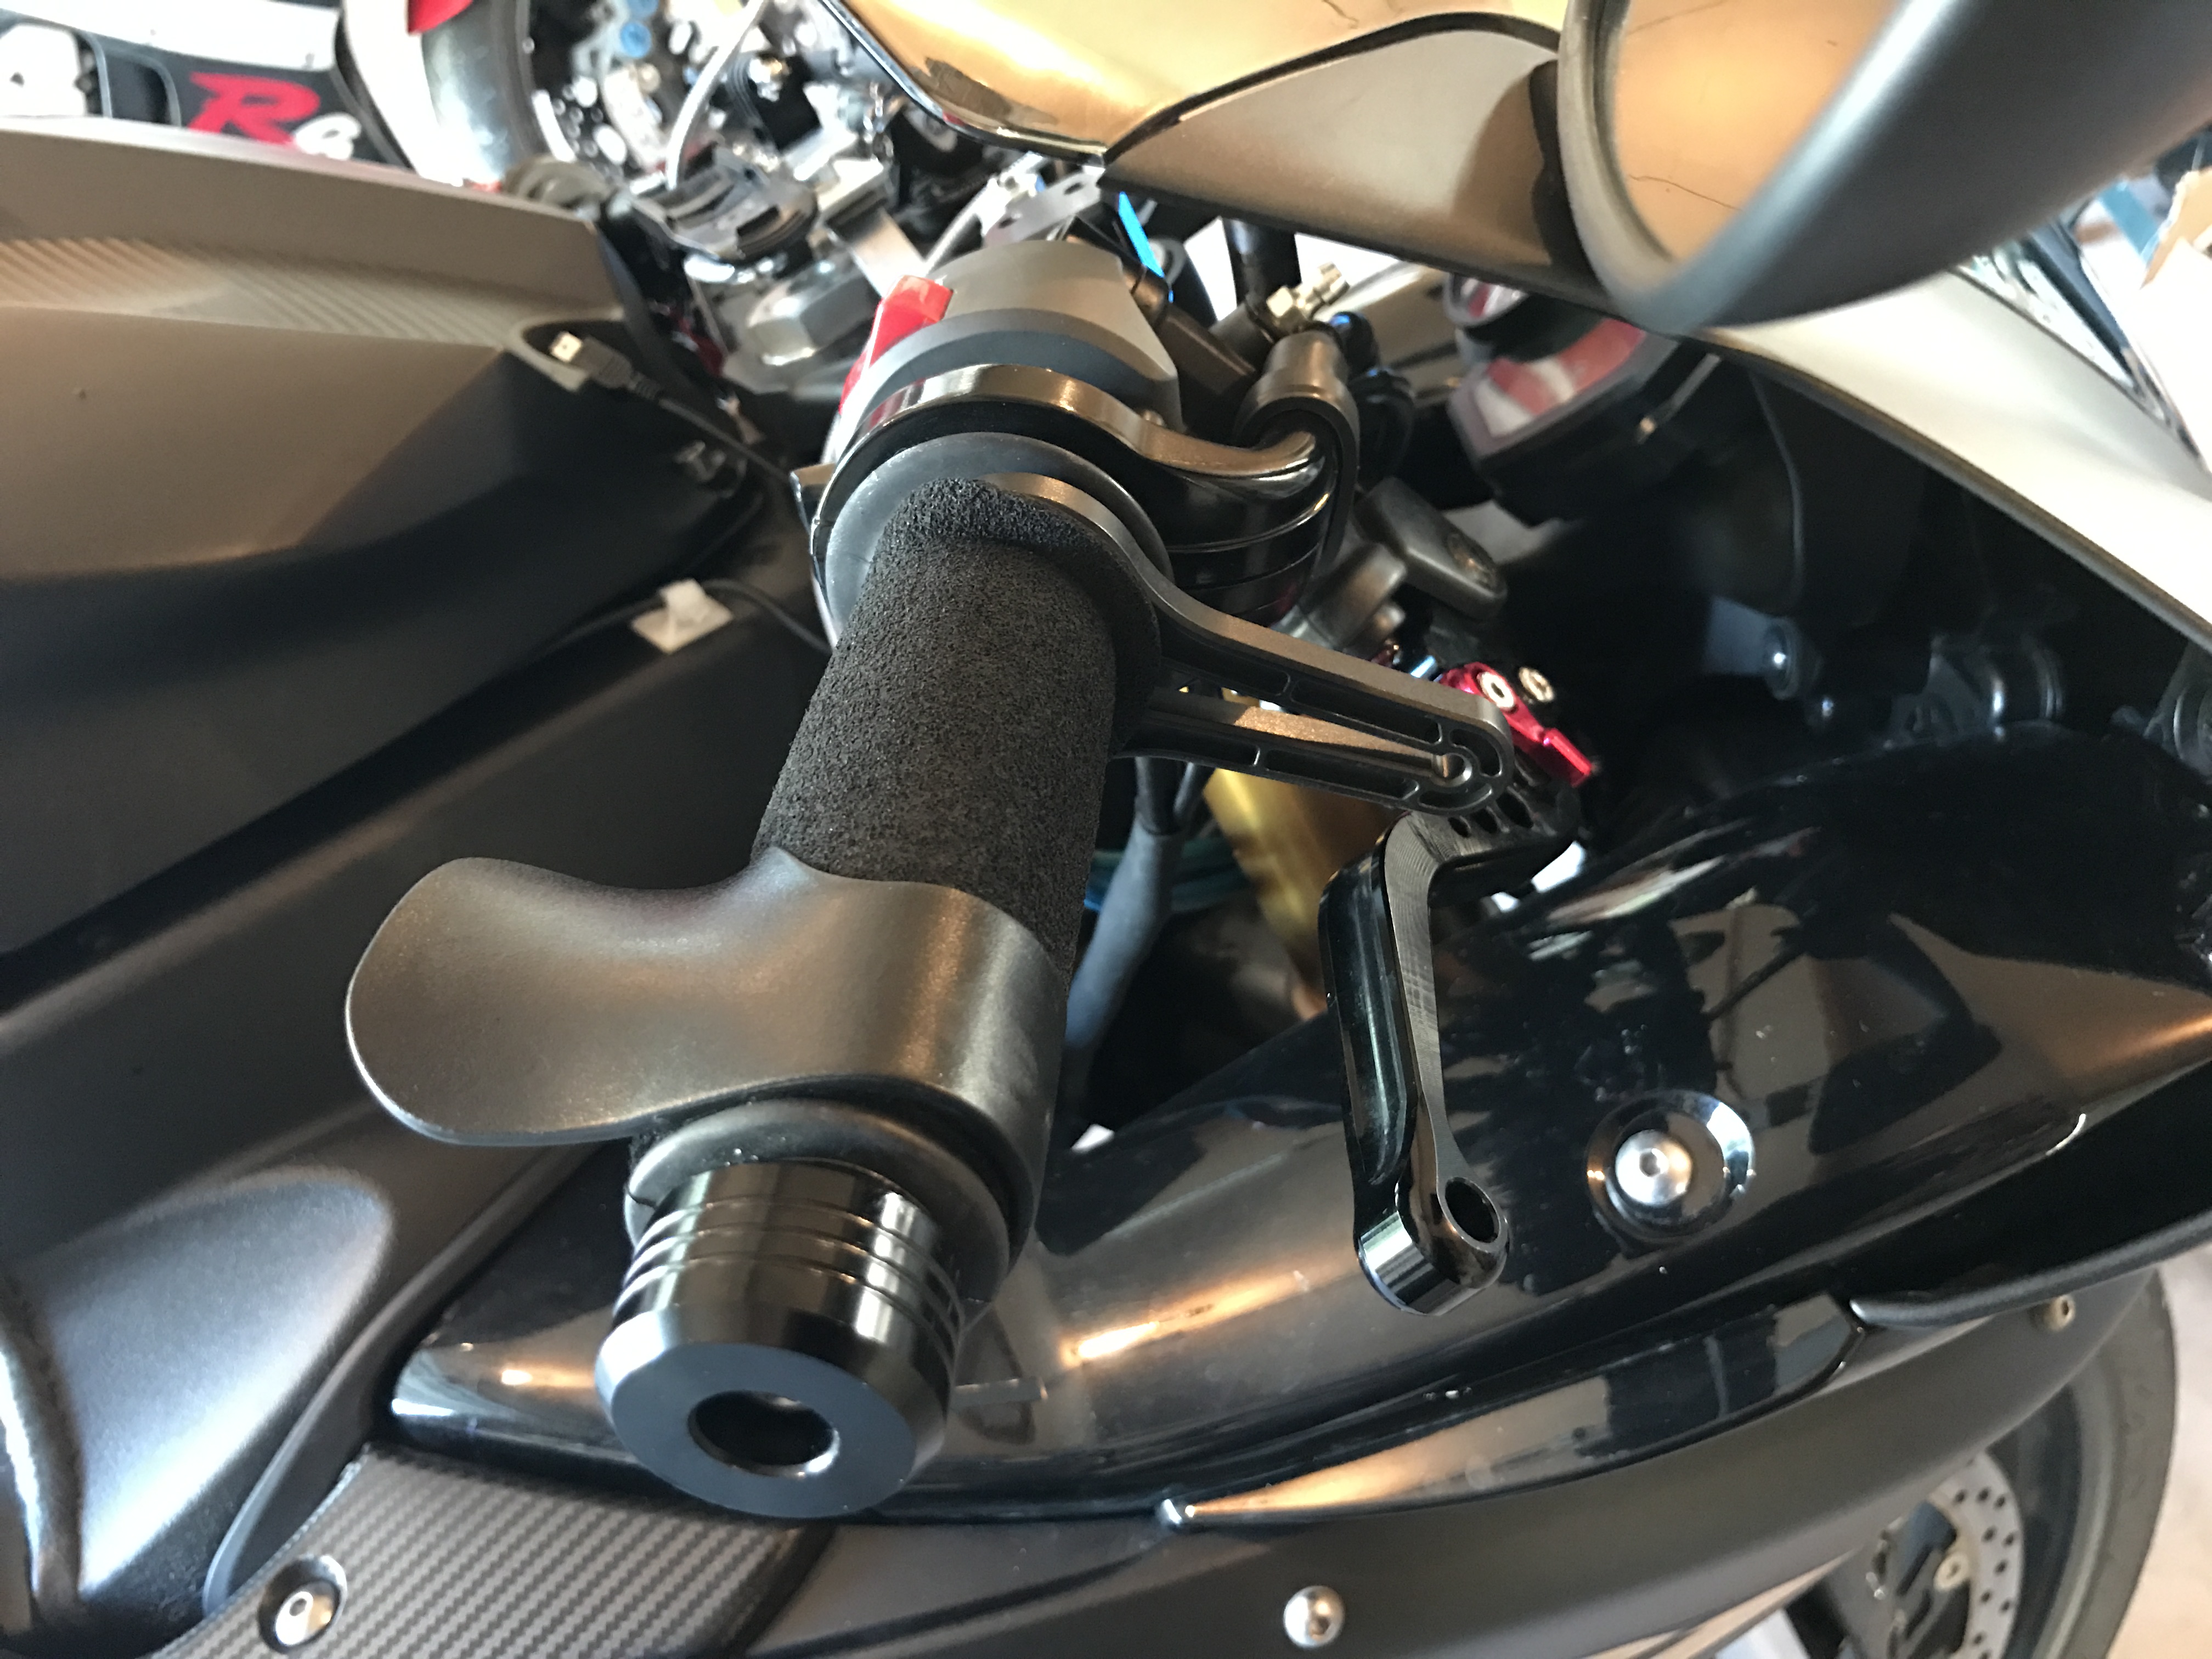

My cramp buster and throttle lock

The top of the Venhill braided hoses after re-fitting different shallow angled banjos
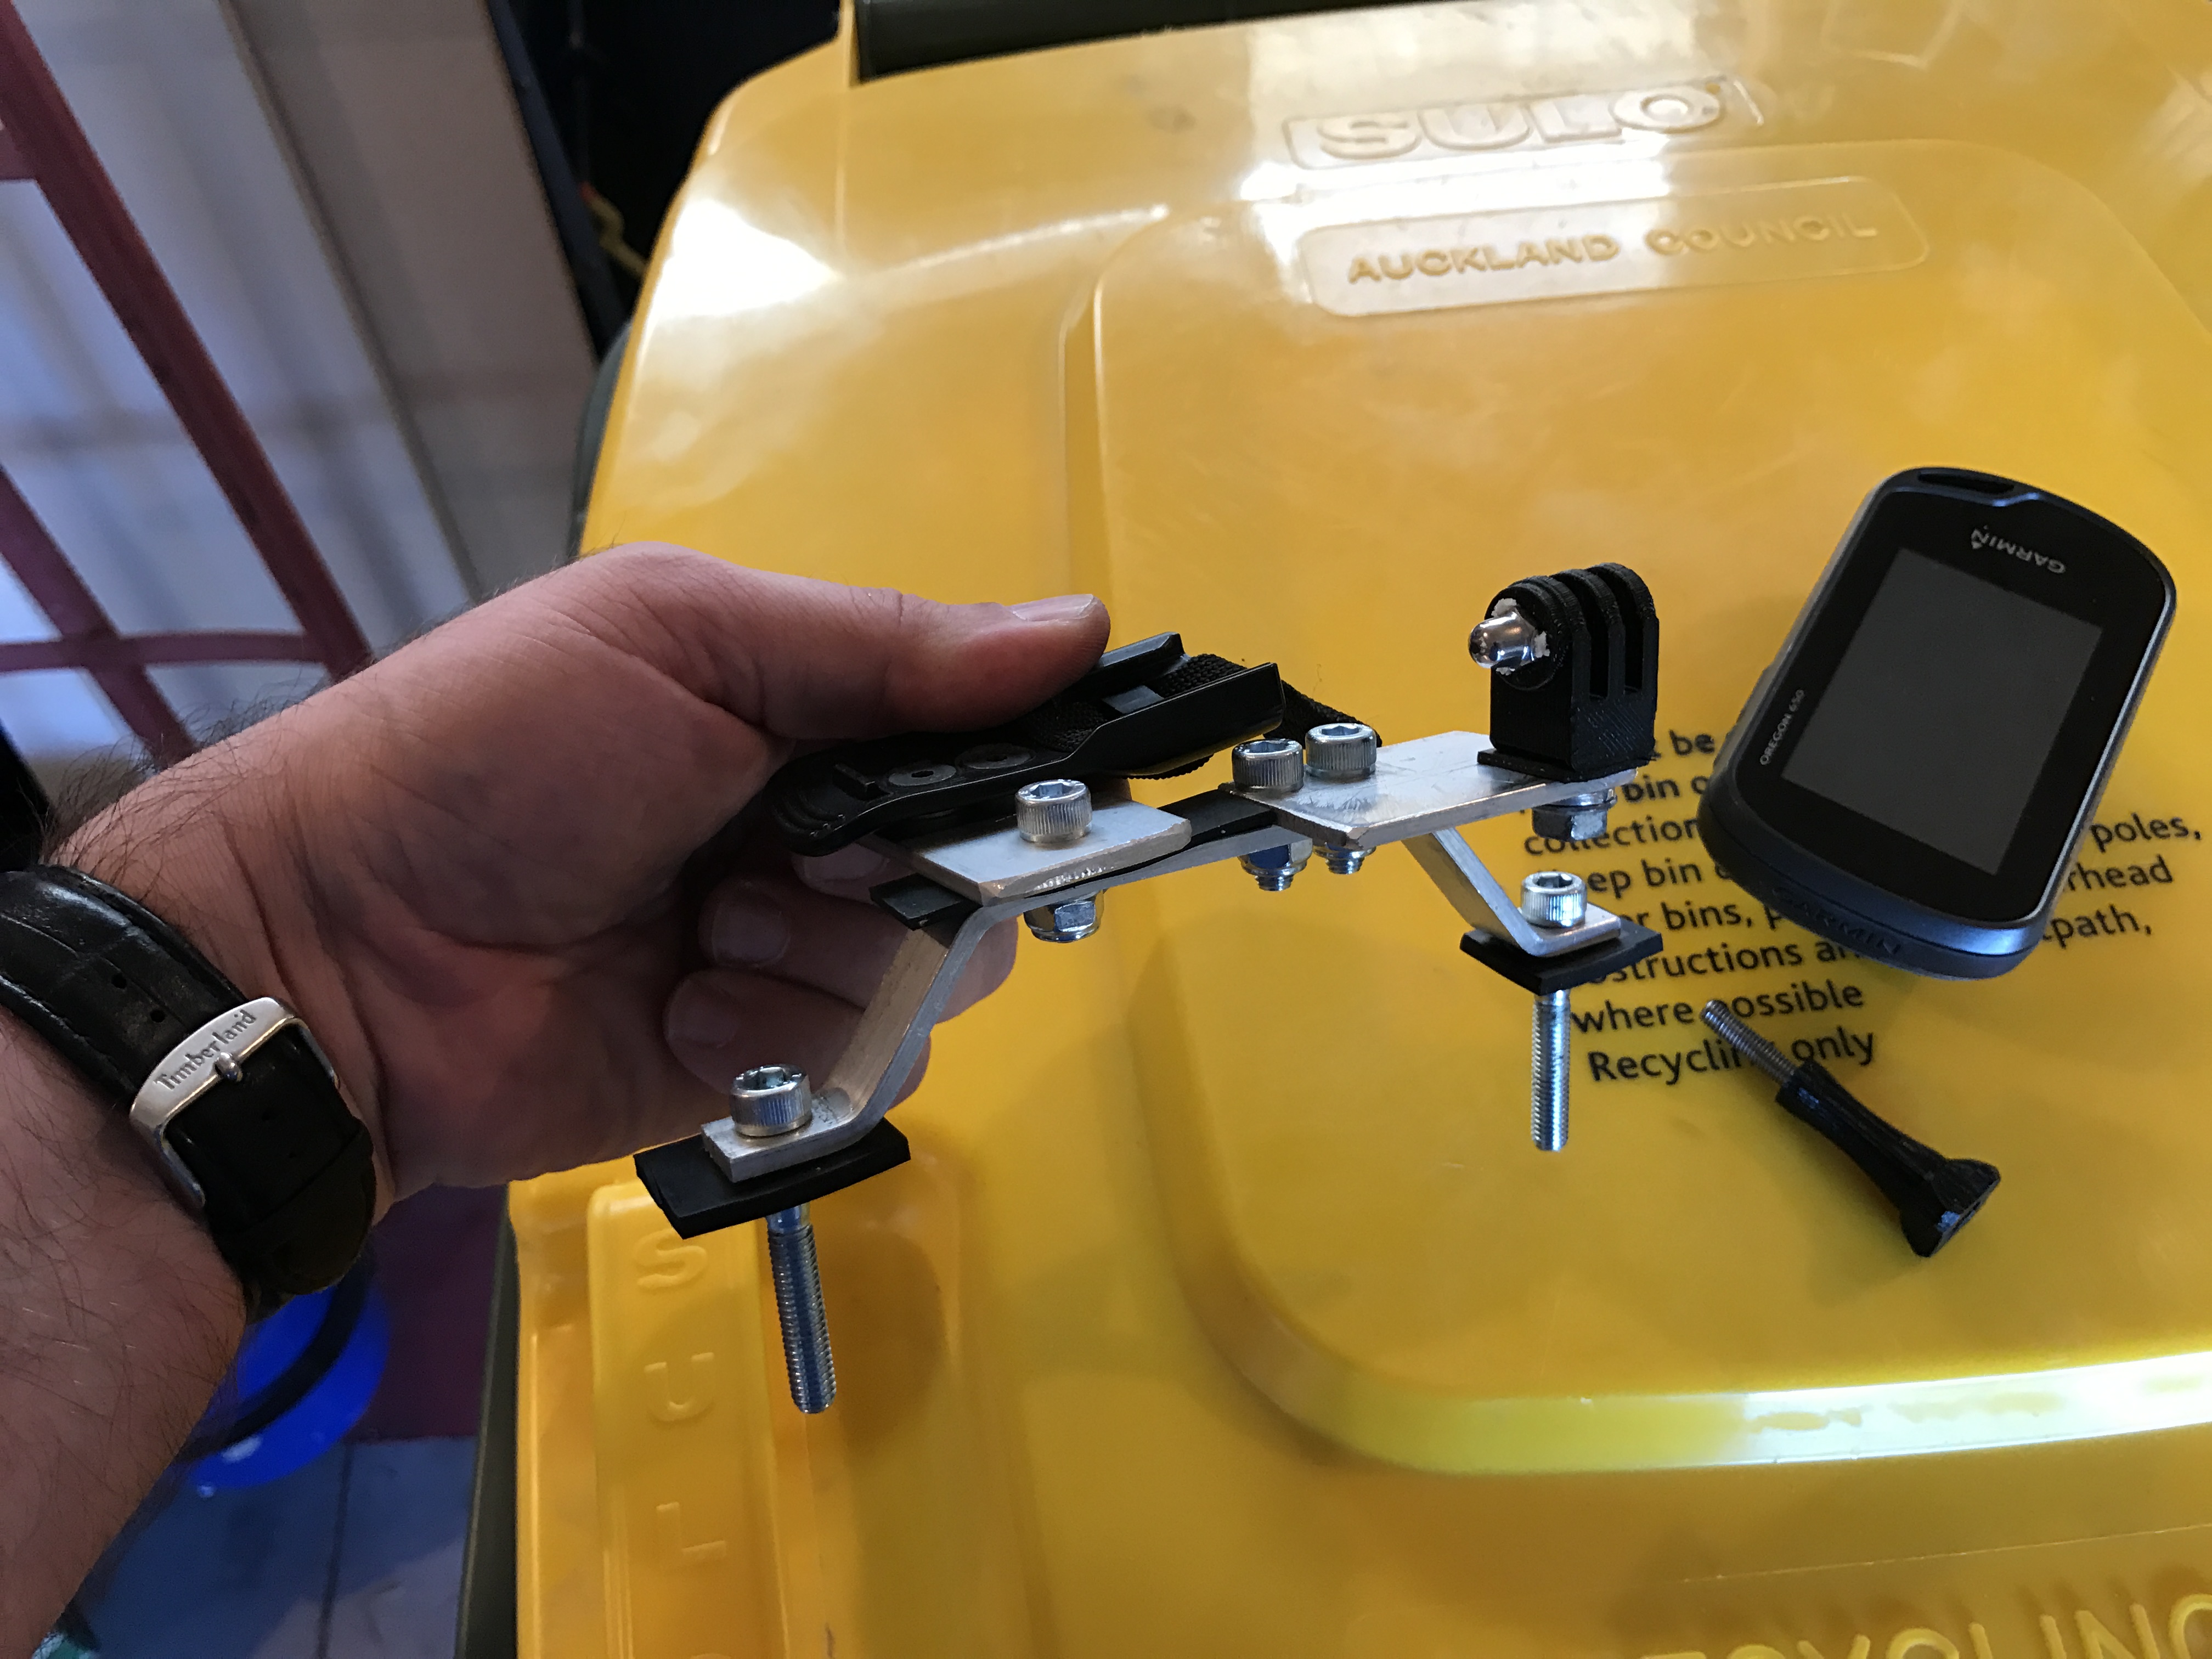
The Rear Camera mount required a custom approach. I had some aerial stays kicking around the garage and so I created a tripod support mounted to the left and right hand sides of my rear-rack, along with my rear right pillion foot peg mount. I wanted to capture some photo / video content from my ride in an effort to ‘give-back’ a little to the supporters who were being very generous with sponsorship for my fund-raiser. This seemed to be a good way to get a balanced camera angle which captured the essence of riding. It showed me on the bike, along with the bike itself, the scenery, and retained the leaning angle of the bike. Worried that it might catch the attention andscrutiny of on-lookers I painted it matt-black and added reflectors to it so that it looked ‘health and safety – compliant’. As it turned out, I had nothing other than interested glances and positive comments.
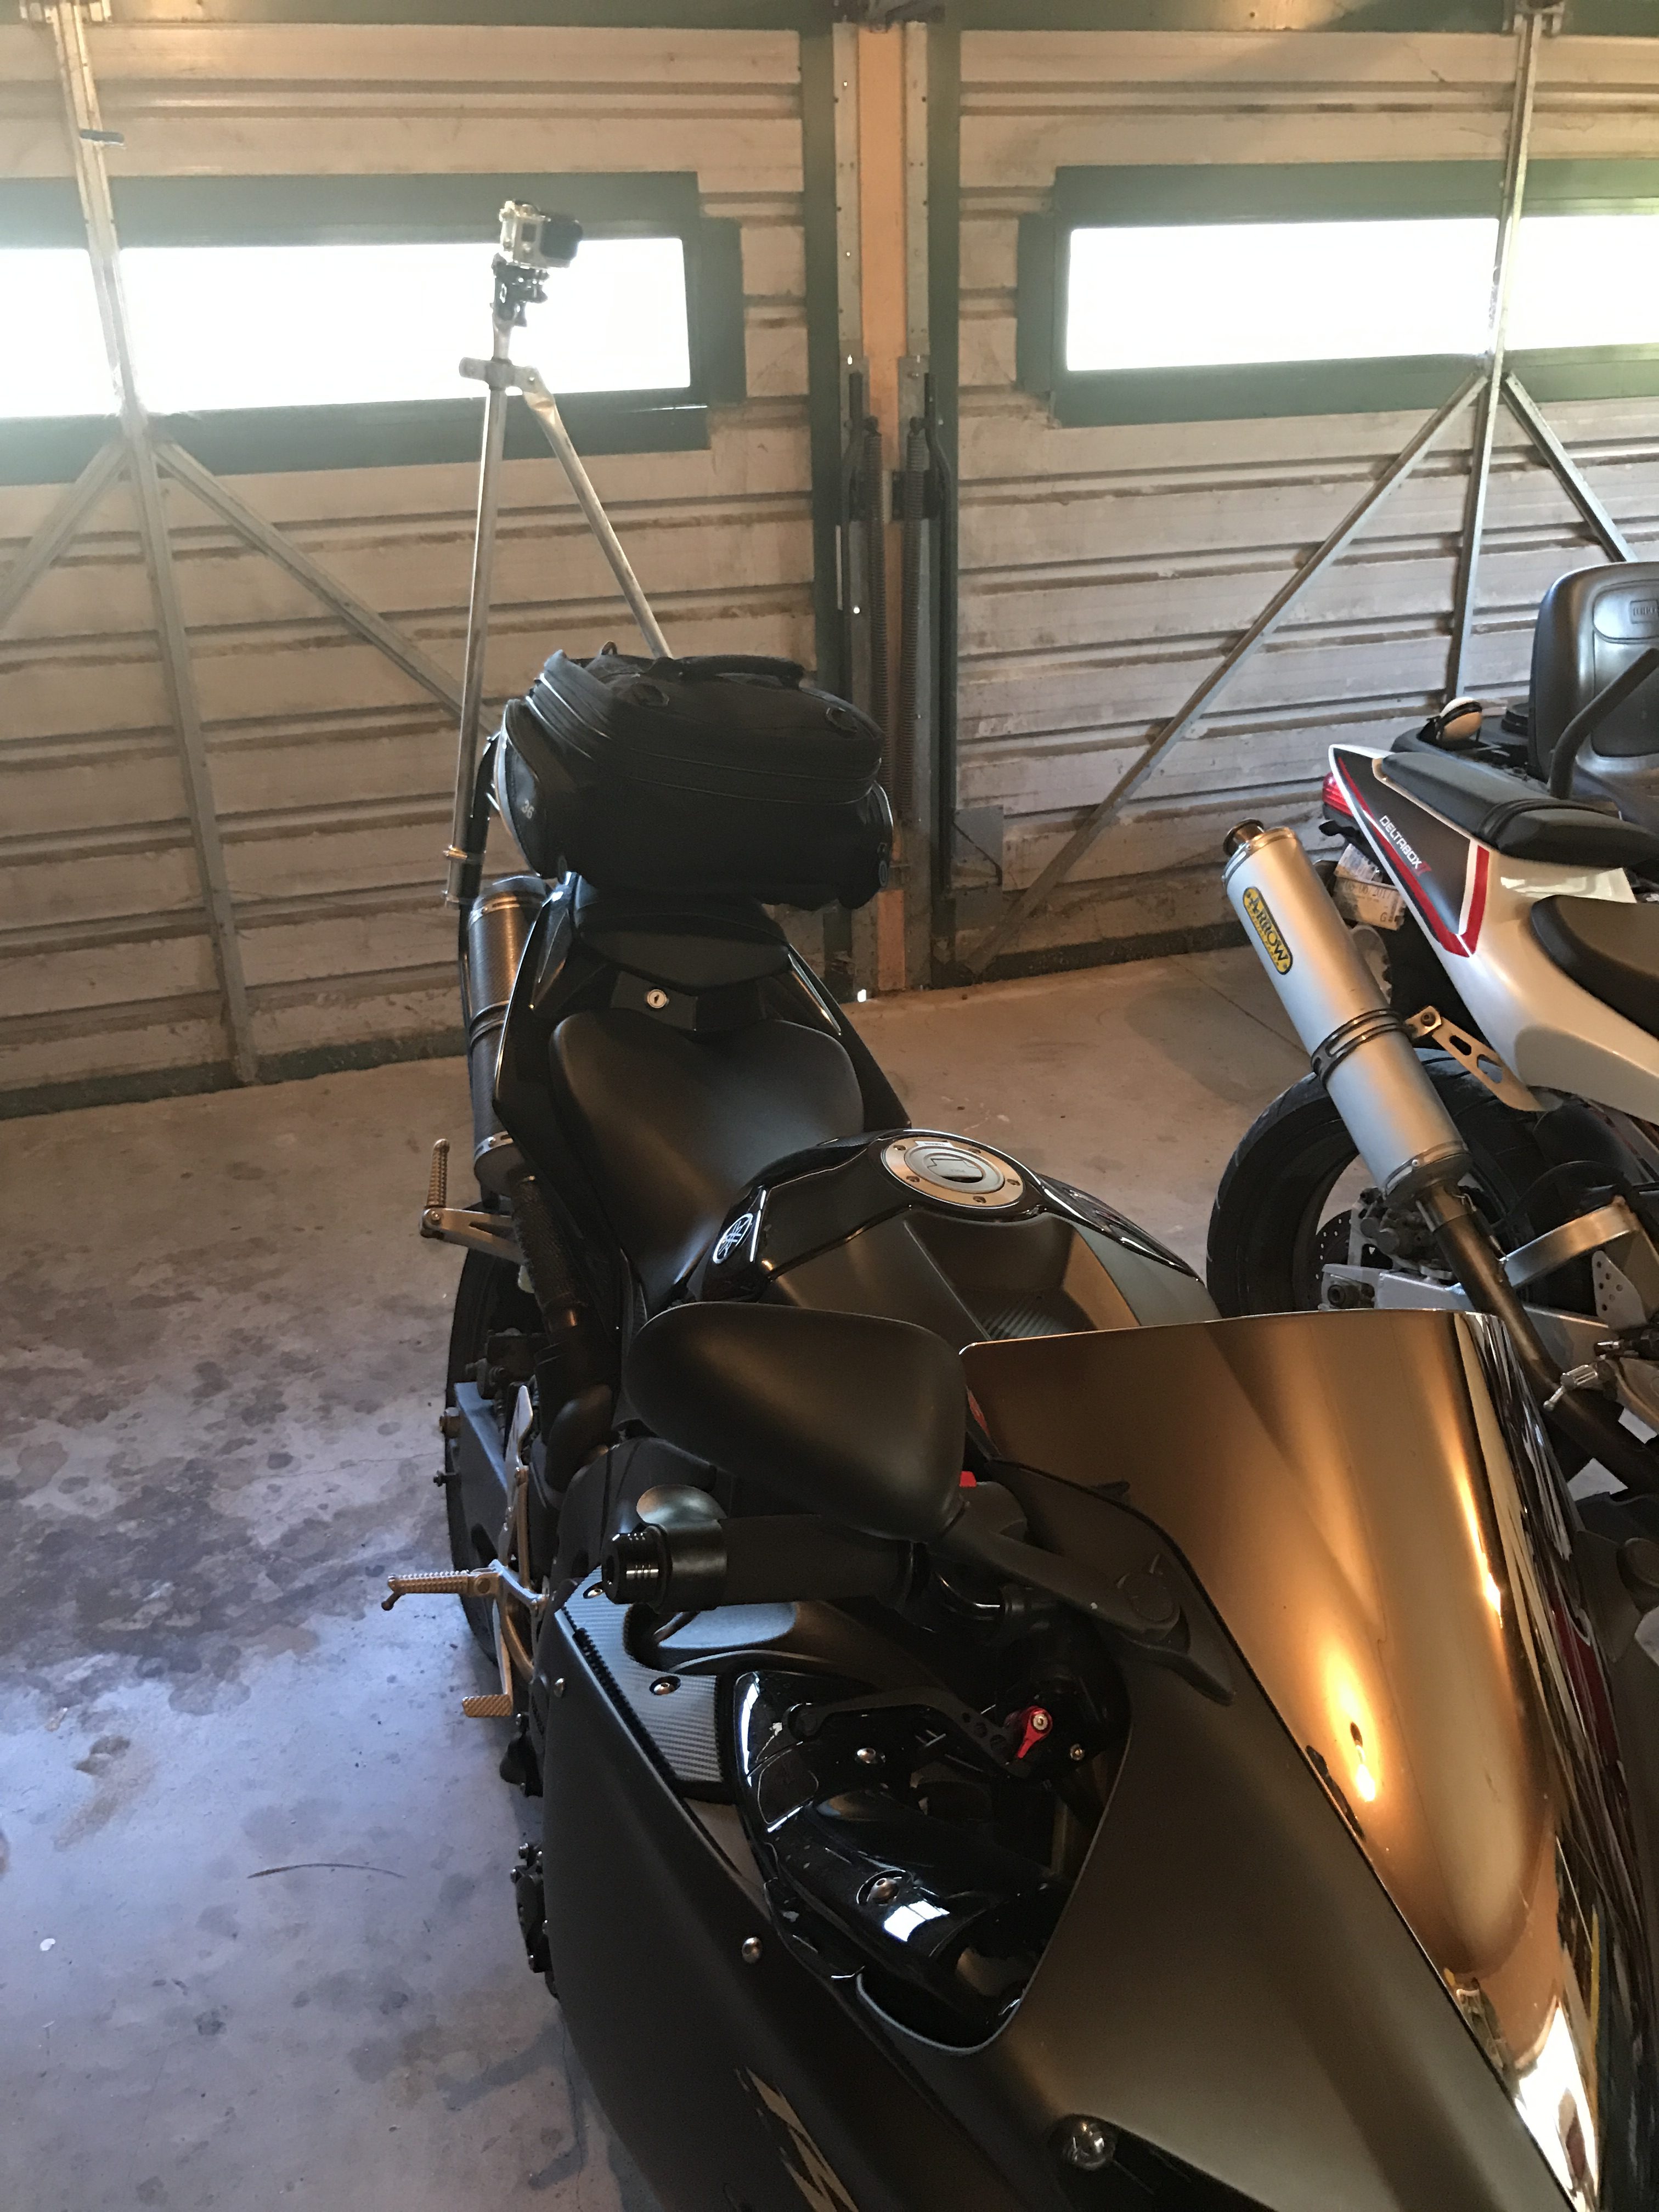
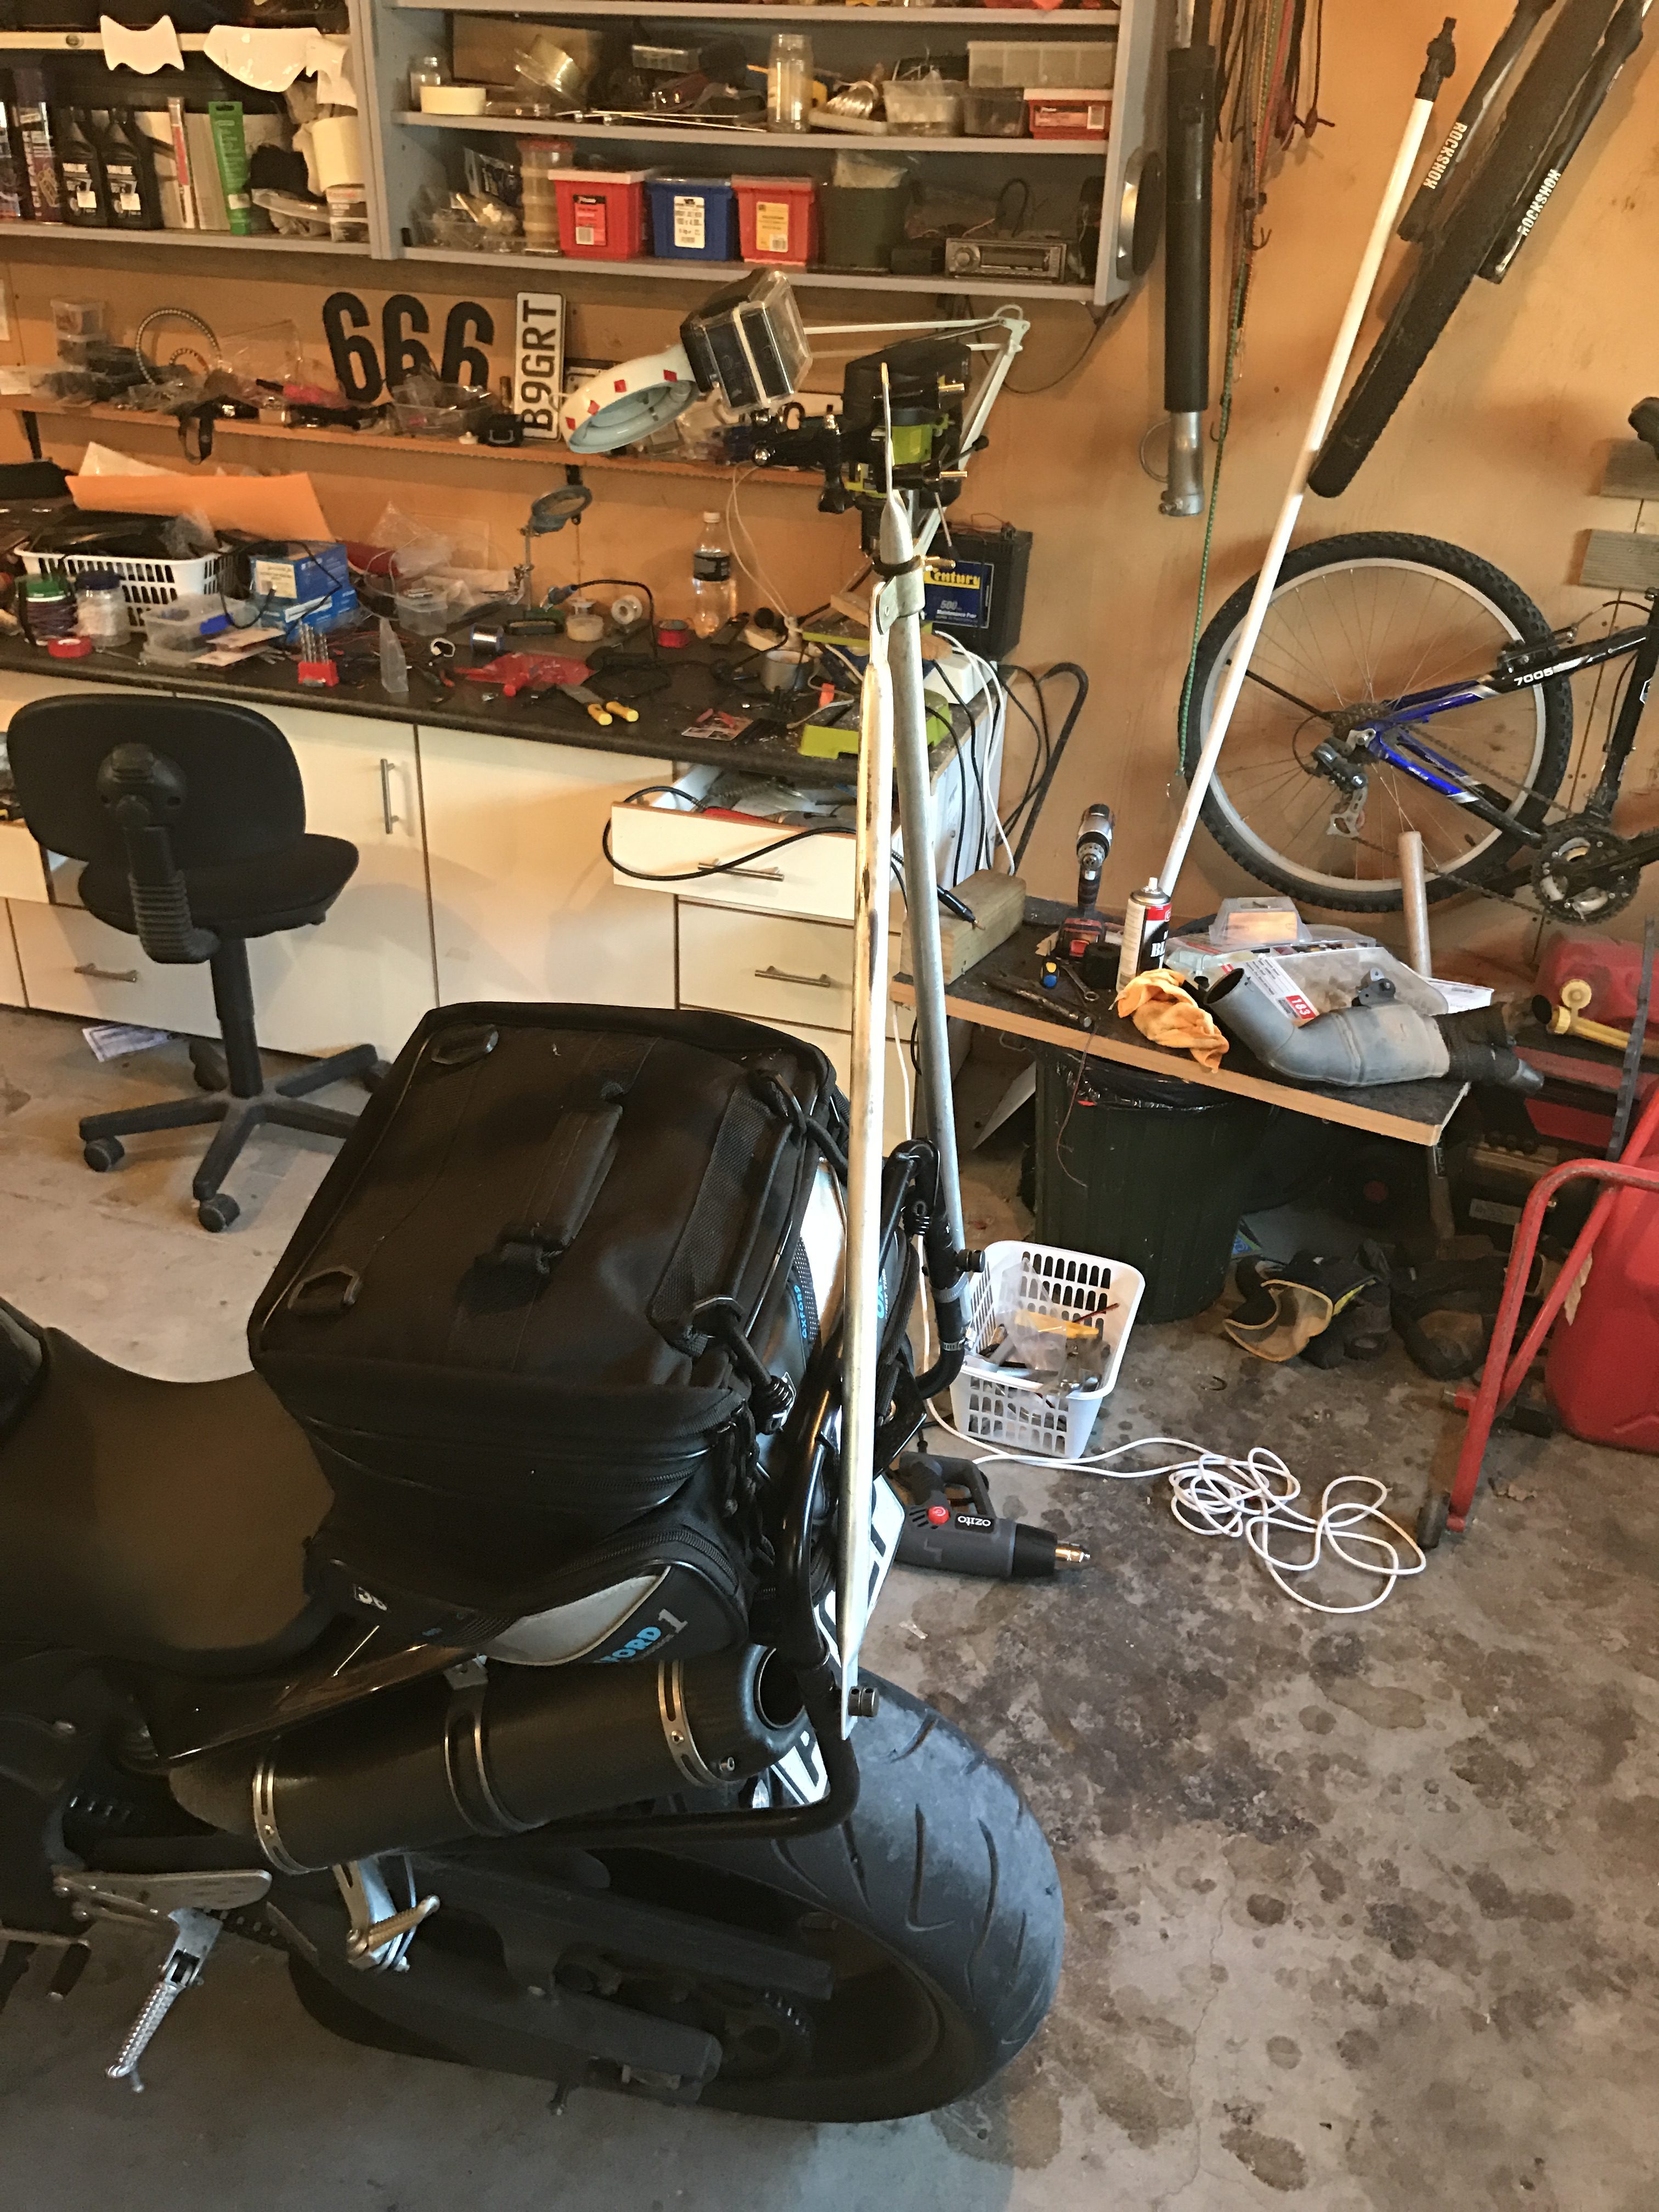
The above are early photos, before the third mount was added.
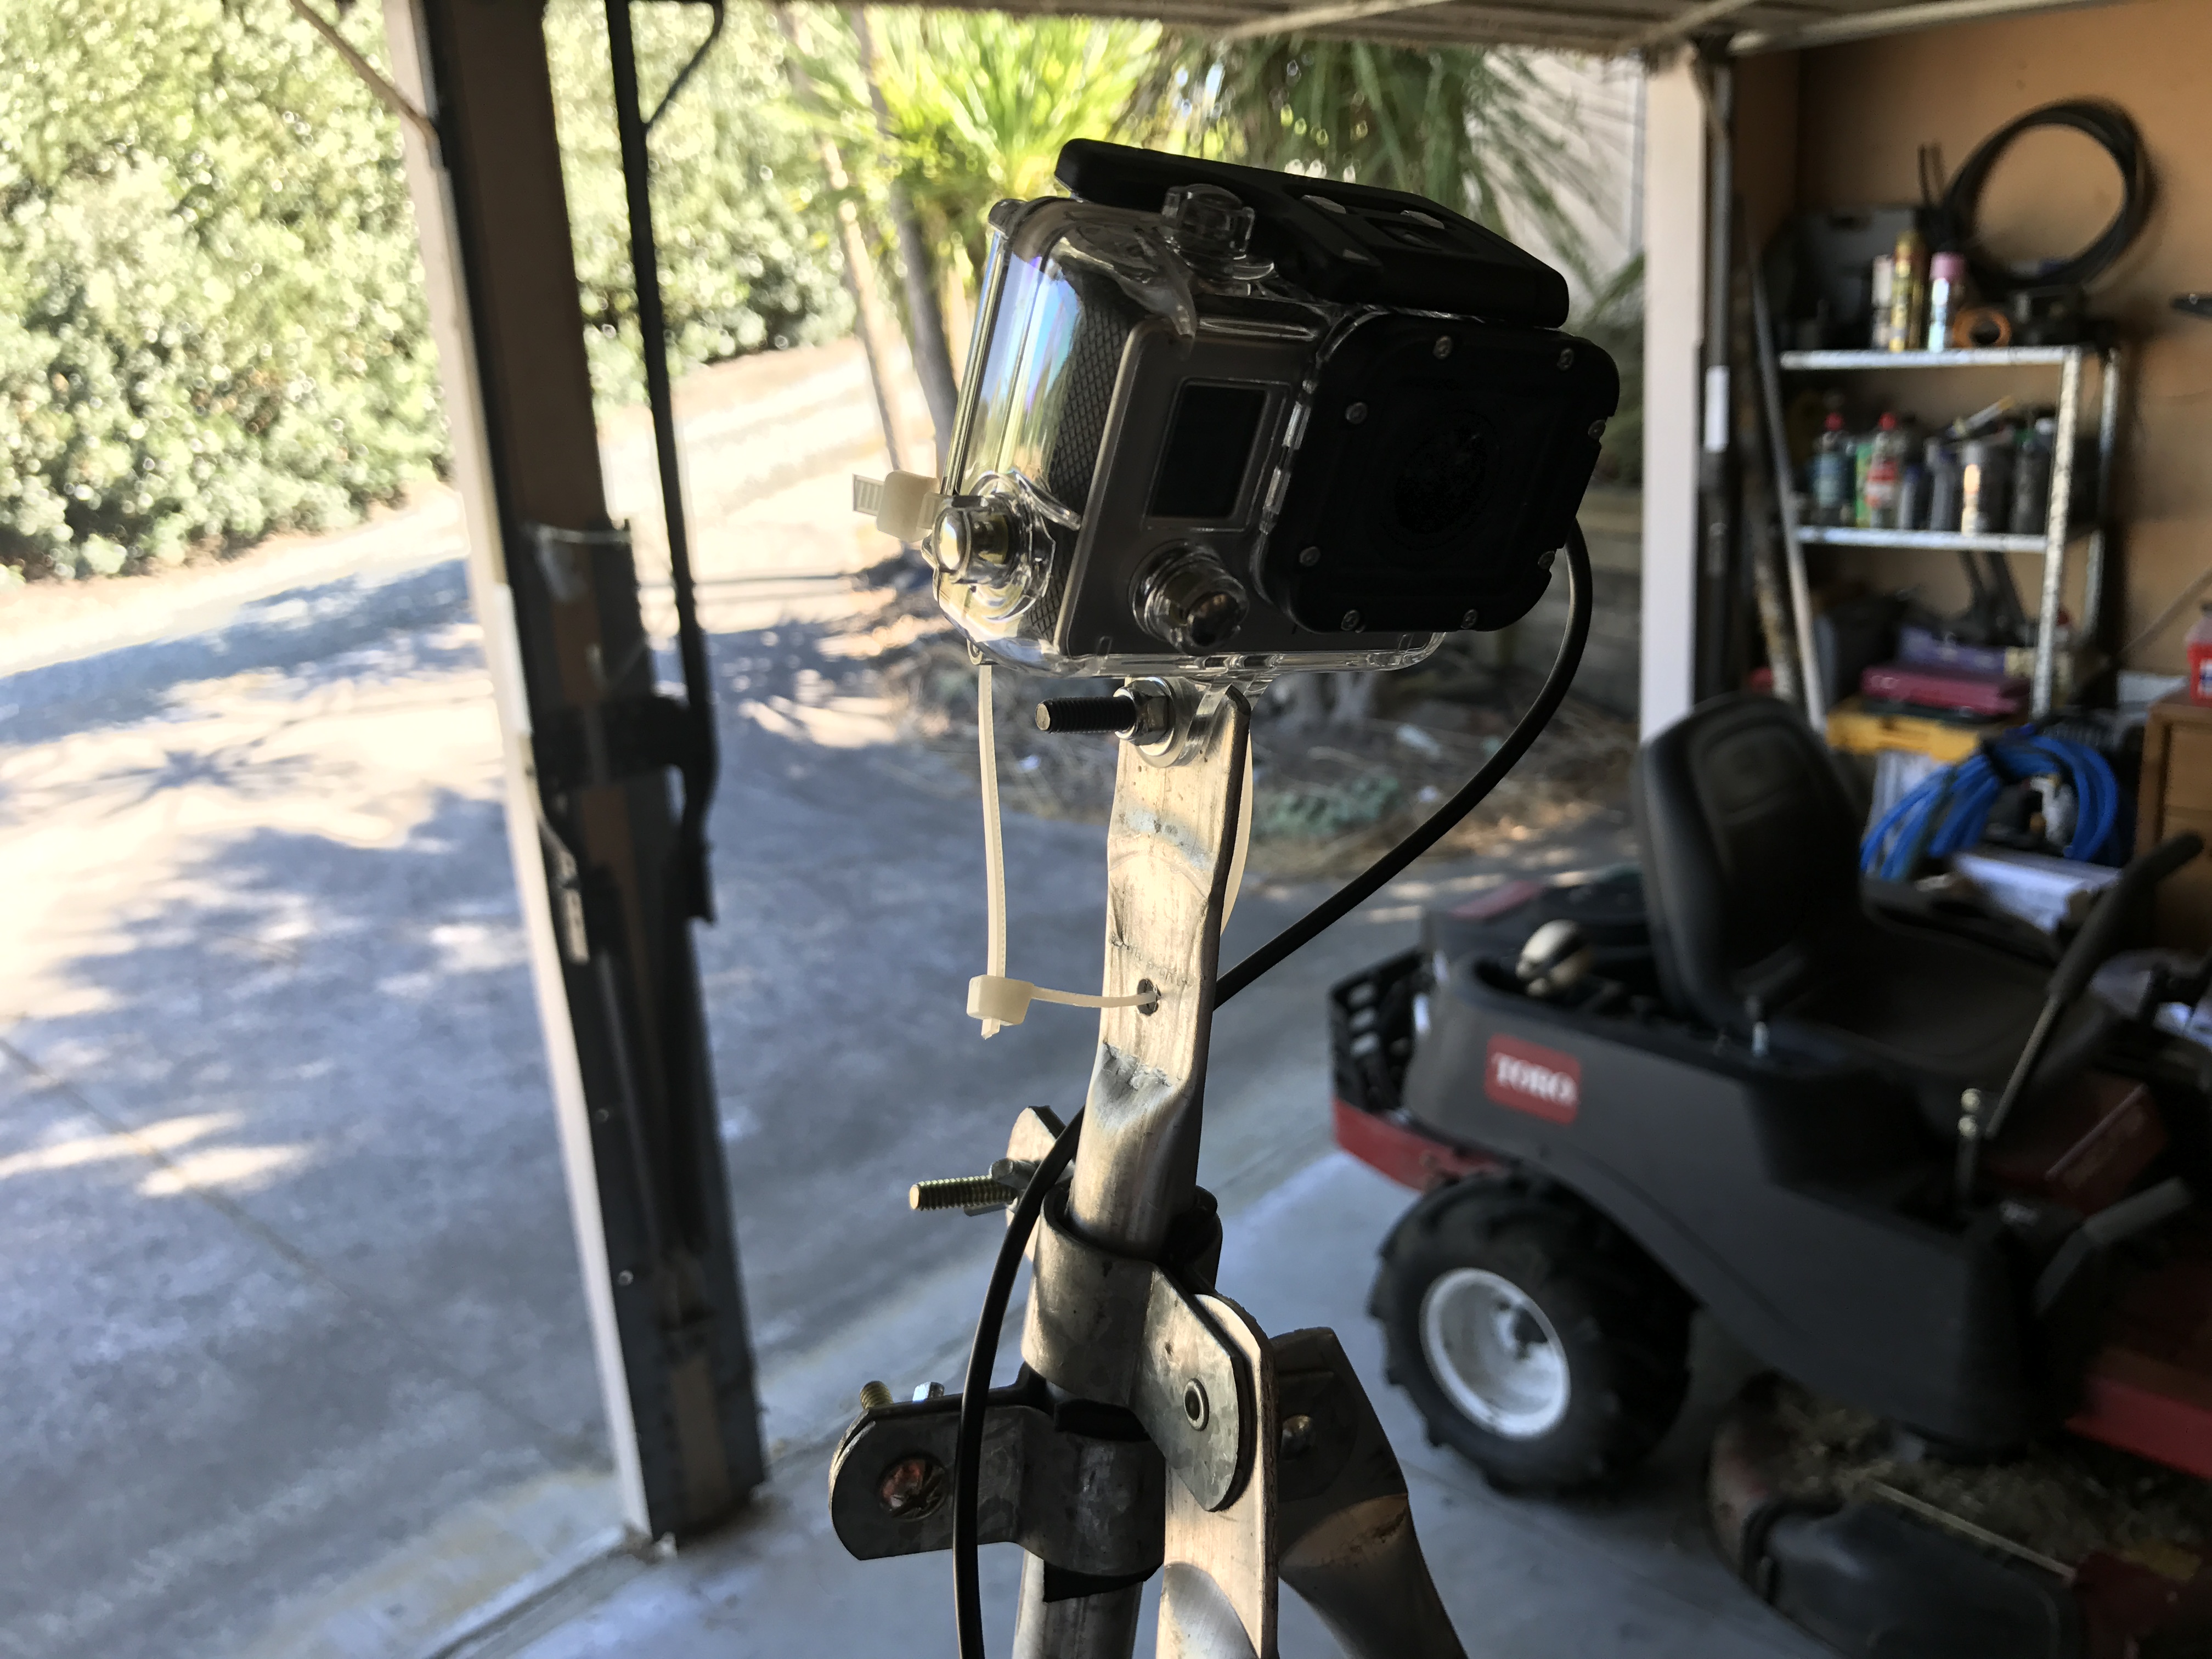
The first version of this mount attempted to use proper GoPro mounts, but this created a point of leverage as it wasn’t directly on the top of the pole. The first version broke and stupidly I hadn’t added a safety tie so the camera housing hung by the charging cable for about a minute before letting go and bouncing down the road. The result was a smashed and broken camera:

Broken GoPro mounts, pole vibrations and leverage had snapped it

It was broken. 🙁
So, I had more stuff to order off eBay in a rush. 🙂 – We found an excellent value replacement camera for a fraction of the price of a GoPro, a chinese made ‘HD Action Camera’ – it worked perfectly for what I wanted, this is what I ended up using for my ride photos and videos: 4K Ultra HD Action Camera on eBay
I’m a GeoCacher from way back, and so naturally I have decent hand-held GPS units, not one specifically for motorcycling, but a model which is good enough that it’s capable of using ‘routable maps’ and can act in a navigational mode. I needed to create a mount and a power supply for this. While I’m at it I knew I would want to be able to use some ride tracking app on my iPhone too, so I went searching for an iPhone mount for the bike.
Again eBay came to the rescue, and I found a ‘3D printed, iPhone mount for the iPhone 6/7+ which had a standard GoPro mount to attach it to whatever I managed to make or find. I placed my order for both that and a third party Garmin mount too, knowing that I’d likely be able to creatively knock something up for the front of my bike. iPhone holder – eBay
I had a strip of Aluminium in the garage which I used to create the mount which incorporated both of these pieces, it bolted onto the yoke with some rubber padding, using the locator-bolt holes which were left when I removed the standard handlebars.

My GoPro type mount for my iPhone, and the Garmin GPS holder all on a custom bracket

My iPhone holder, this thing has been brilliant
We had also ordered some Bluetooth / Radio comms headsets for the bikes (eBay Link), and knew that these also required some power to charge them when the onboard batteries ran out. So the need for power on the bikes was growing. Since neither of these bikes are touring models they don’t come with niceties like power sockets or USB outlets, so I had to make some.

Our FODSPORTS headsets, these have been brilliant
Thankfully, I have a keen interest in electronics and already had a number of small integrated circuit boards, capable of reducing 9-24dcv down to 5dcv, with a 3A output load. I wired up 2 of these boards in parallel, mounted them into a box with a dual USB socket for my primary box, then repeated this with a single unit for a secondary, lower current box. I created 4 USB outlets on my bike and wanted 2 for the R6. This was enough to power iPhone, GPS, Camera and recharge my headset. It would power Jon’s iPhone and GPS, and we planned to use a battery bank USB unit for charging his headset. – On the day, it all worked perfectly. 🙂
For the R6, I found this nice little unit on eBay which saved me from having to custom make addition units for the R6: (eBay Link)

At this point I was starting to feel like we’re getting pretty close to having the bikes prepared.
I’ve been used to having a decent, and large tank bag on my bike while on longer rides, I love the weight reduction and relief it provides on your wrists as you can lean your upper body weight onto the bag.
Things have moved on a long way since I bought my last tank bag, so I did some research looking for an option which was well-suited for the R1’s unusual tank. The front half of it is just a plastic air-box cover, it’s only the rear section which could possibly hold a magnetic bag… A friend recommended the ‘Givi TankLock’ system. He swore by his so I looked for the largest available TankLock bag which appears to be a 25L bag – model XS306. It’s actually not that big but since I had mounted my GPS and phone in-front of it this size was a pretty good option for my setup. I bought locally not from Revzilla, but my local store’s website is down today, so here’s an alternative link: https://www.revzilla.com/motorcycle/givi-xs306-tanklock-tankbag
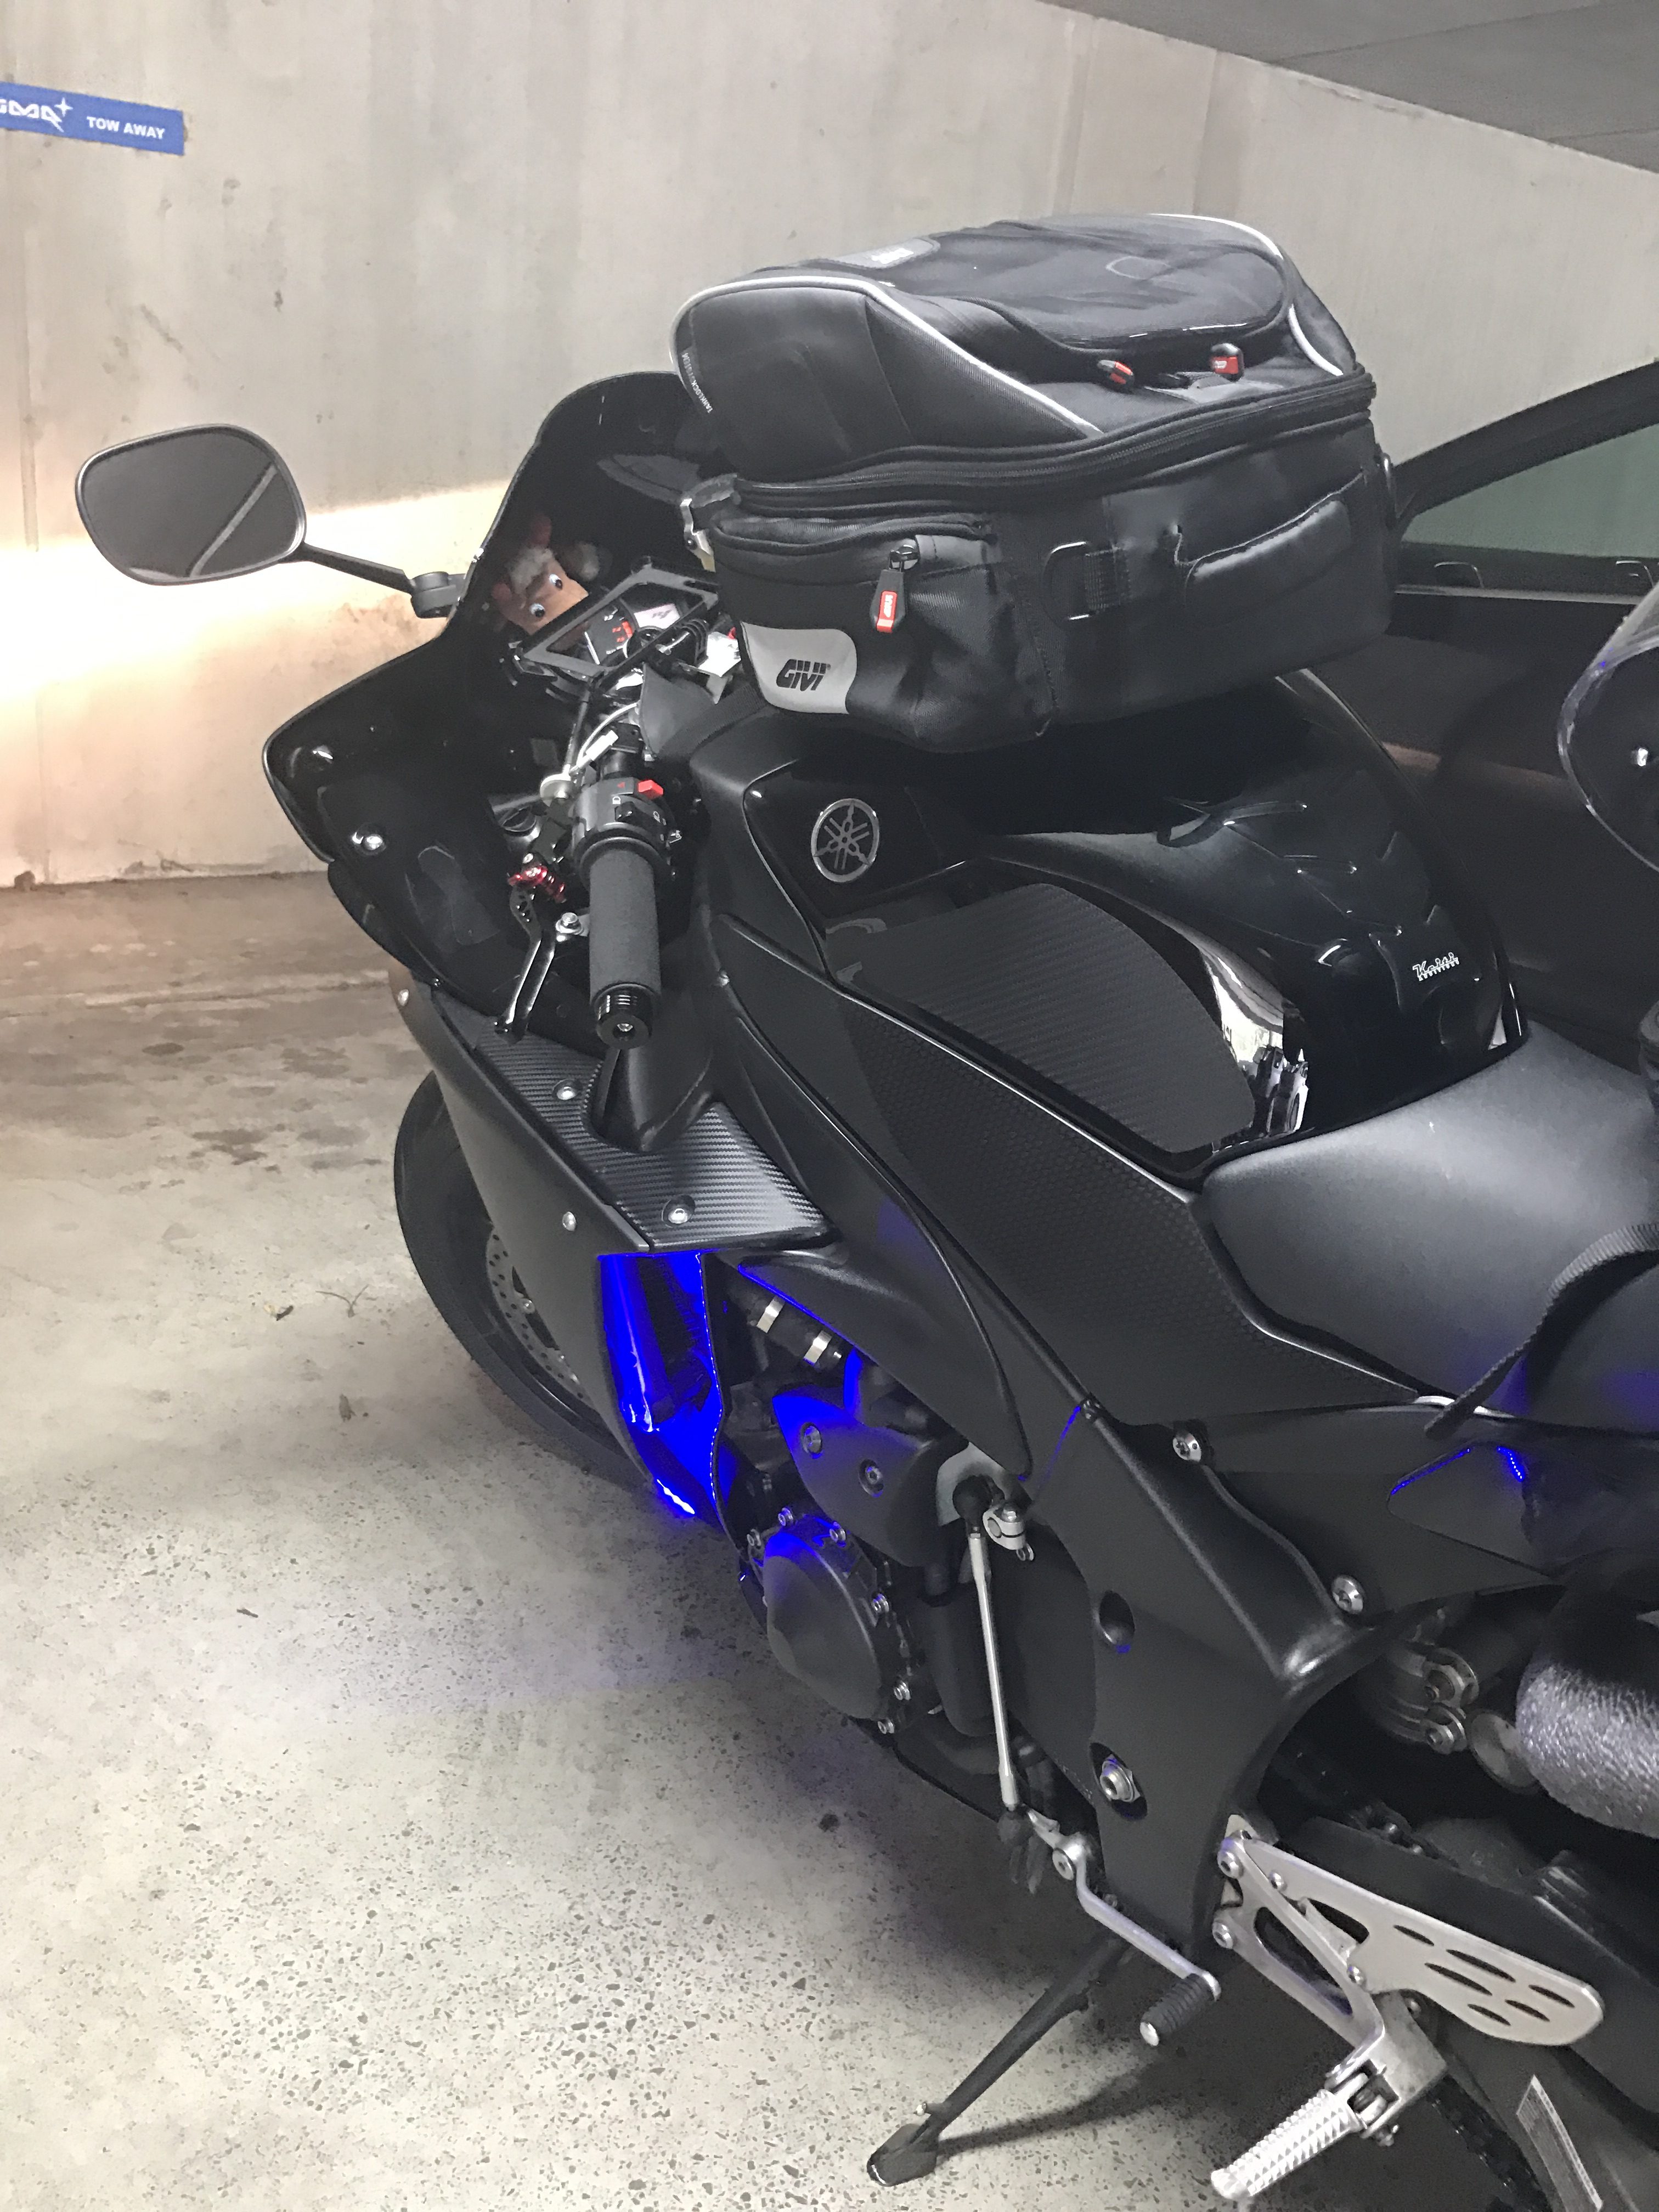
Some people have said that the bag looks huge, but honestly, when I’m on the bike it just disappears in-front of me and helps to hold me up. 🙂
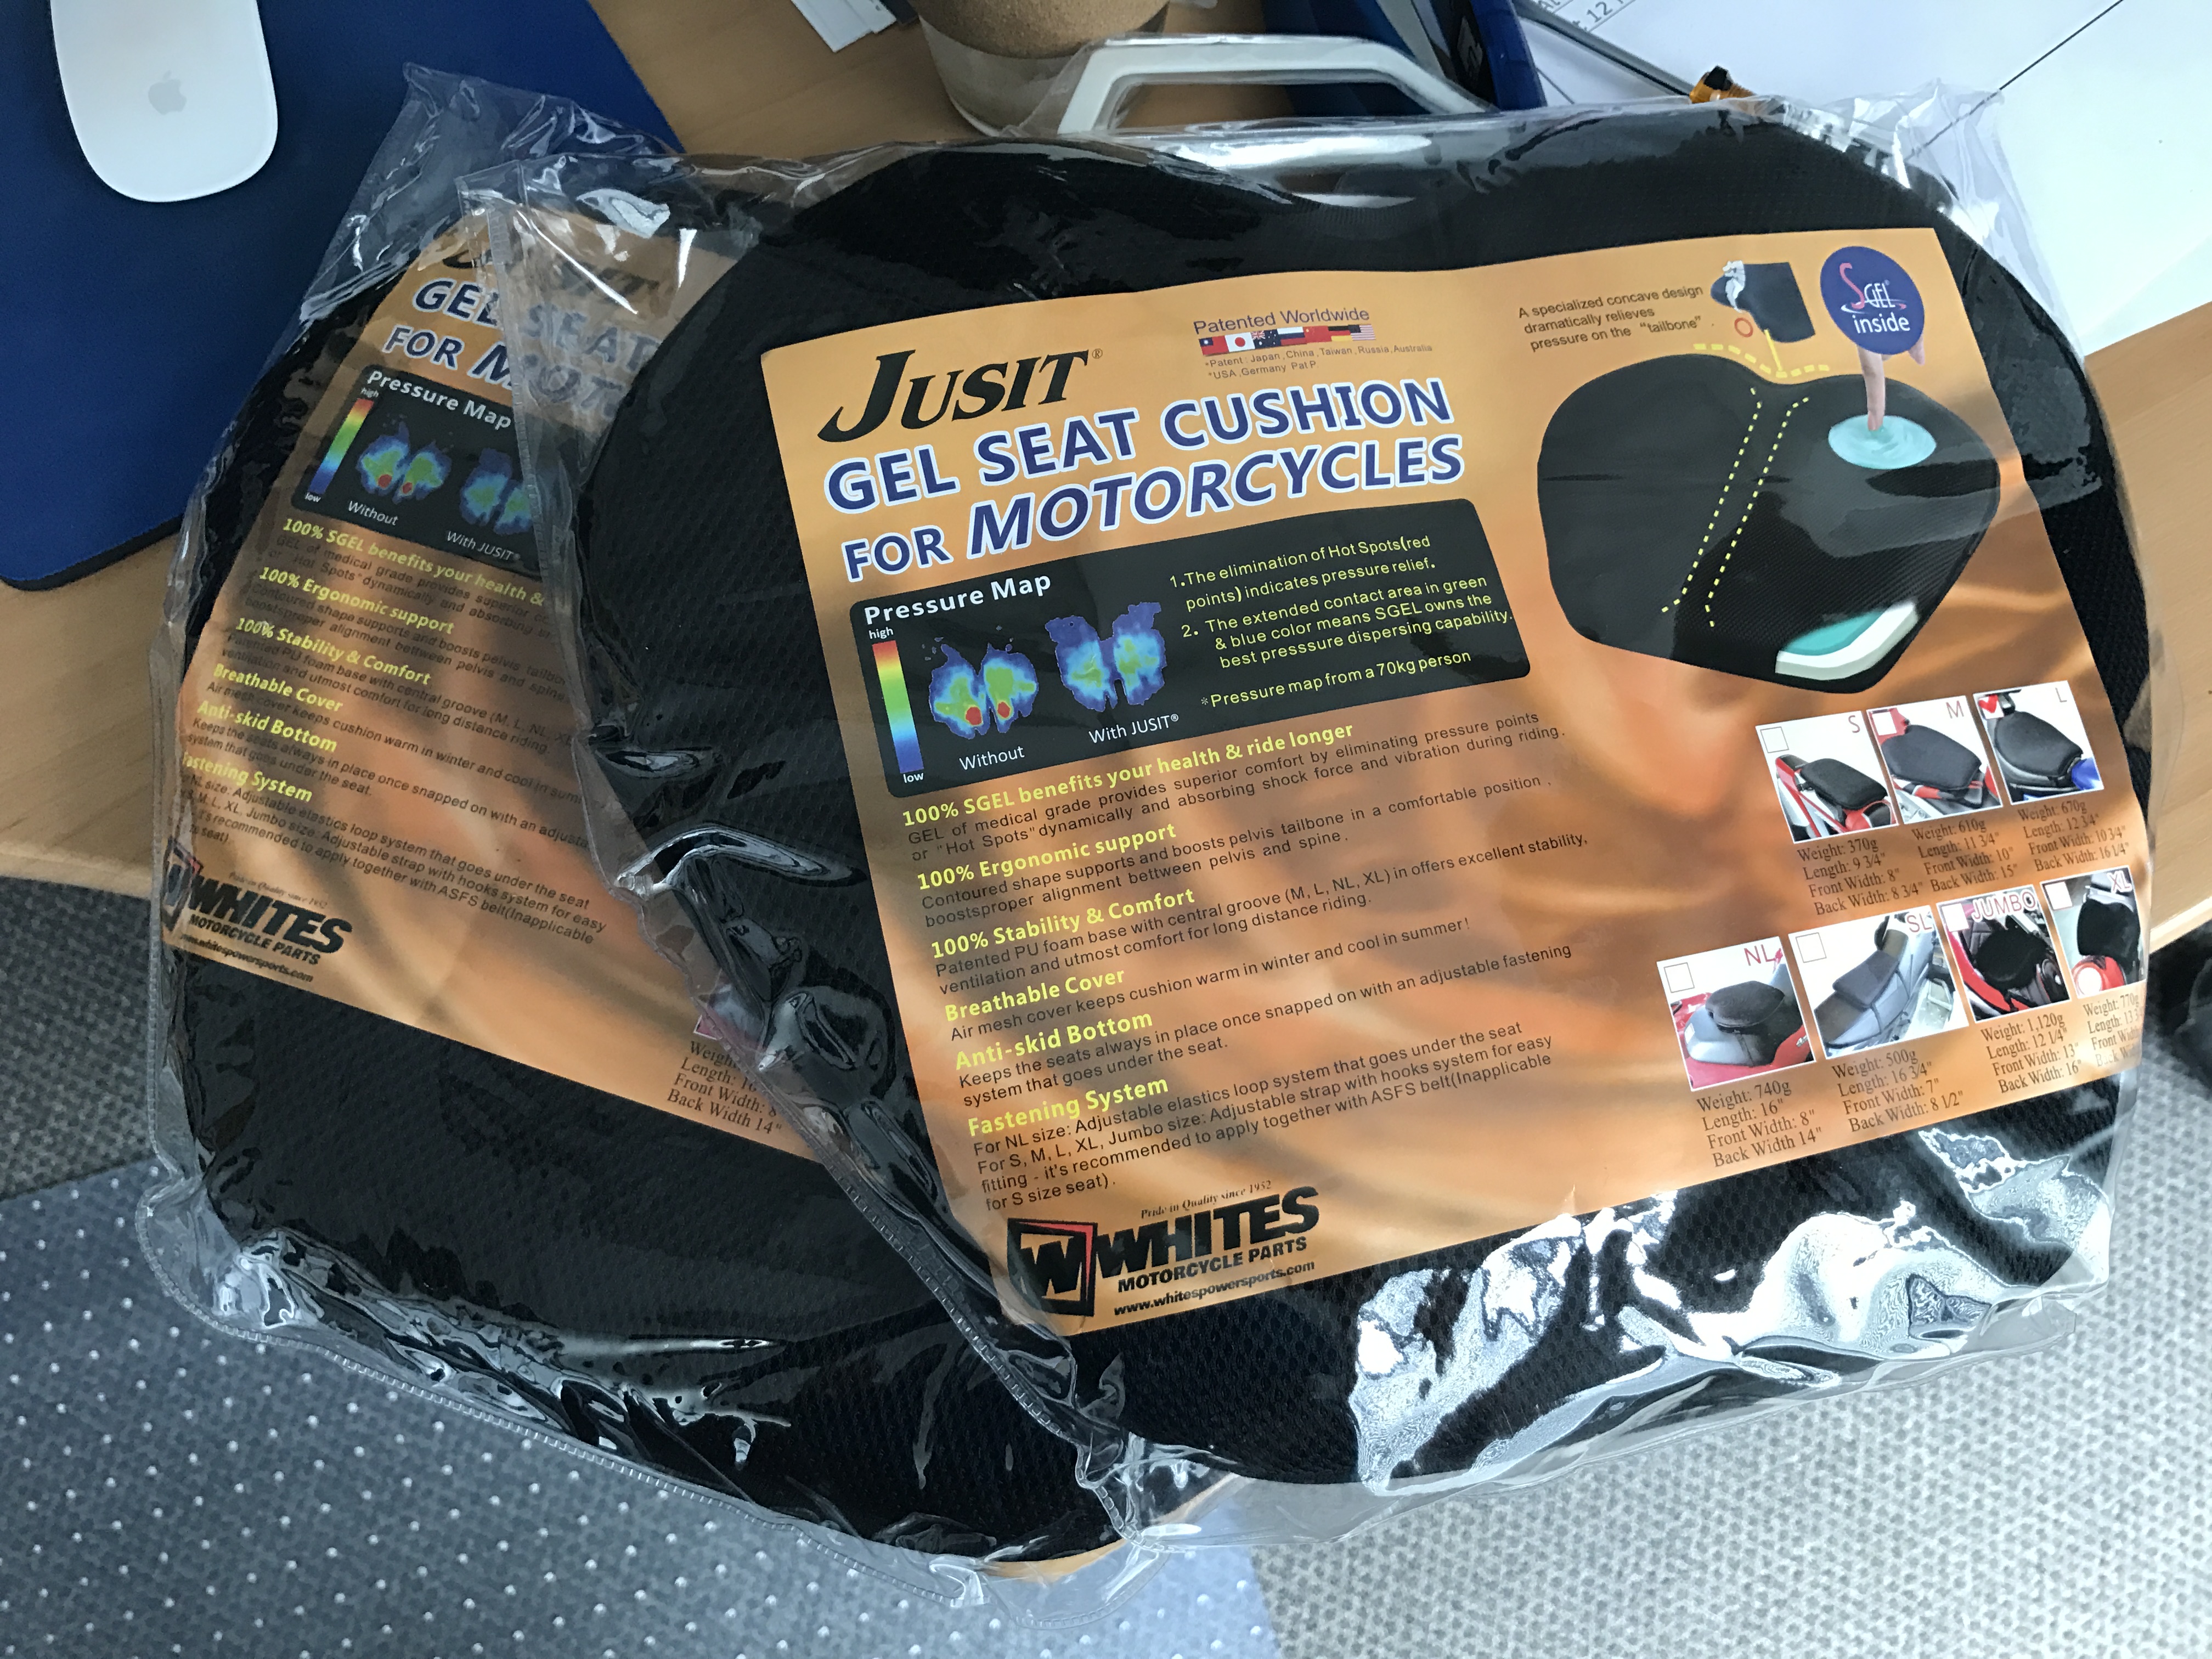
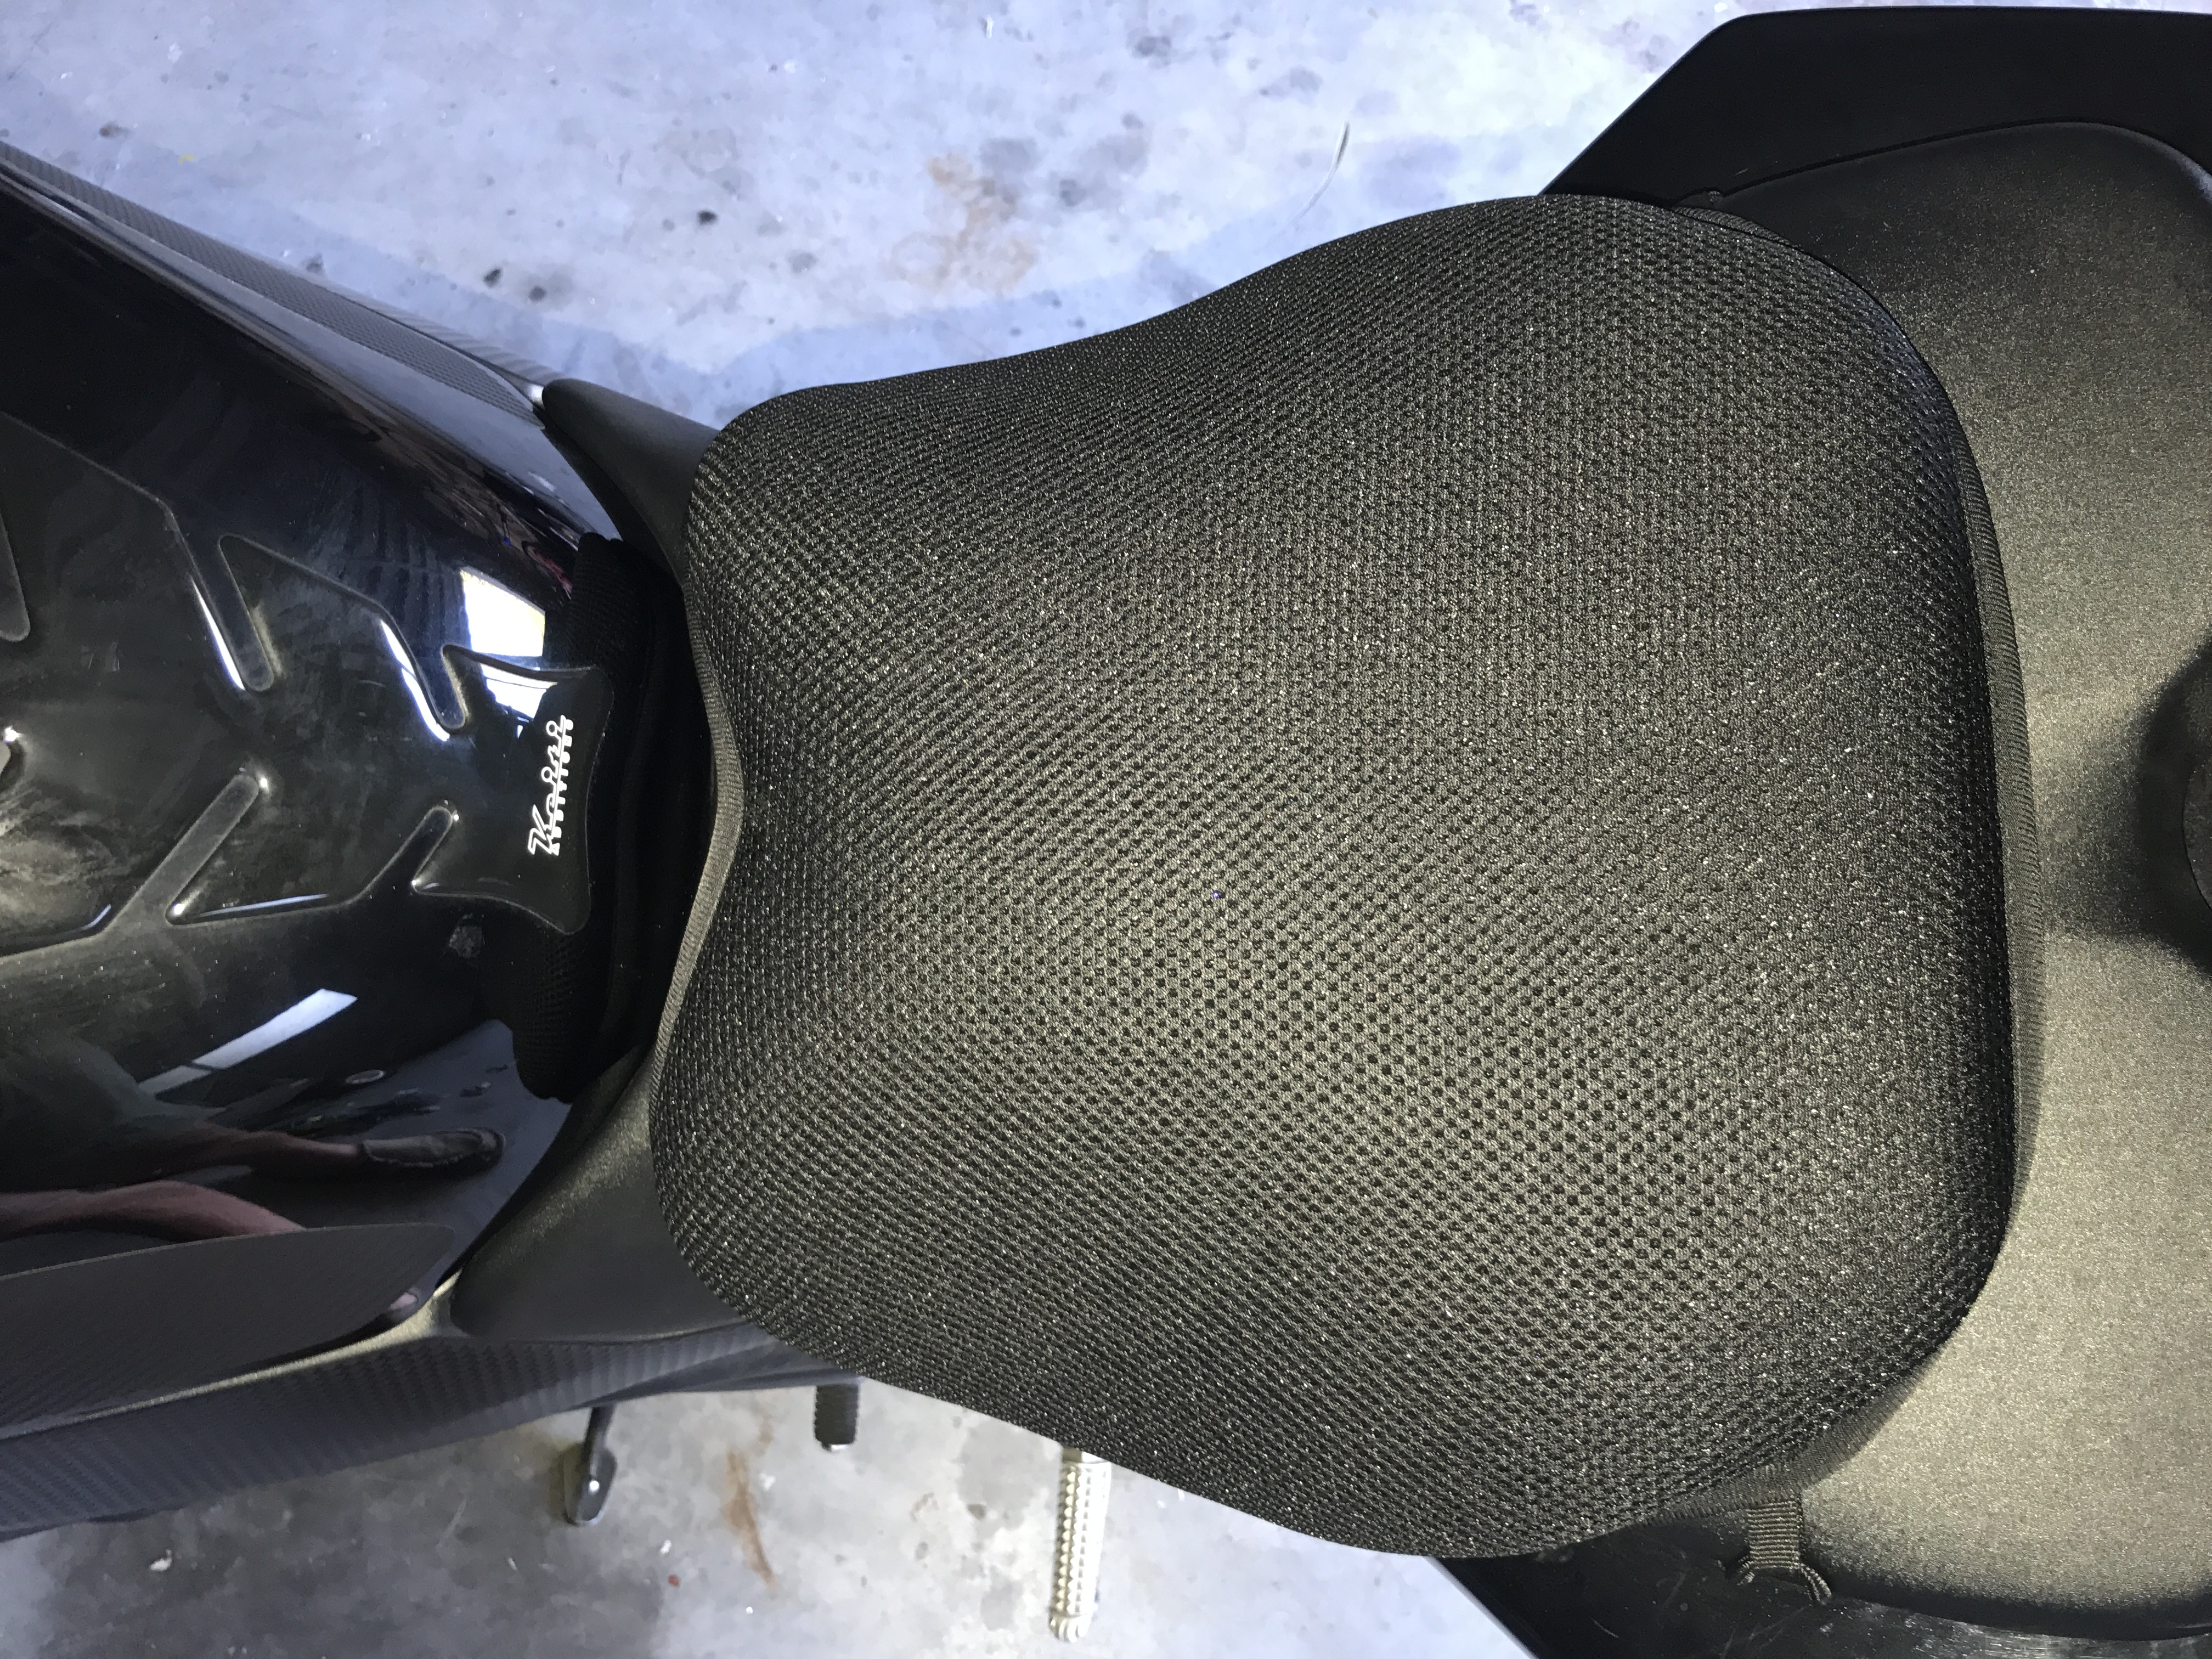
Next thing was the comfort of my butt. Heaps of people have said to invest in a Gel, padded seat. There are two options if you want to do this – spend a lot and buy one which is specifically made for your bike, or spend a lot less and get a pad which fits reasonably well and can be strapped securely to your bike. I opted for the second option it was around NZ$70:

This is mounted the ‘correct way’ round, but it actually fitted better on my bike in reverse (see below):
So with that ticked off, there was only one further thing I could think of which would ease with night-time riding on the roads which we were planning (highways which are quite twisty and which have only a single-lane in each direction). I needed better, wider, auxiliary lights activated with my high beam. My forks are upside-down forks which means that the majority of them are part of the ‘sprung-mass. Below the fairing just above the brakes is the lowest part of the sprung section of the forks and there was just a sufficient amount of room to mount a light on each side. I planned to clamp them to the forks using metal hose/exhaust/pipe-clamps. In this case, it was Amazon which was my friend, not eBay.
I found 2x pairs of CREE based (high quality Chinese based LEDs) light units, with 6x 3W bulbs in each. All had spot focus reflectors for *only US$10* each pair! Shipping cost another US$20 to get them to NZ which I thought was also a good deal.
 Amazon Link for the auxilliary lights.
When it came to fitting these to the bike, it was another evening in the garage creating the wiring loom, trying to figure out where within the existing wiring it made sense to tap the switching voltage lead into. I did this properly, with a separately fused feed off the battery, through a switching relay. This assembly is all mounted nicely behind my front fairing, just above the current headlight cluster to make sure it doesn’t get wet. In this way it was neat to be able to run a single pair of wires back from the front to the battery, with the fuse mounted in an accessible area under my seat, the switching lead was short going from the high beam headlight plug to the relay making it nice, clean and simple.
For safety, I checked what might happen if the clamps broke, I added thick cable ties to the supply wires and checked that a loose unit couldn’t get lodged into the front wheel in any way. I was satisfied that it might bounce around a bit but that it would be incapable of becoming lodged between the wheel spokes and my forks, or brakes.
When fitting these, I deliberately aimed them up and outwards, the purpose of these were not to add light to normal highway driving, but to ‘light around the corners when banking’. Commonly, if you’re travelling at any reasonable cruising speed around twisty corners at night as you bank your bike, even with high beam on, you lose light around and through the corner. These were added specifically to address that problem and they worked an absolute treat!

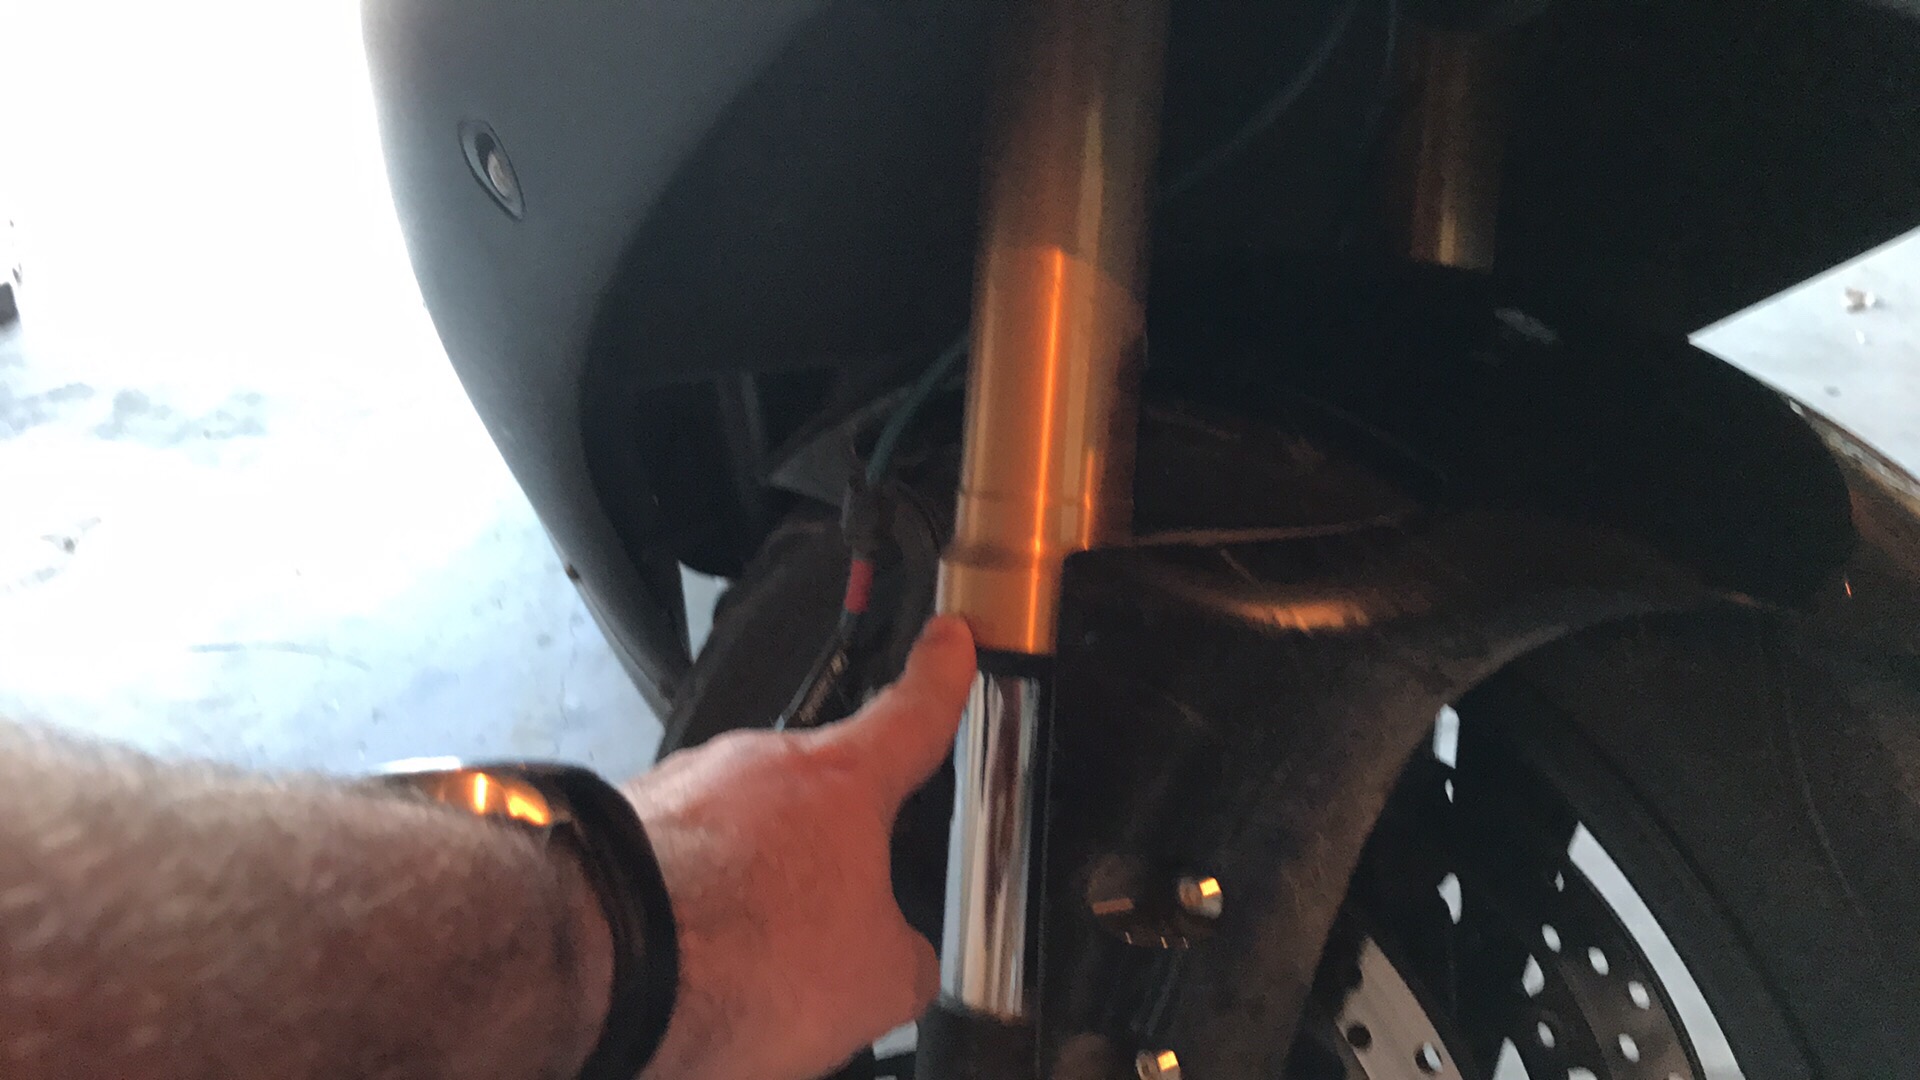
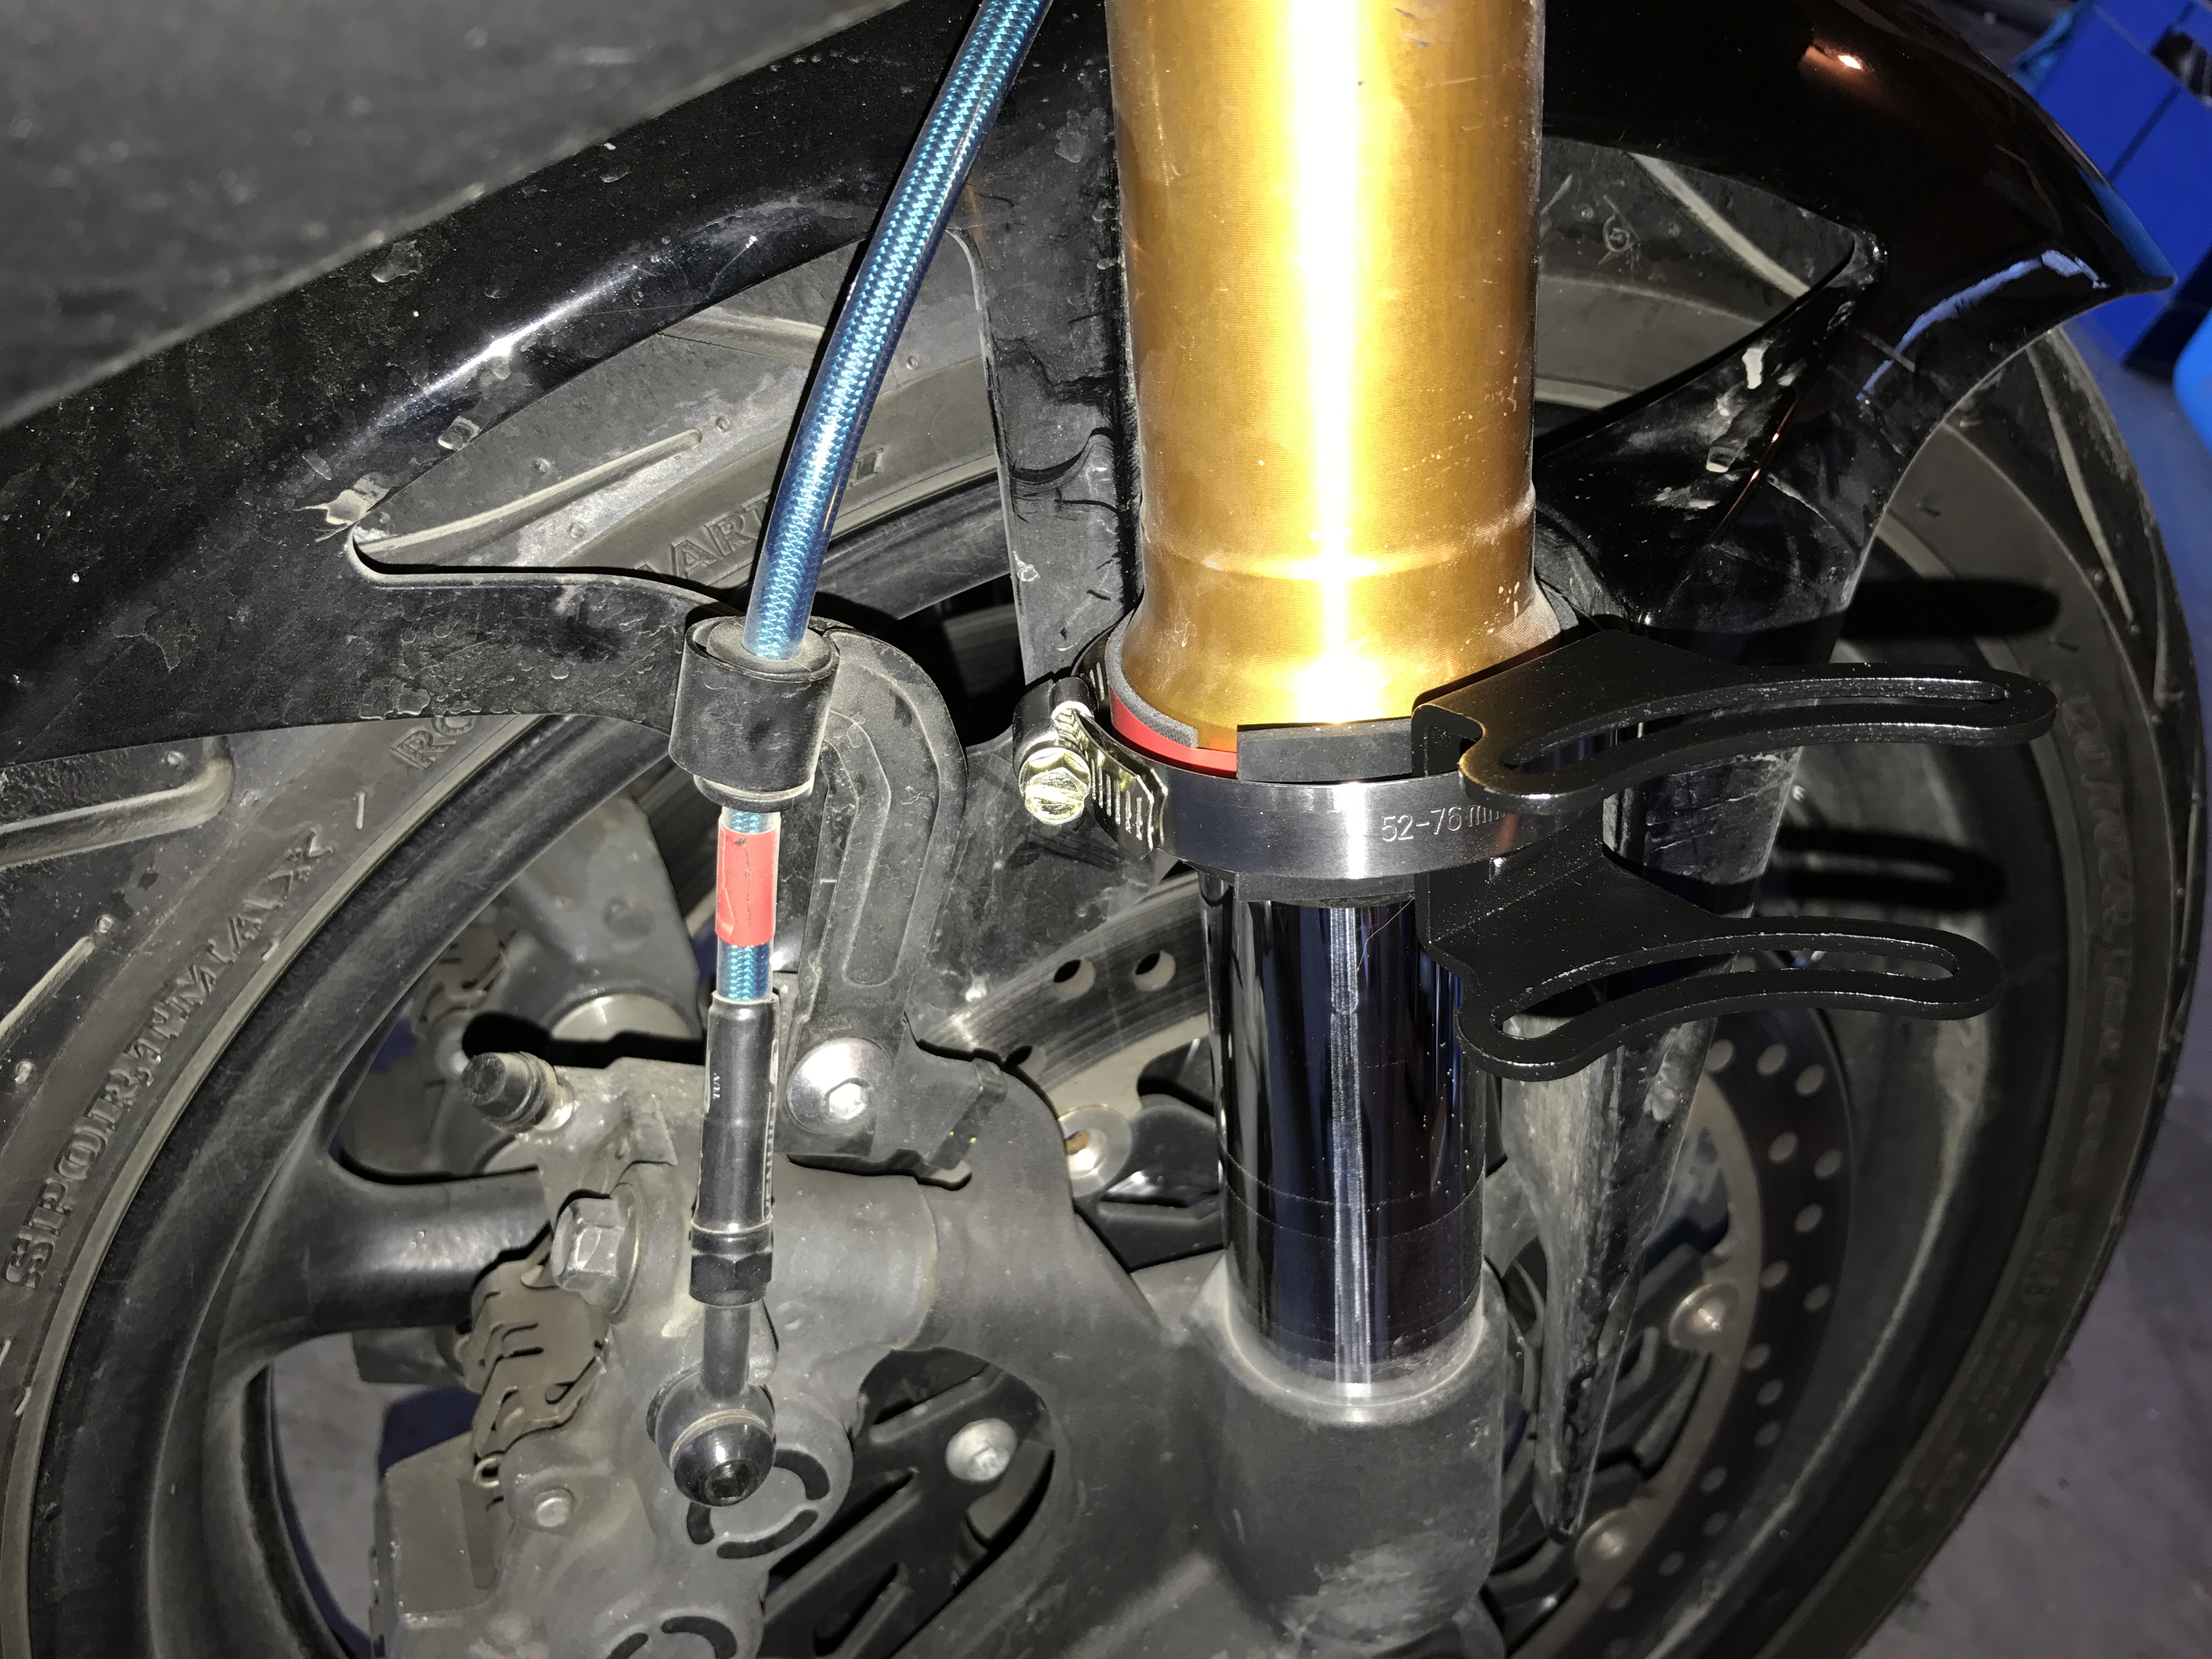
Mounting the strong clips on rubber, with an additional piece of rubber where the light mount sits allowed me to skew the mount and position it where I wanted it to be.
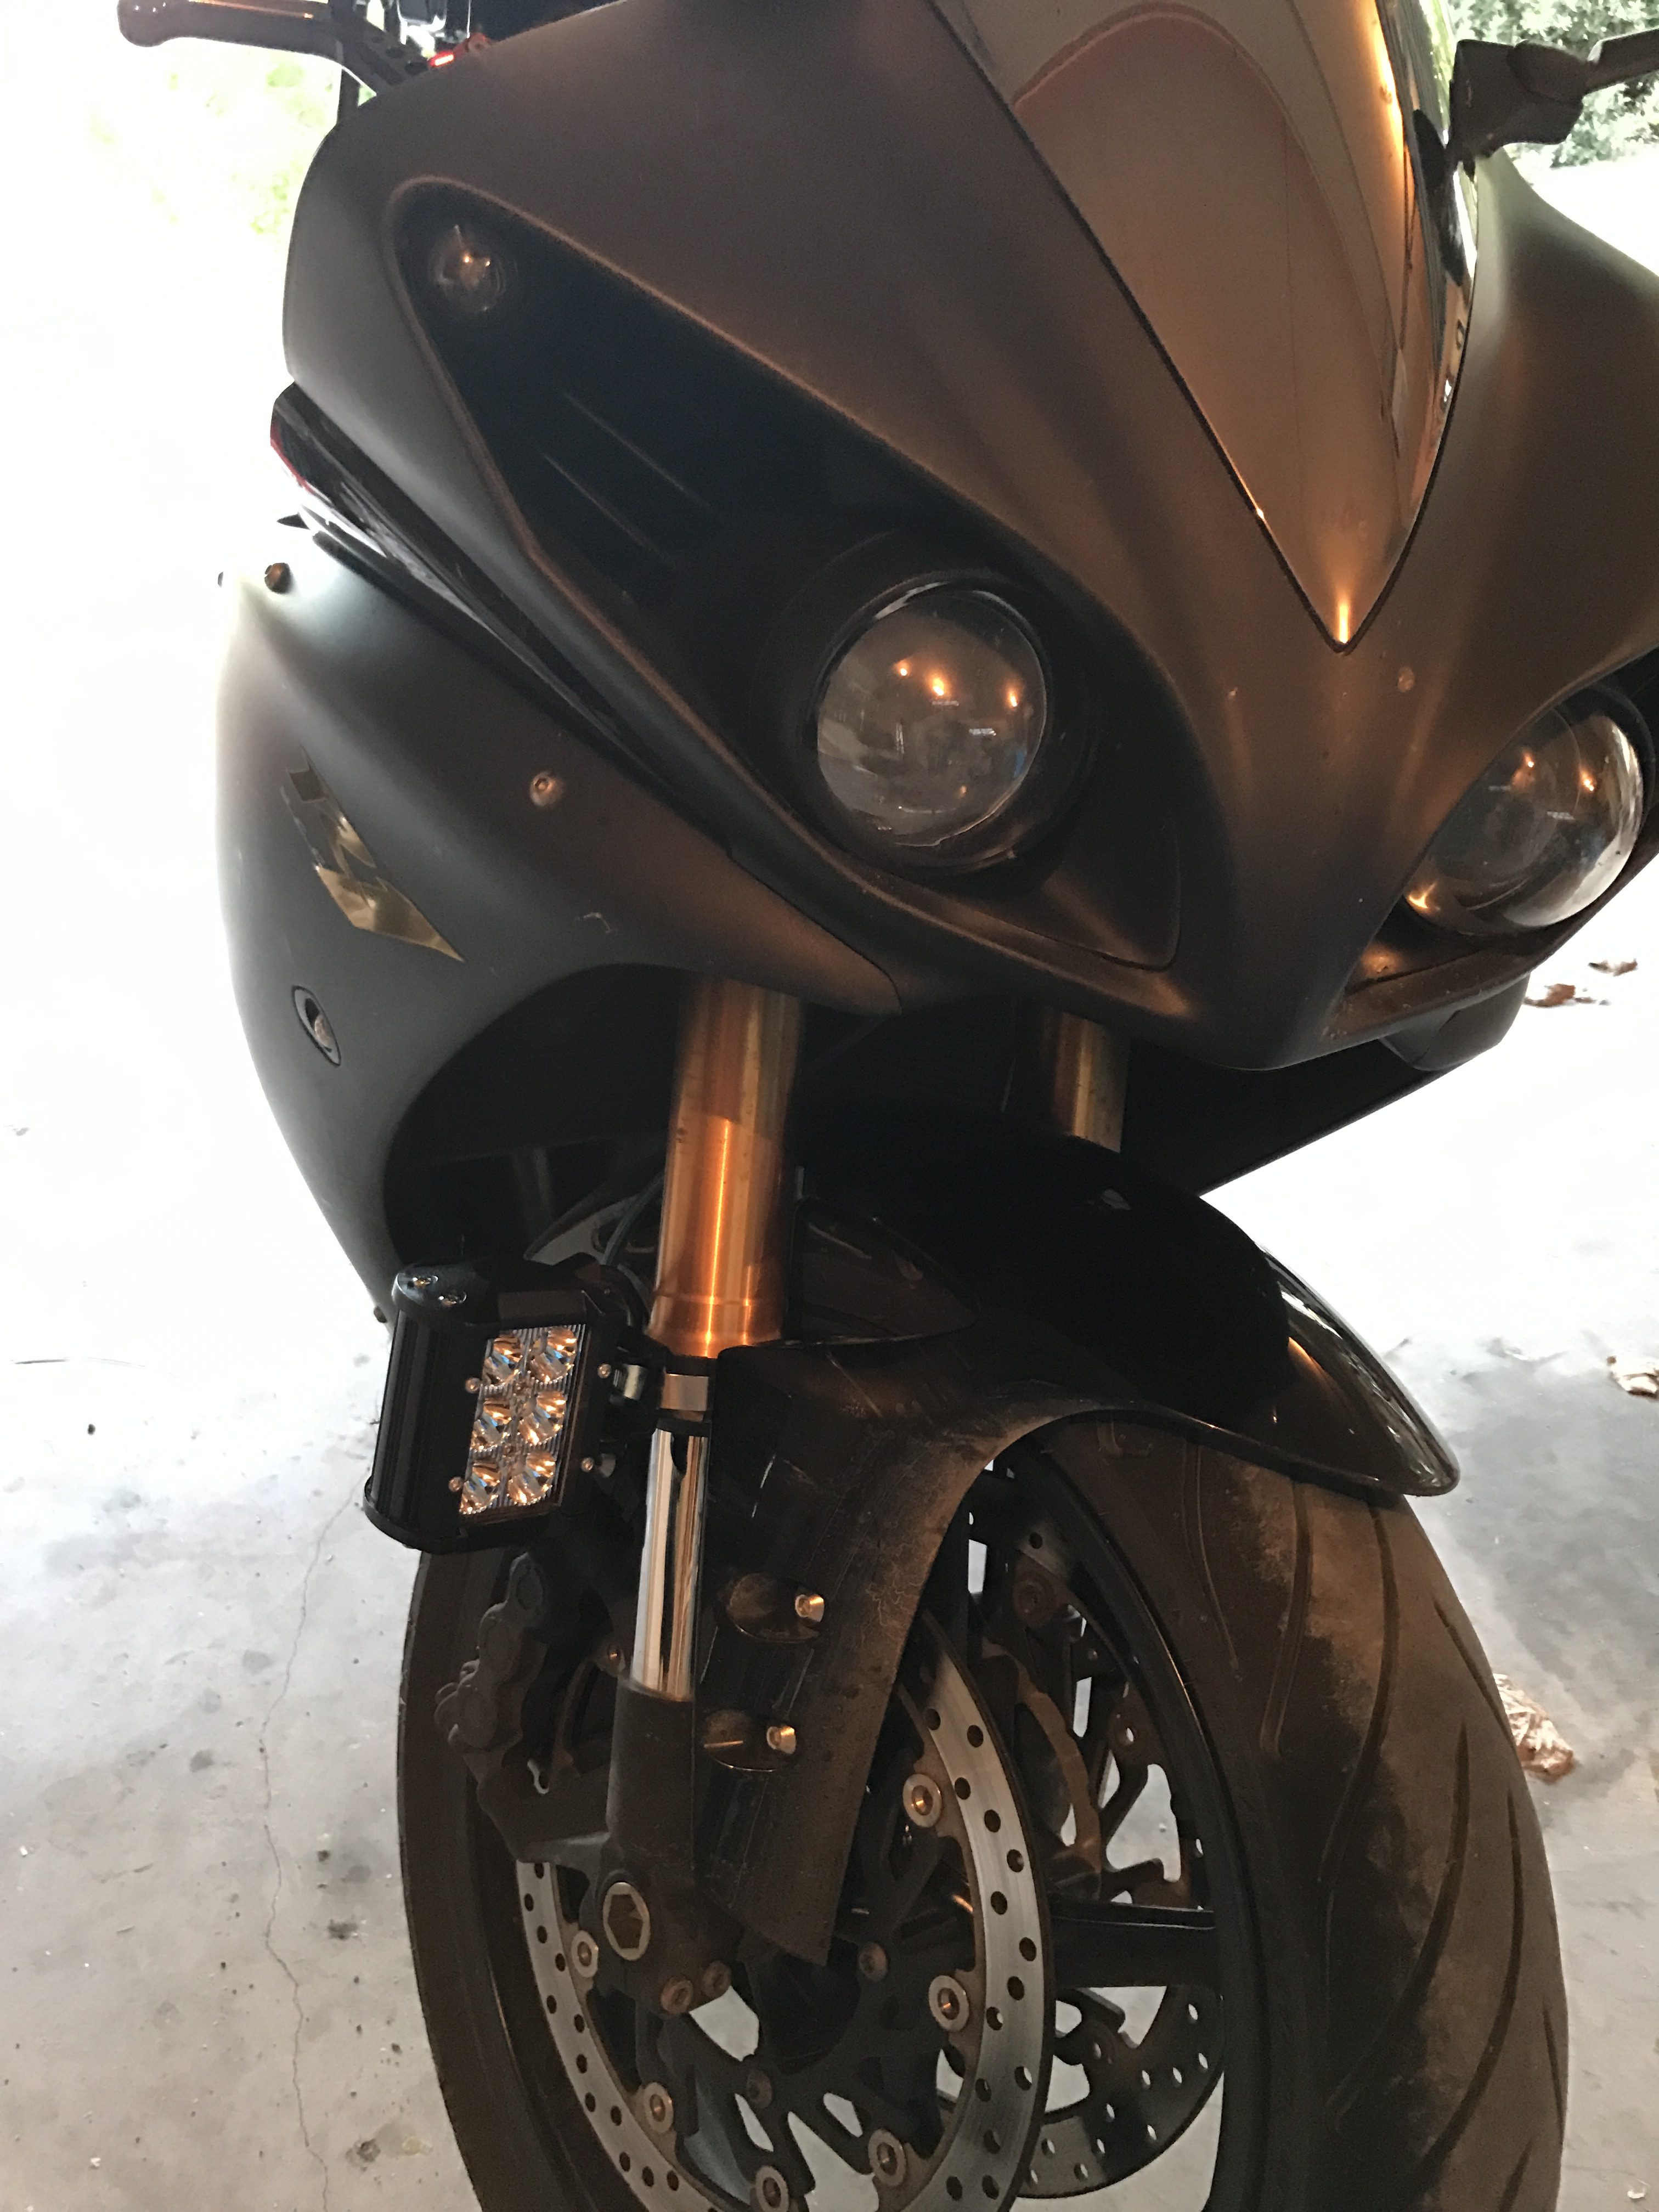
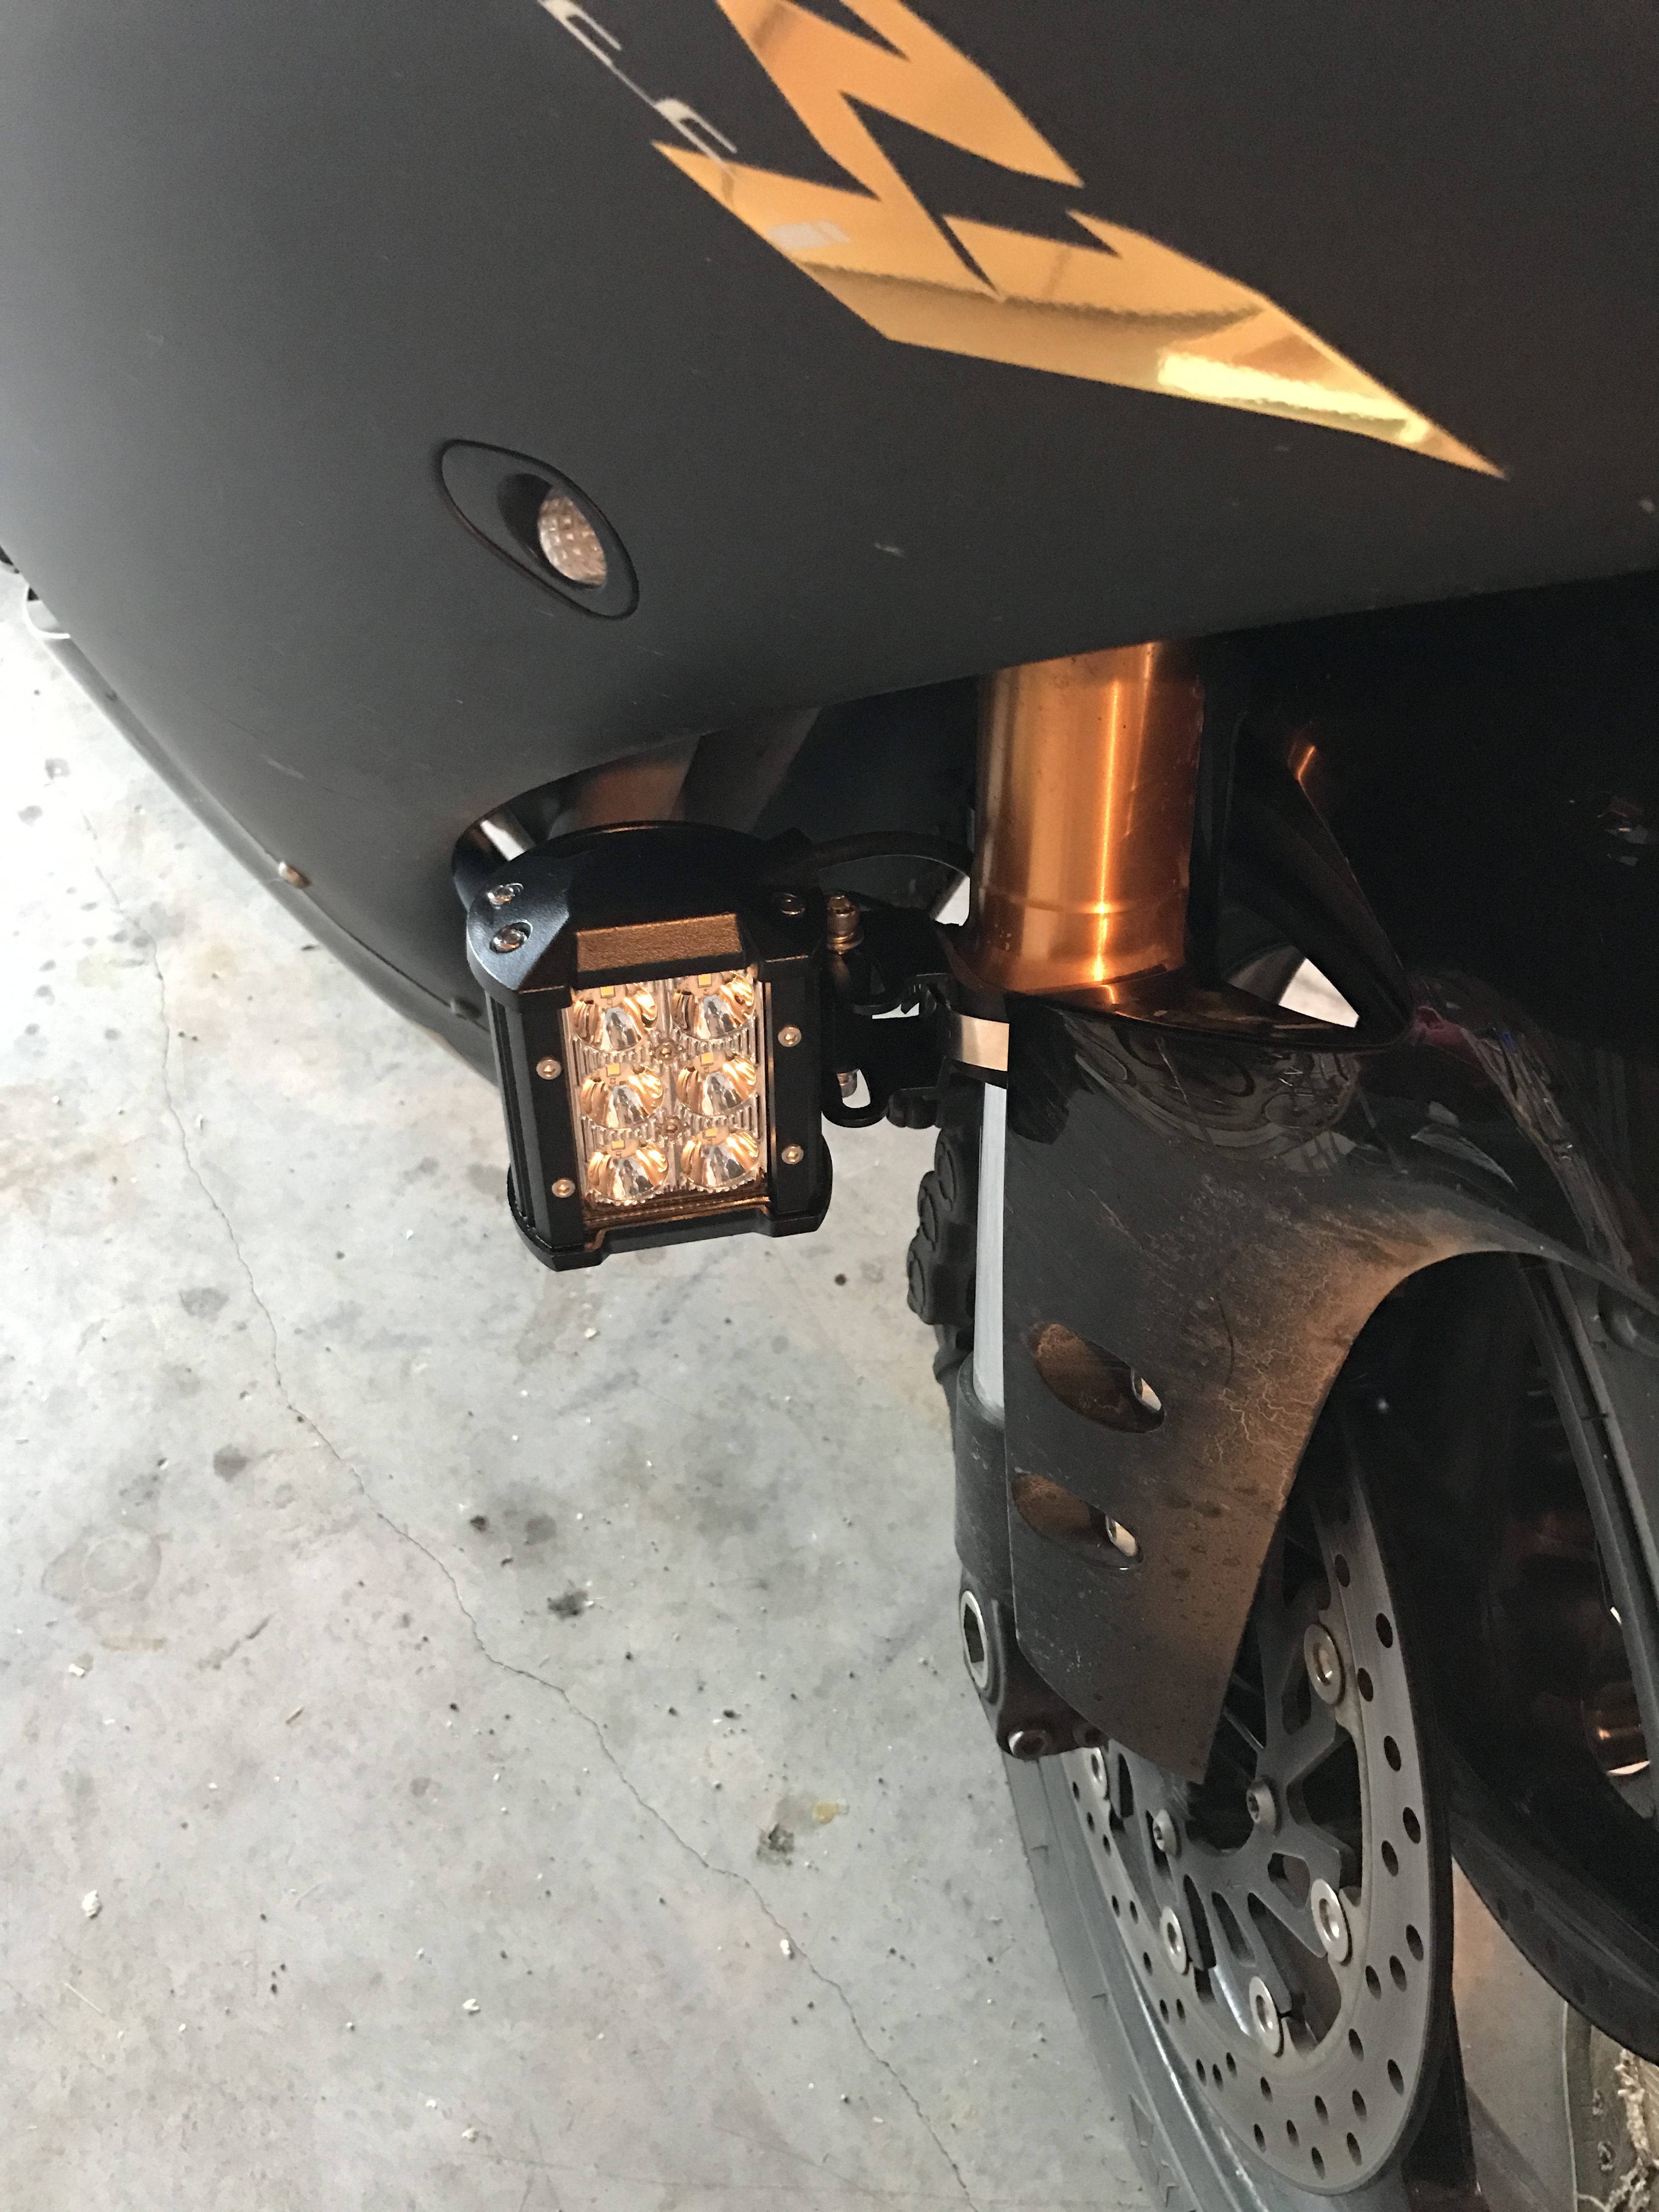
Being part of the sprung-mass, the light moves with the bike / fairing, so it won’t get any closer to the fairing than this (it’s at full lock).
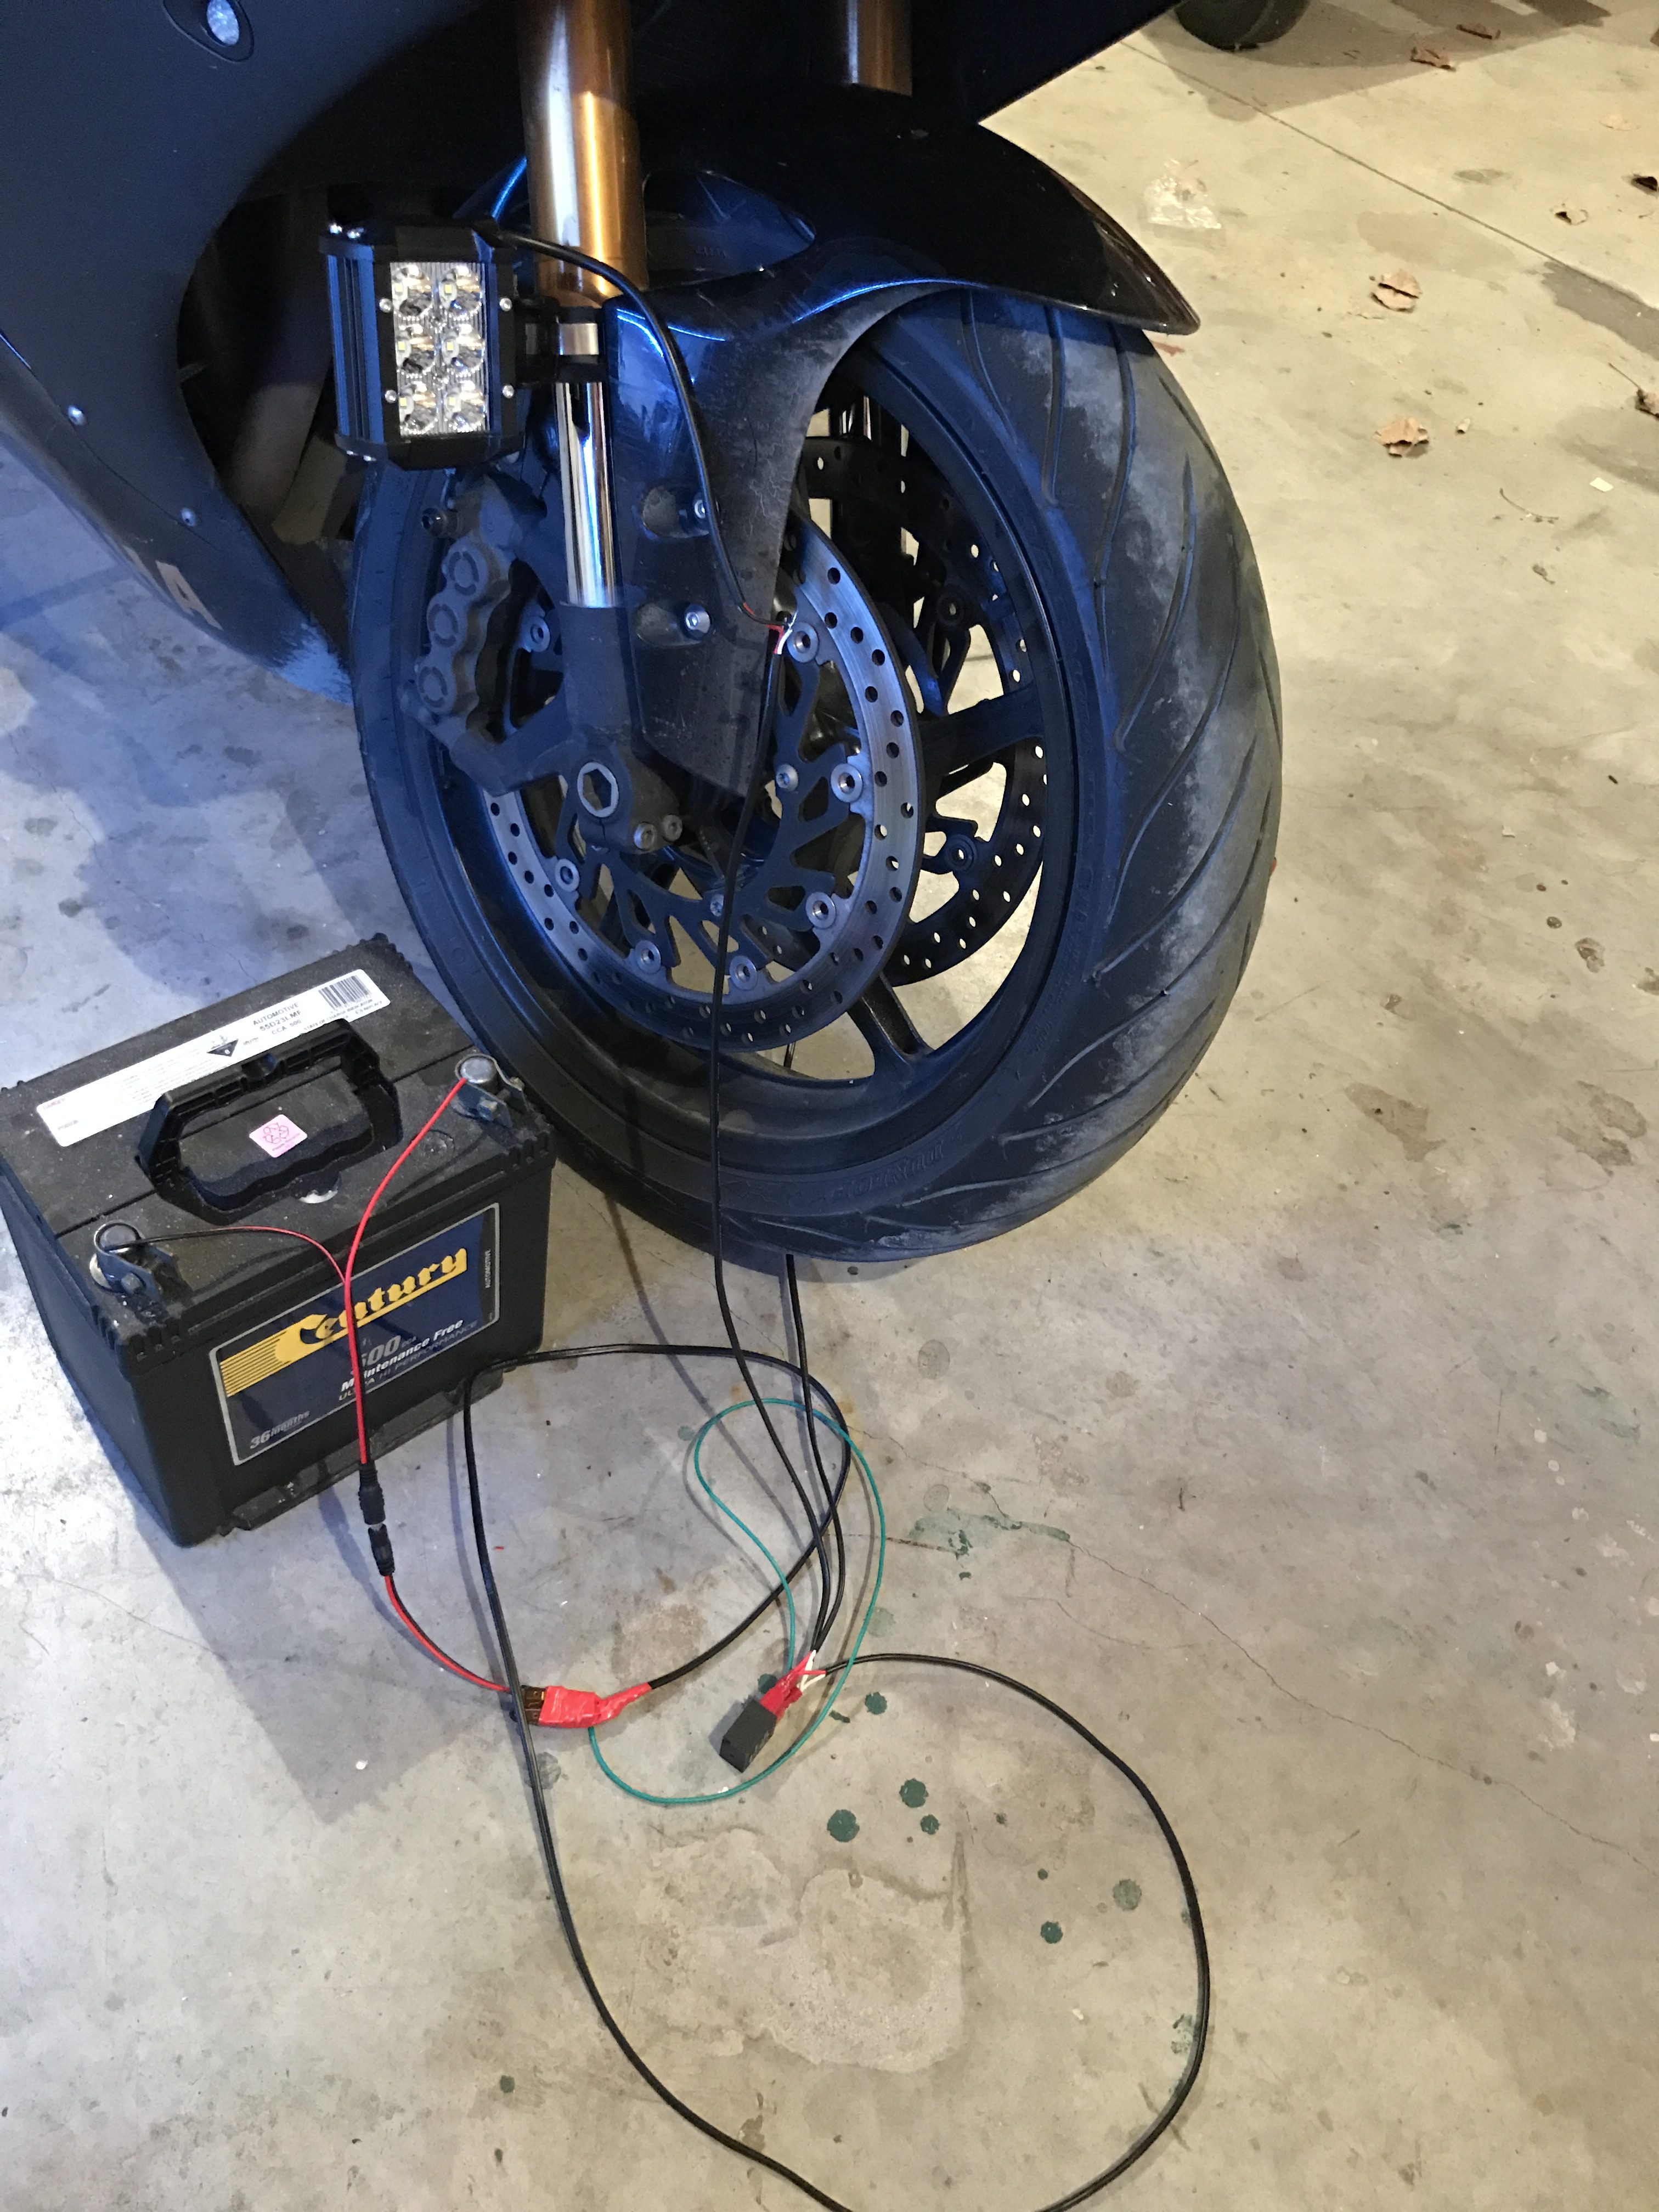
This is my full harness. I chose to buy a ‘micro’ relay which was capable of switching up to 7A, these are a total of 36W (2x 18W), so would run only 3A. You can see the in-line fuse which is simply made with insulated spade connectors directly onto a 7A fuse.

Yep, daylight. – Very pleasing.
The remaining work was planning, map routing, GPS loading, visible timing sheets, familiarity with the GPS units, getting the witness forms ready, figuring out who was going to sign them, packing etc.
Software trialling
Facebook live
With the fundraising work we had been doing we strongly wanted to be able to involve our sponsors as directly as possible with our ride. Initial thoughts were to try to connect with the Facebook group as we were riding – using a live streaming feed of some portion of the ride. With my iPhone mounted on the front mount in the weeks before the ride, I trialled this with my headset unit in my helmet to see if we could talk using the mic through Facebook live. The picture worked fine, but the Facebook app failed to pick up the bluetooth microphone source. Instead it just picked up the onboard mic on the phone. You could hear the engine and that would have been fine with a front facing camera, but it didn’t work well with a view of my helmet. I tried to find a work-around so that I could ‘chat’ with people while we rode but this just didn’t pan out, so we shelved the idea.
Tracking software
Rever
Rever works really well for personal ride tracking, but you can’t publicly share your track – you’re limited to being able to share it only with your contacts within the Rever system. Despite this, I liked Rever a lot so I continued to use it while I was preparing for the ride, and during the ride itself.
RunKeeper
While it’s not intended to be used to log the burning of fossil fuel based activities it can be used for this. There is an ‘other’ activity which I felt was fair to use. The free plan does not allow sharing of your live track but a premium monthly payment will permit you to share your track, live on a URL – you can share it with your friend network via Facebook.
It would have worked, but… for whatever reason I didn’t like it enough to stop looking at other options.
SpotWalla
This appears to be the ‘go-to’ system for IBA riders. There are ‘Spot’ devices which are capable of pushing a track up to SpotWalla.com. That website also allow you to add ‘off-line’ devices too which, like my GPS units, you need to download the track files (in GPX format normally) and then upload them to SpotWalla.com using your browser.
There are apps you can get for your various models of phone which turn your smartphone into a ‘Spot’ device. SWConnect is the app for the iPhone, it is very basic and to be honest, I didn’t like it much.
Raah.co
I can’t remember where I found this, but it’s my pick of the bunch for live sharing. This appears to only offer iPhone based tracking source options via one of their two apps. Both of the apps are good. The free one would be ideal for casual ride tracking, but not super long runs. With a small ~US$6 purchase, you can get hold of the Pro app, which has more modes including one which logs your location and builds a detailed track, logging every second or so. It also holds your location in a buffer on the device when you drop out of cellphone range, uploading it all when you connect to the network again.
The guy who wrote this app invites people to contact him and ask for custom setup help like changing your tracking icon, help with providing URLs and more. So I wrote him an email explaining what I was doing including the fundraising elements. I told him I wanted to keep my supporters informed of my progress through my ride and he was very receptive. He provided me detailed, descriptive emails on how to use various aspects of the web addresses that he shared with me and he setup a custom URL which always shares my most recent track. This is exactly what I needed in order for my event tracking to be simple, painless and setup well in advance of us starting. The last thing I wanted to have to mess around with Facebook posts when we were trying to get onto the road at the very start of our ride.
He also setup a motorcycle icon to show our current location. This option is really excellent and well worth checking out if you are planning a publicly shared ride for whatever reason, I am sure there are many fundraising Saddle Sore rides performed. This worked flawlessly for the entire 22hr ride period; I had many comments from my followers that they found the day captivating and couldn’t take their eyes off the screen while watching us ride all day long. 🙂 – This was so rewarding for me to know that I had managed to engage our supporters in this way.
The week before the ride
As if there wasn’t enough to do, we had already planned to get the R6 to Jon during the weekend before the weekend before our ride (so, about 8 days before our Monday start). To add to that there was also another fundraising ride planned for that same Sunday which I had wanted to do with my wife on her R6. This meant a fair amount of logistical arrangements and running around as we also needed to drop off some of our new racing tyres to Jon (to fit to the bike) and we couldn’t carry them down into the city on the bikes. Saturday ended up being devoted to running our car down into town and parking it packed with all of the stuff to give to Jon. After we completed the Sunday ride we used the car and we dropped the R6 off to Jon with all of the gear. Then we returned to pick up my bike which we had left parked in place of the car. It was all very complicated. I suspect we try to take on too much at times.
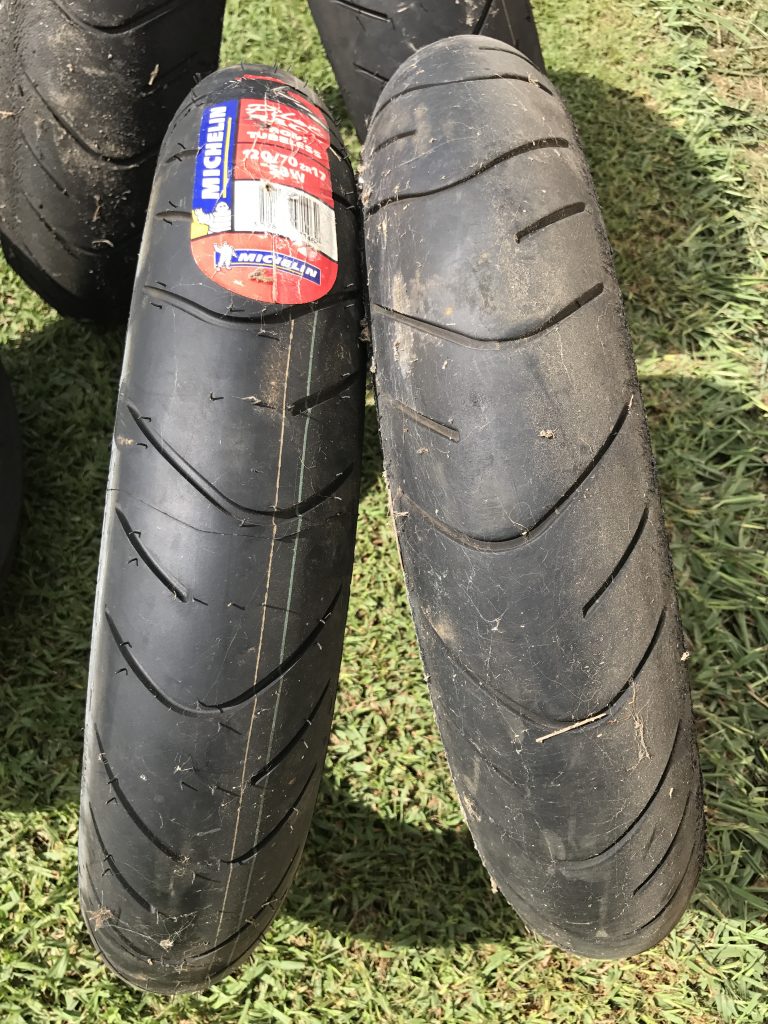
Pictured below are some of the front tyre options which I presented to Jon. The rear tyre on the R6 was going to be fine but the front definitely needed changing. He chose to go with the brand new one and to my surprise there is still heaps of tread left on it since completing the ride. These are road legal race tyres, they’re significantly old but despite that they worked absolutely perfectly. 🙂
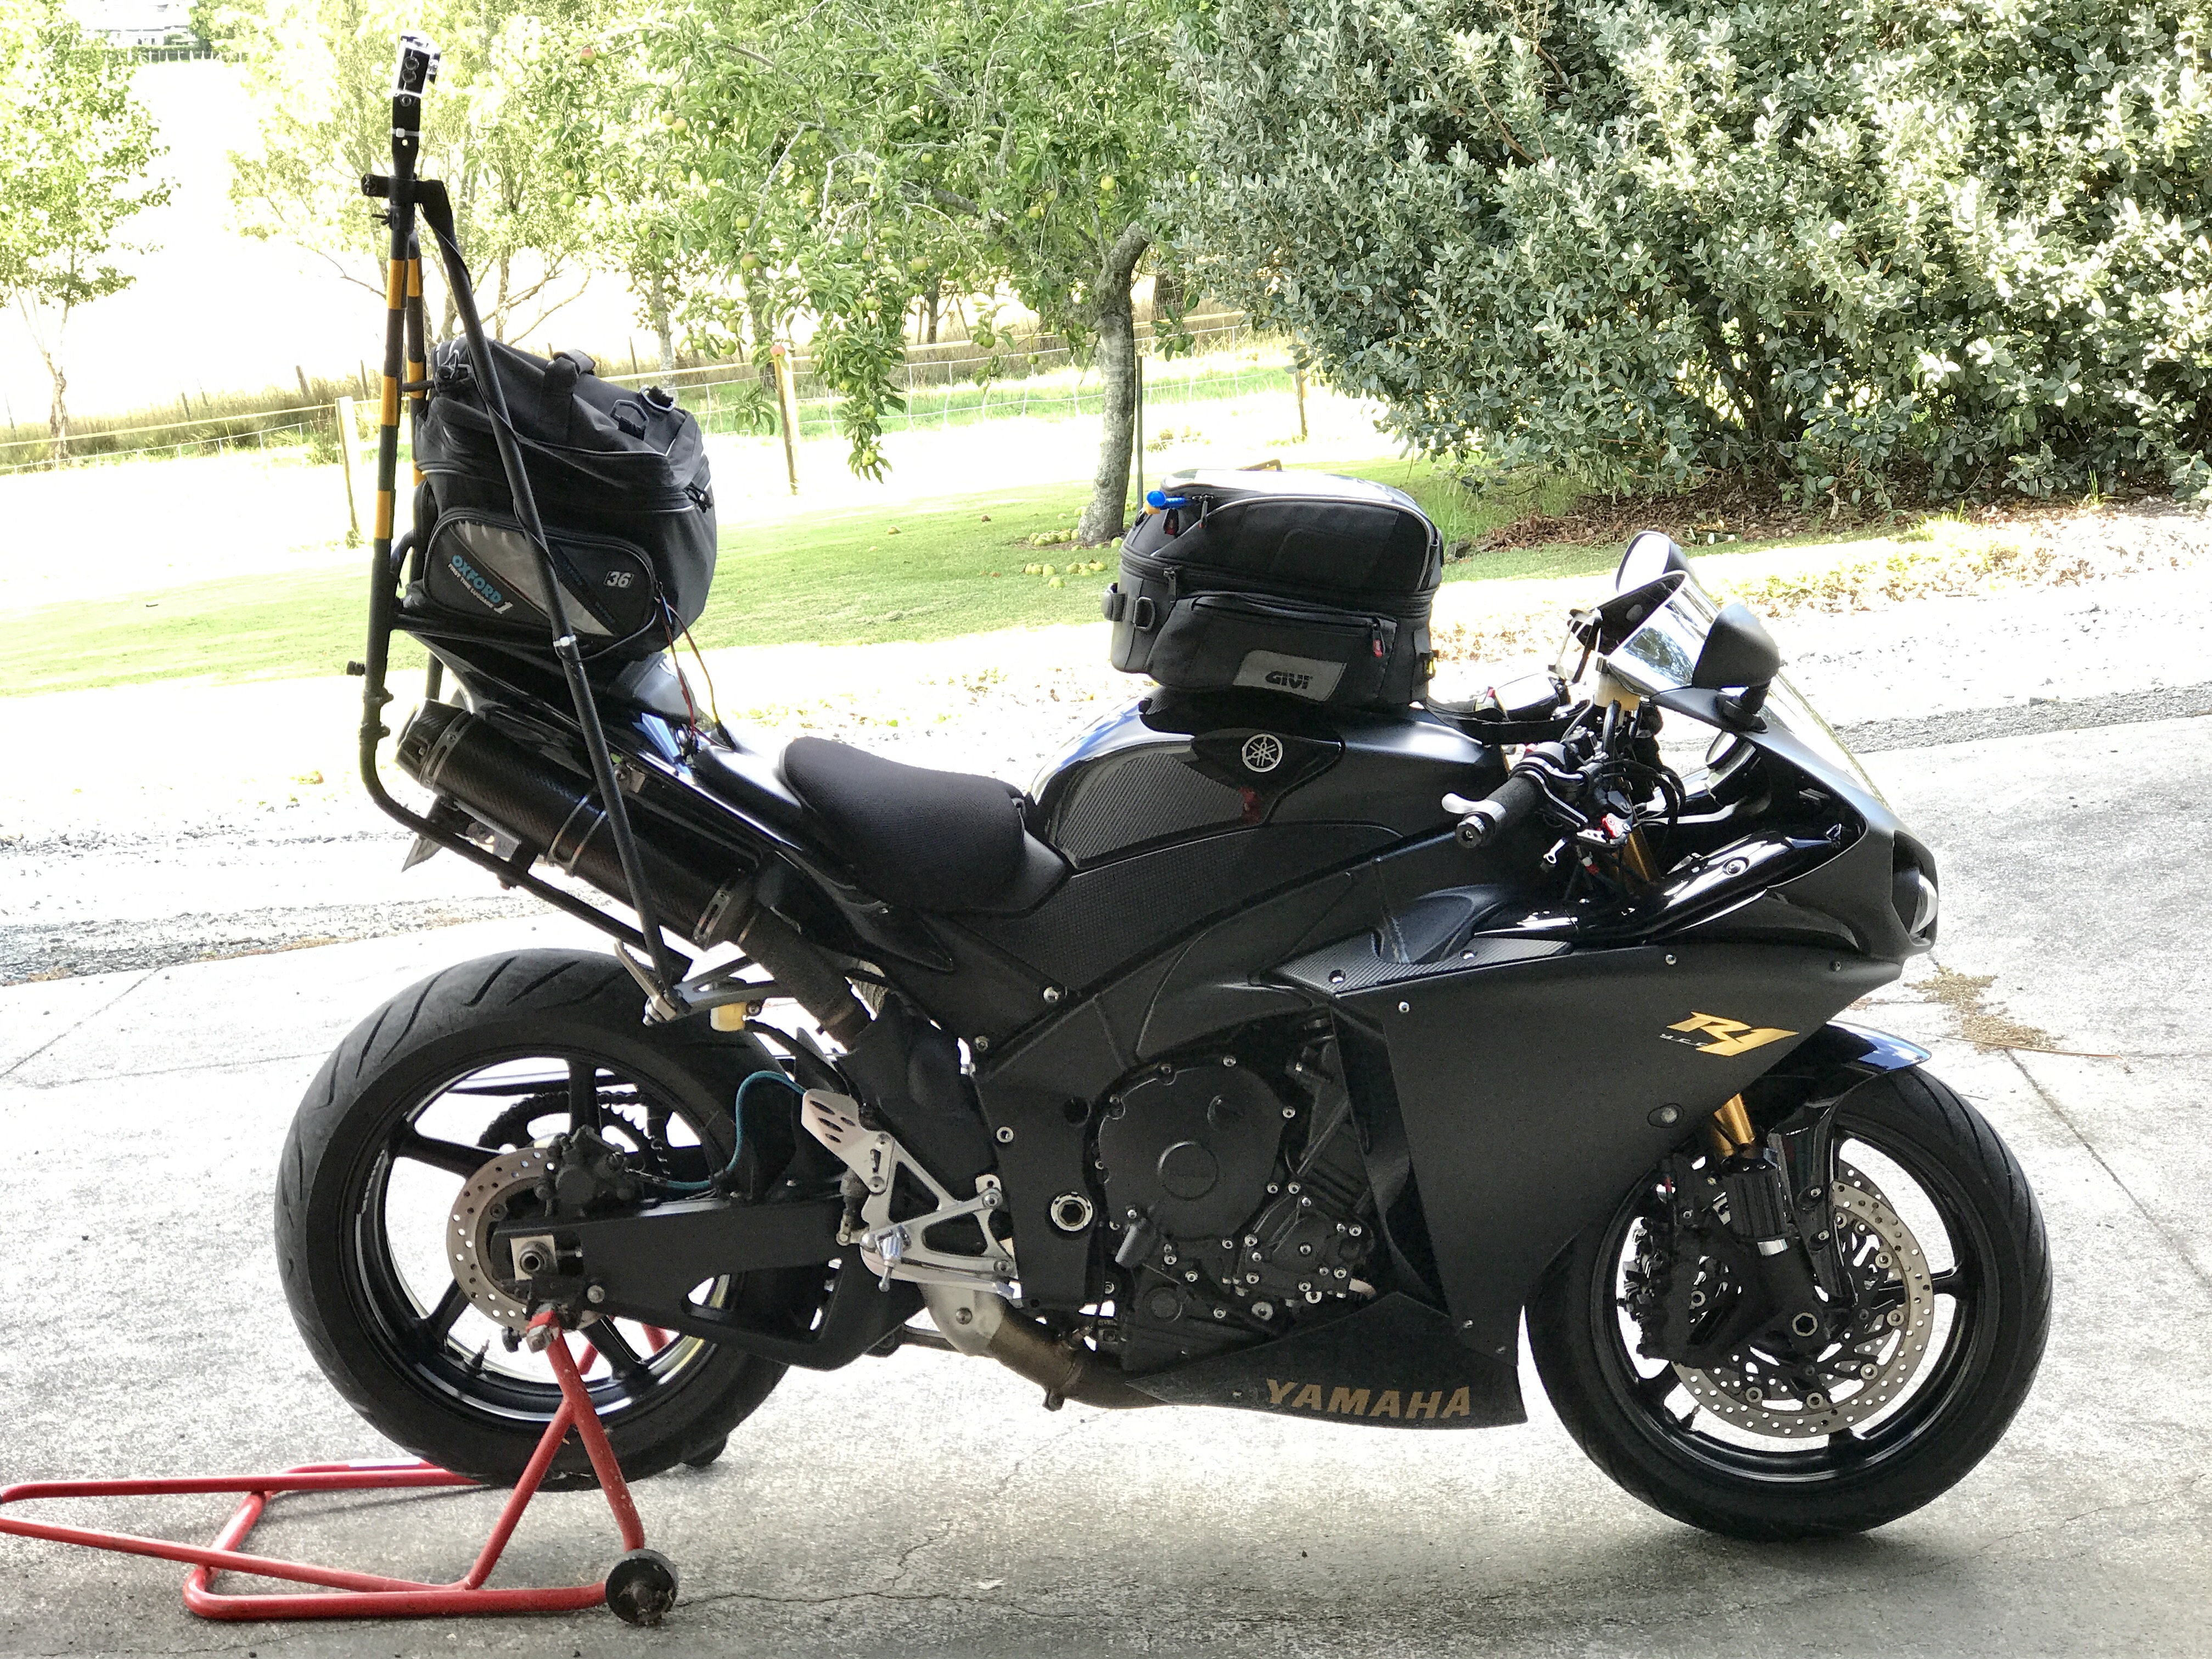
So, on the following weekend, I checked through the well prepared bike, cleaned it, took some photos. I looked at it with pride, and smiled… It had been a fair journey to get this far, and we hadn’t even started our ride yet.
The finished bike
That was it, no more preparation needed on the bike. – I proudly present, my finished, fully prepared bike (doesn’t look like I did much does it?):
The Ride
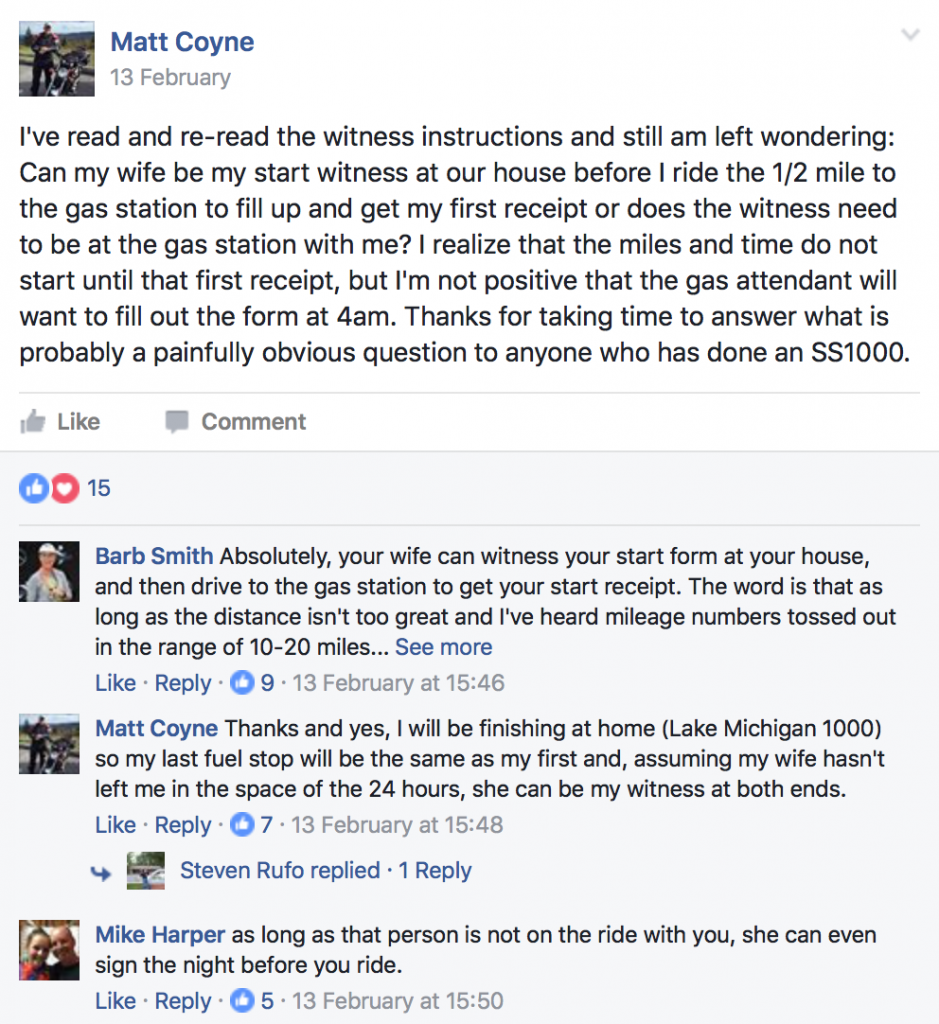
This was such good timing, I had incorrectly read (or assumed) that it needed to be someone entirely independent and at the actual start and finish. The discussion was useful and from it I understood that as long as the mileage is accounted for, and that its reasonable, it could be done outside of the actual ride itself, our house is 23km away from the 24/7 fuel station we were using for our start and finish points.
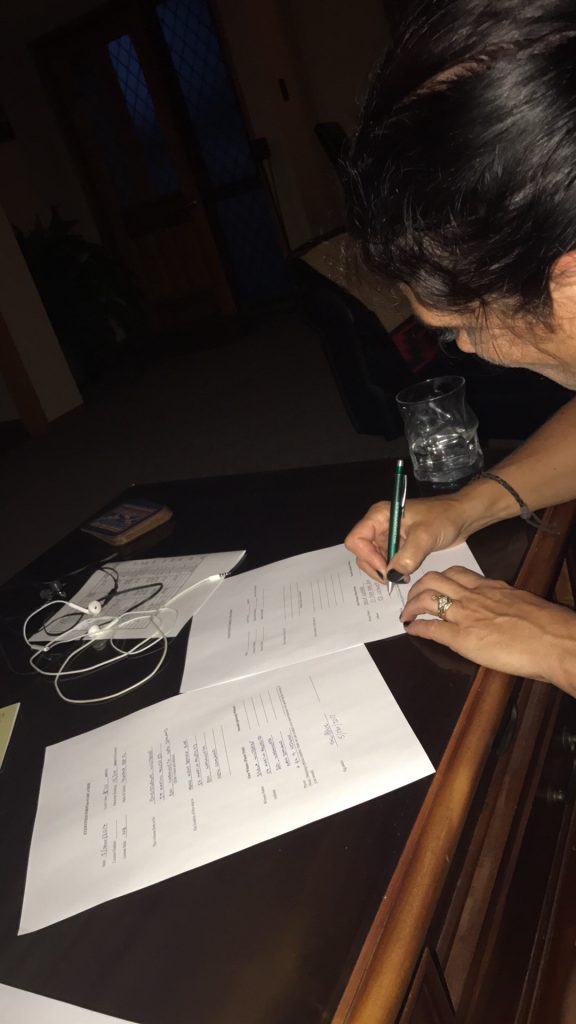
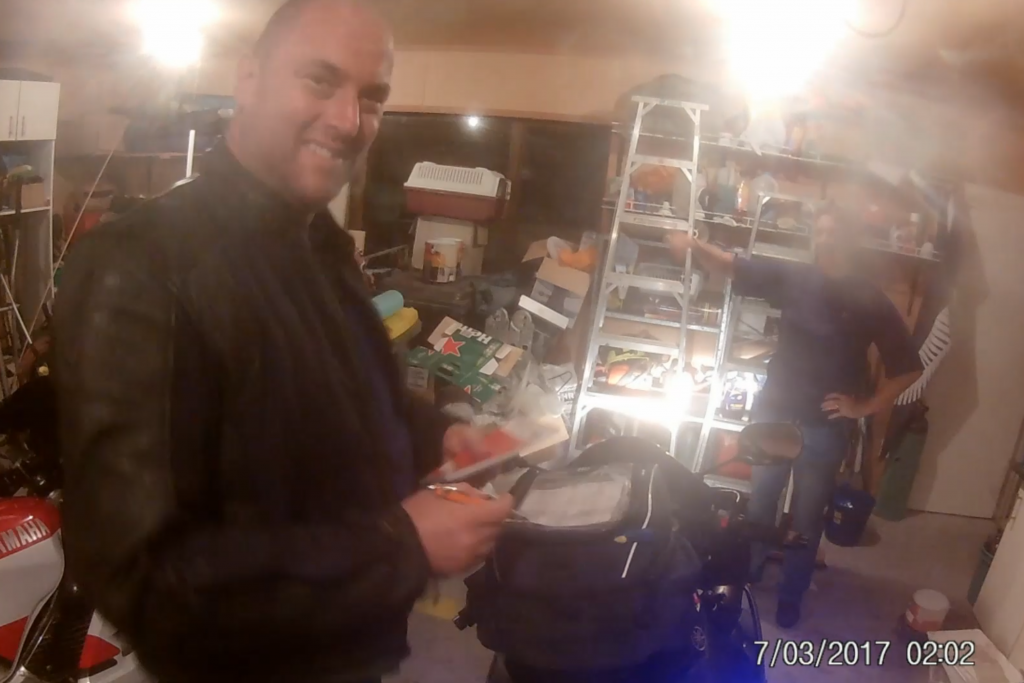
I had another read of the rules about this and also noted that it could be a spouse, but not an accompanying rider. – So we asked my wife to be our witness the night before we set off:
Time to go
When we were planning our ride, we debated the best time of day to depart. There appeared to be two main options; as early as you would normally wake up (but then you’re having to ride through the following early morning for an extended period when you’re already tired), or deliberately very early so that you finish towards the end of a normal waking day, and minimise your night riding when you’re likely to be tired at the end of your ride.
We decided that the latter option was the most sensible as it protected us from very difficult night riding while we were most tired.
We woke at 2:15am, left home by 2:45am, arrived at our starting fuel station just after 3:10am, ready to leave there at 3:30am. Our plan had us arriving back to our end station at 1:03am. This worked in well with another challenging aspect of our ride; we needed to ride through Auckland City on a weekday morning and the traffic through Auckland can regularly be brutal. Leaving this early we would be through the city before 4:30am and we’d be returning back through it after midnight.
We rode on Monday morning, 6th March 2017. Jon arrived on the Sunday afternoon on the R6. He had checked over the bike during the previous week and was happy with everything. We hooked up and checked the USB charging supply and found a less than perfect electrical connection. We fixed that and were happy that everything was then good to go.
Sleep before
As with doing anything exciting for the first time, there’s so much buzzing through your head the night before. It makes getting to sleep incredibly difficult. We were in bed at 9pm knowing we were getting up at 2:15am. It was so difficult to crash out that night.
We had a cricket / cicada chirping so incredibly loudly right outside of the bedroom that night; so much so my wife even offered to try to find and relocate it. It was a hot night, I couldn’t get comfortable. Eventually at about 11pm I slipped off to sleep.
The alarm went off at 2:15, we could hear Jon getting up too. My wife Stella was good enough to get up with us and make us a cooked breakfast. Getting our gear on and heading to the garage, plugging everything in, we set the tracking going, we got the video camera recording. It all seemed familiar and easy, it had been practiced so many times in the weeks leading up to this, it was almost second nature. We were quite relaxed and quietly excited to get on and get going.
I think we both felt that we wouldn’t know how this was going to go until we actually got going on the ride. I don’t know why we would think that anything might not go well as we’re used to riding and this wasn’t really anything fundamentally different. But it felt like it could be, perhaps it was just fear of the unknown?
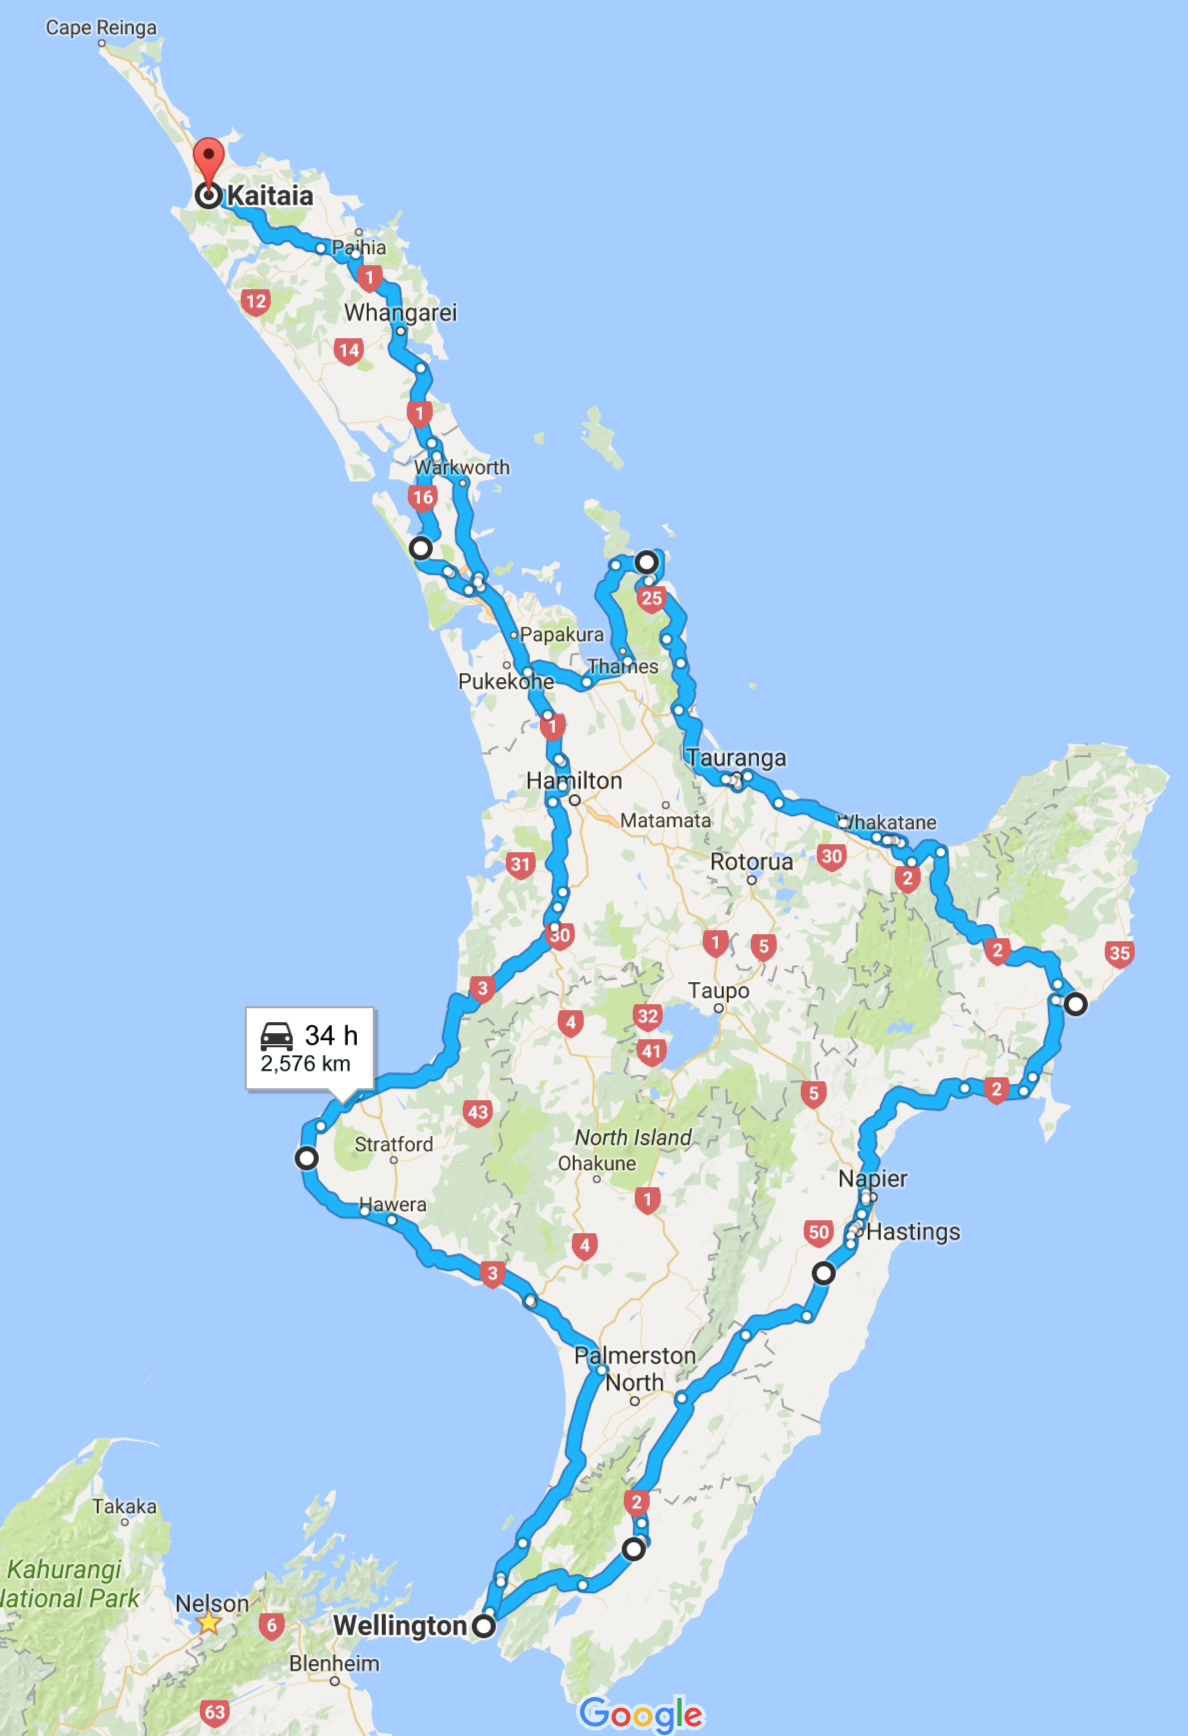
The Plan – Clockwise around the North Island
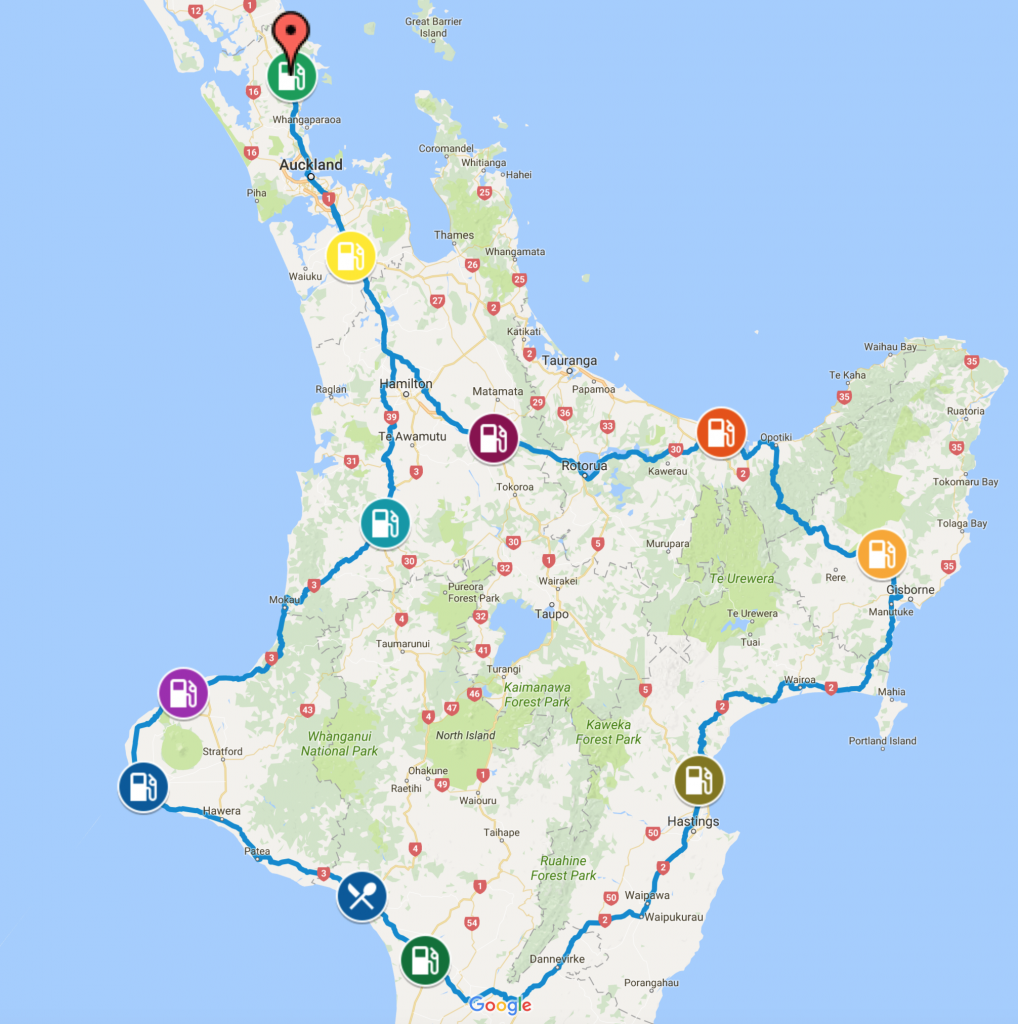
Our plan sheet below was printed and made visible from within the top of our tank bags from inside waterproof plastic bags of course. I found the format of this table *particularly useful for quick glances* at while riding. All of our fuel stops were in bold red with the distance between fuel stops on the far right. The planned arrival times for each stop are shown on the far left in bold:
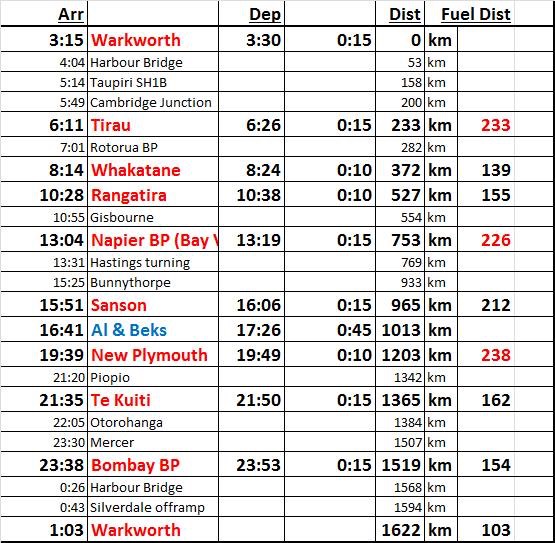
When we left a fuel stop I would get the GPS setup to showing directions and distance to the next. The dashboard I had setup on the GPS had ‘ETA’ on the map view so to check how we were tracking against our next planned stoppage time was super easy. As the timings varied between the stops I would call them out to Jon on the headset, saying something like, ‘We’re now 4 mins ahead of schedule for our stop at Sanson…’, ‘Now we’re 9 minutes ahead of plan…’ – It was super easy to keep the day running to schedule this way.
Getting going, our formal start
There were no issues filling up at the start, we had heaps of time before our planned start time when we arrived at Warkworth. We were chatty with the fuel station attendant and explained to him what we were doing and that we’d appreciate it if we could pay at a specific time to get 03:30 on our receipts. He understood and had no problem with that. Doing this well would make using the planning sheet easy throughout the day, it was kind of important otherwise we would have had to continually performed arithmetic on the times as we rode round.
So, a few nervous toilet stops later and after a little bit of bag re-packing we were off to pay. We remembered to log the mileage in our logbooks, reset our trip meters on the bikes, I gave my wife a big hug, and we rolled out on our ride.
I forgot to get my major GPS route started. This was a pretty major rookie mistake and could have been a problem for me if I hadn’t also made sure we had each stop added in as easy to find waypoints too. – I’ll cover this in more detail later on.
It is about 45km from Warkworth to the northern side of Auckland city. A friend of ours Nigel was waiting for us there. Yes, he must be crazy, he got up before 3:30am to ride out and meet us! He was interested in riding with us until our first fuel stop at Tirau (@233km) where he planned to turn around and ride back to Auckland as he had some work to do during Monday’s daytime. We spoke briefly on the phone as we approached so that we knew which motorway on-ramp he was sitting on. When we saw him we flashed and he joined our small convoy.
The traffic was almost nonexistent in Auckland, the only small problem we faced was that the motorway was closed for 3 of the city junctions which forced us to leave and detour through some of the city streets. We were unaware that this was going to happen, so it caught us a little by surprise.
Beyond South Auckland you enter an area known as ‘The Waikato’, it’s a very flat area known for its dairy farming. It tends to attract fog at certain times of the year. I had hoped that we were not going to have to ride through morning fog at 4-5am and thankfully it was perfectly clear. At Taupiri we turned off the main highway and started what was going to be a full day’s worth of single carriageway highway driving. From that point on (~@158km), until we came back through that same point we were not expecting to see any dual carriageway highways. This meant that about 1,300km of our 1,600km ride was going to be on normal, twisty roads.
We had a second friend who was keen to meet up with us that morning, Scott had been sent instructions on where to meet:
We had used basecamp route planning to determine the exact minute which we were due to arrive at that point so he knew what time to be there. In preparation for meeting us on our ride he had ridden out to this point the week before and then gone through to the next fuel stop. On the way down to Tirau through these back-road highways my auxiliary lights proved highly valuable. They provided significant extra visibility and made keeping a good average speed easy despite it being a very dark night.
If you manage to watch the video of the ride, then you’ll see a number of people in the planned fuel stop at Tirau, that’s Nigel and Scott getting to meet each other for the first time. They both stopped there and apparently had a chat and a coffee for half an hour before they went their separate ways.
As for me and Jon we were only just getting going. The initial segment felt good, it was dark but clear. The weather was cool but we were dressed with enough layers to keep warm. I had put on a thin thermal t-shirt, a normal t-shirt, my jacket’s inner liner, and then my summer riding jacket. This way as the day warmed up I could take layers off and put them back on at the end of the day as it cooled again. I was very comfortable all day as a result.
The next segment of the ride saw us travelling through one of the best known thermal areas in New Zealand, Rotorua. You know when you’ve arrived in Rotorua; even in your car you can smell the sulphurous stench like rotting eggs. Rotorua is based on the edge of a fair sized lake and our route took us around the western, southern and eastern shores of the lake before heading back up towards the coast to a place called Whakatane (which is pronounced ‘Fak-a-tarn-ay’).
For a good portion of the ride after the lakes the speed limit is lowered to 80km/h, and we just happened to enter that area behind an unmarked police car. We were forced to be on our absolute best behaviour as he too was going to Whakatane and was happy to sit just under the speed limit. There was no reasonable way passed him. We had to sit behind him for 20 gruelling minutes. 07:29am on the time-coded video through to 07:53am as we enter Whakatane.
The headsets got some use as we discussed whether we could just trickle by him gently or not. We decided that the potential to lose time was not worth the potential gain in doing so. This unmarked car was the one and only police car which we saw on our entire ride! – That is unheard of here.
It’s probably also a good time for me to state that we were not riding excessively fast at any point during our ride, we settled into a good, steady and sustained pace. At no point during our day would the police had any issue with how we were riding. The derestricted speed limits in NZ are quite low, they are a blanket 100km/h (60mph). So in order for us to complete our ride we knew we needed to eliminate any and all unnecessary stops and to keep on trucking along at the relevant limits. Our average moving speed (as clocked by our GPS units) was 87km/h – our overall average (including stops) was 73km/h.
We arrived at Whakatane at 8am which was some 14 minutes ahead of our plan. We held this margin through until Lunch, but then lost that through road-works into the afternoon. By the time we arrived at our major planned rest break in Whanganui we were spot on our planned timing, to the minute again.
At Whakatane, (8am) it was properly light, the sun was shining through. We have ridden through sun-strike as we rounded the lakes on the way up there. We had also had one brief period of showery rain, just enough to concern me in my summer riding jacket that I might need to stop and put my water proofs on. Just as I was about to make that call it had stopped and then immediately cleared up. That ended up being the only rain we had throughout our ride. By Whakatane, it was certainly warming up, two of the layers came off and I was back to riding in my T-shirt and summer riding jacket.
We had a chance to stretch the legs while we were stripping off, I switched the video camera from time lapse photos to video capture, and changed the SD card over to a fresh 64GB card.
We left Whakatane, heading out towards Gisbourne, through the Waioeka Gorge this is where some of our video footage is worth pausing ~09:18 or so on the time-stamp, and framing forward slowly to check out the road. It’s some of the nicest, flowing road we have and there’s hardly any traffic on it.
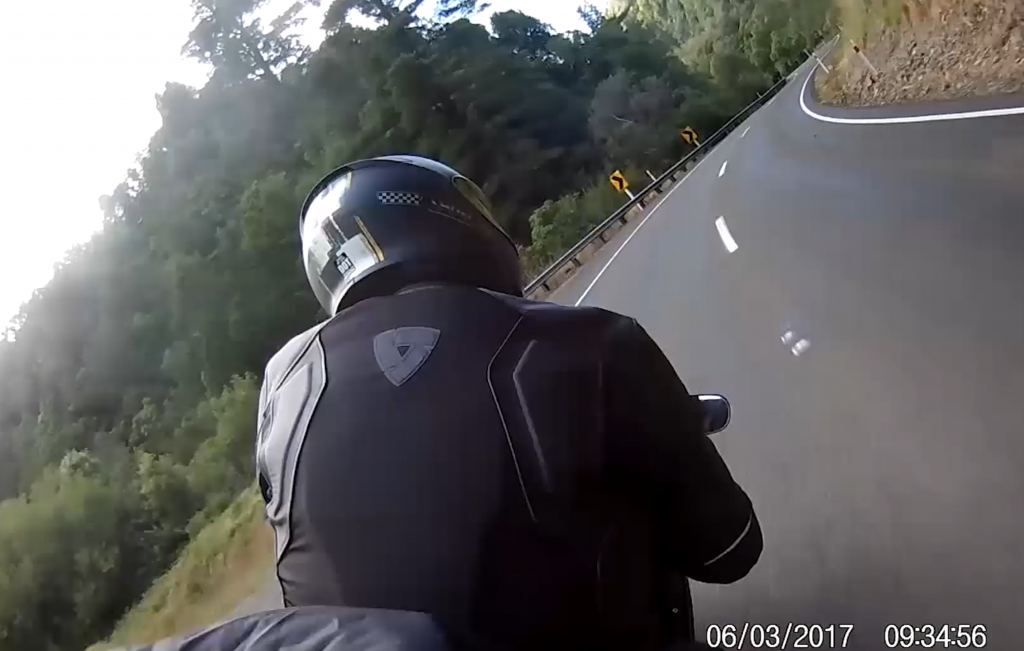
That’s a sweeping right, followed by a left
The rest of the morning was more of the same beautiful roads, then stunning light on the hills as it opened up to the East.
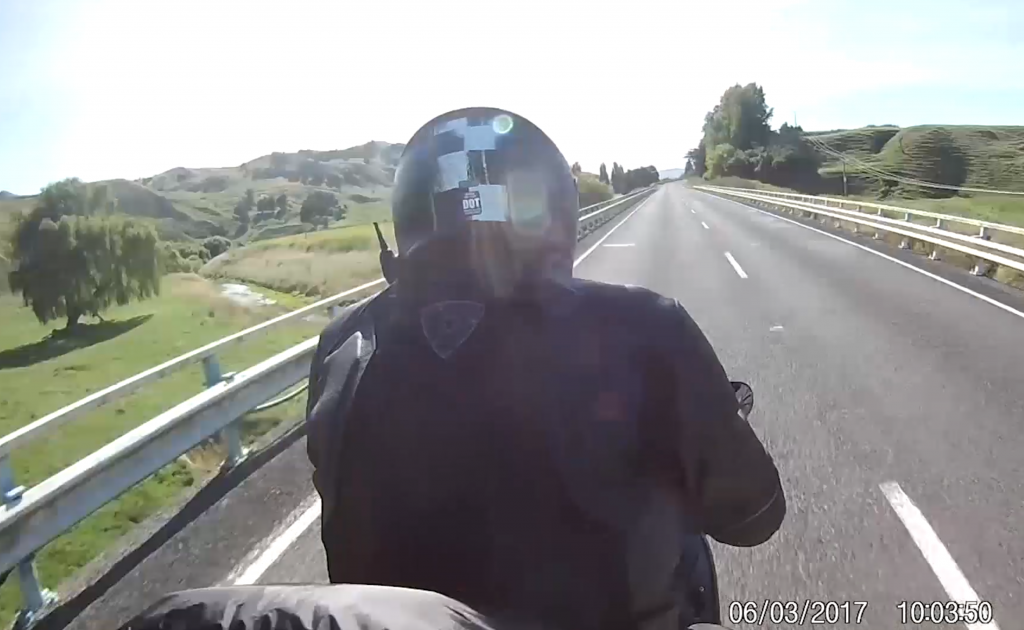
I remember as we came into the Gisbourne area at about 10:40am that it had turned into a stunning, sunny morning. I found it odd that we were in Gisbourne at 10am – from Auckland! I found that so striking and odd, that I placed a call to my work-collegues who were just part way through their morning.
On Friday night, as I left work, I had setup one of our monitoring screens in the open-plan office to show my active ride tracking. – When I called the team put me onto their speaker phone to say hello and wish us all the best for the ride. They had been following progress all morning. They had even noticed when the pointer stopped updating for a while as we had passed outside of cell reception this was a really nice chat with them, and while things were already going well, it really helped to lift my spirits up even more.
We didn’t stop at Gisbourne, but pushed on towards Napier. There are some stunning areas of coastal scenery around this stretch of road.
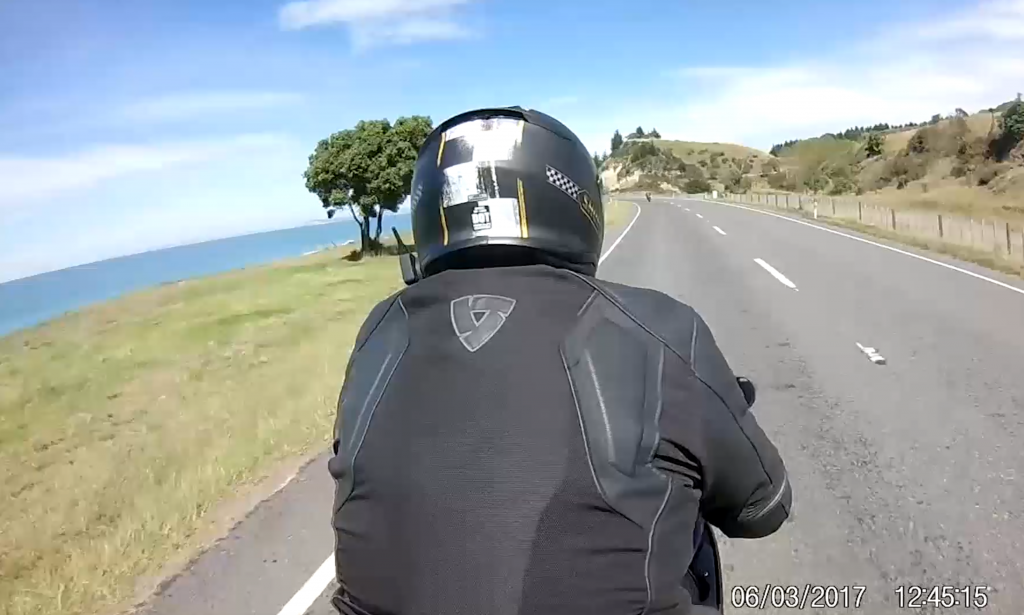
We arrived in our planned lunch stop and scoffed down a pie and a sandwich. I was amazed at how hungry I was. Then again it was about 1pm and it had been about 10.5 hours since we had eaten our breakfast.
The next few hours had the heaviest traffic of our day, coupled with lots of roadworks to contend with… We were 9 minutes ahead of plan when we arrived and left our lunch stop, but that leading margin disappeared over the next segment of the ride.
We decided to stop for a selfie at 800km at our half way point. This is the revere direction to the image which is used in the banner at the very top of this report. Our half way point at exactly 800 GPS kms was by the Poukawa School sign.

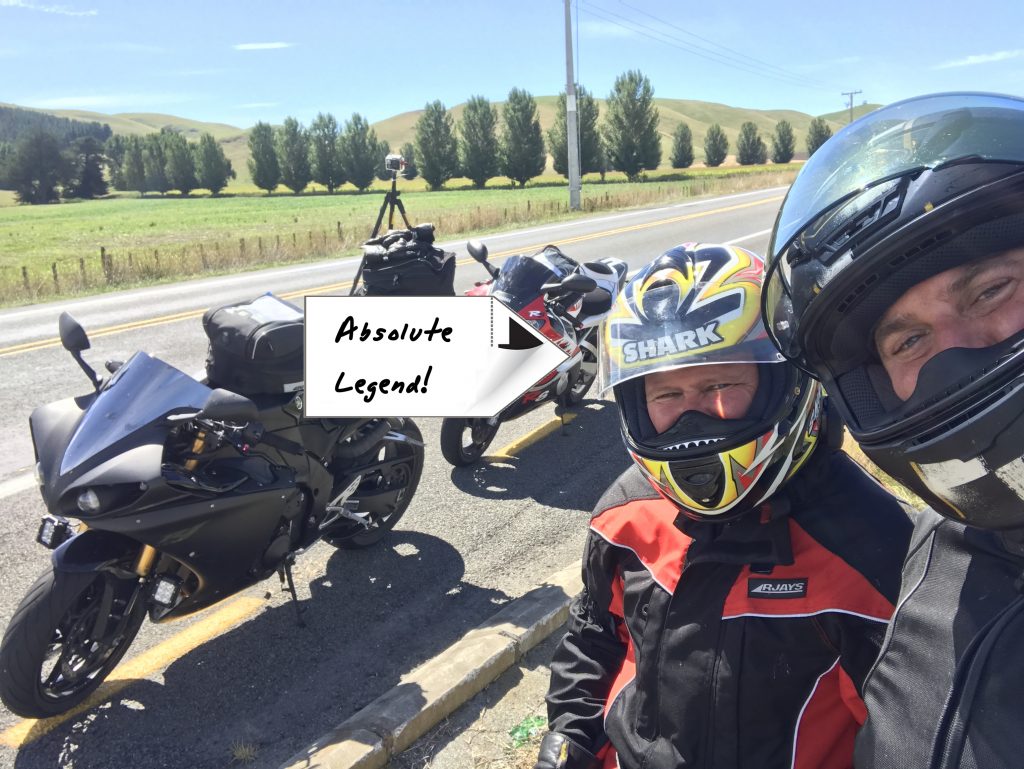
The absolute legend tag against Jon’s head has been explained in a Facebook post and I’ve gone into those details again in the ‘After the Ride’ section of this report below, it has something to do with Jon having a large piece of wood in his buttock throughout this entire ride (more later…).
The next section of the ride took us through our second gorge, the Manawatu Gorge. This too is very pretty but it’s also a pain in the butt as it’s a 7km stretch of road with lowered speed limits and no overtaking! Arrrggggh. The car drivers which we were following appeared to be incredibly inept at driving through the gorge at those permitted speeds. Boy was that frustrating! We were seeing our time starting to slip away a bit, only by a few minutes. I recall we ended up being 4 minutes down as we left the gorge.
We had to skirt through the city of Palmerston North and oddly the route planning programme thought it would be harder to get through the city than it was, so we picked up those lost 4 minutes. Perhaps it was just being able to filtering through traffic which helped? I don’t know.
The next fuel stop was one where our butts had really started to ache but we weren’t far from our planned major rest stop then. We pushed on to Wanganui, where some very good friends of mine, Al and Beks put us up for our break; they bought Pizza in for us to munch on, gave us sweets for the ride, and I even managed to have a shower and a change of underwear, socks and t-shirt. I was able to use some nice body spray and I felt completely fresh and ready to go again. We made a point of not sitting down on their couch or getting too comfy anywhere… The rest stop was at our ~1,000km mark. This was significant, as everything from that point really, honestly felt like we were homeward bound.
I remember saying to Jon over the headset, ‘You watch, each 100km block from here on is just going to fall away so quickly…’ and that’s how it felt. 100km increments were called out on the remainder of the trip and they really just felt like they were falling away. .. But, I get ahead of myself…
As we left Wanganui we had two other riders join us; Al, on his 125cc scooter lead us out of the city to the speed derestriction zone, and Andy on his large Triumph rode on with us for another 50km or so to Hawera.
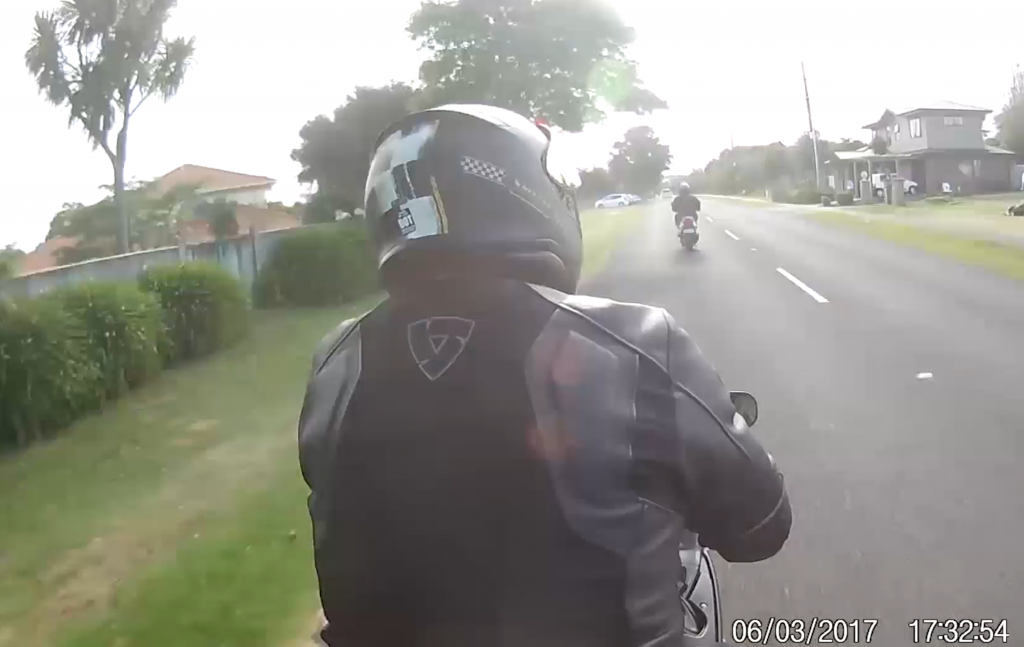
Al, leading us out of Wanganui on his scooter
The next section of our ride took us out into a very remote area, the west coast of the North Island, through to a place called Opunake, which is almost at the very western tip of the Taranaki peninsula. We made an additional fuel stop here simply to collect a receipt. We did this specifically as there is an inland road which could have been taken between Wanganui and our next major fuel stop at New Plymouth. Opunake was a splash and dash purely for the paperwork.
We arrived at New Plymouth at 8pm, and I switched the SD card in the camera again and also the mode to time-lapse photos. My photos were being taken every 5 seconds. Being photos, they coped with the lower light level better than a video capture would have, I ended up with content which was far less grainy this way.
The section between New Plymouth and Te Kuiti was probably the hardest leg for a number of reasons. It had just become dark, the dust light was pretty hard to ride through, it was another very dark night with no moon to speak of and there was still a fair amount of traffic on the road including a good number of trucks. The road went through our third gorge, the Awakino Gorge. It is a very tight, twisty road and at night with a reasonable amount of traffic coming the other way, it occasionally got pretty hard to see. I had another problem, bugs…
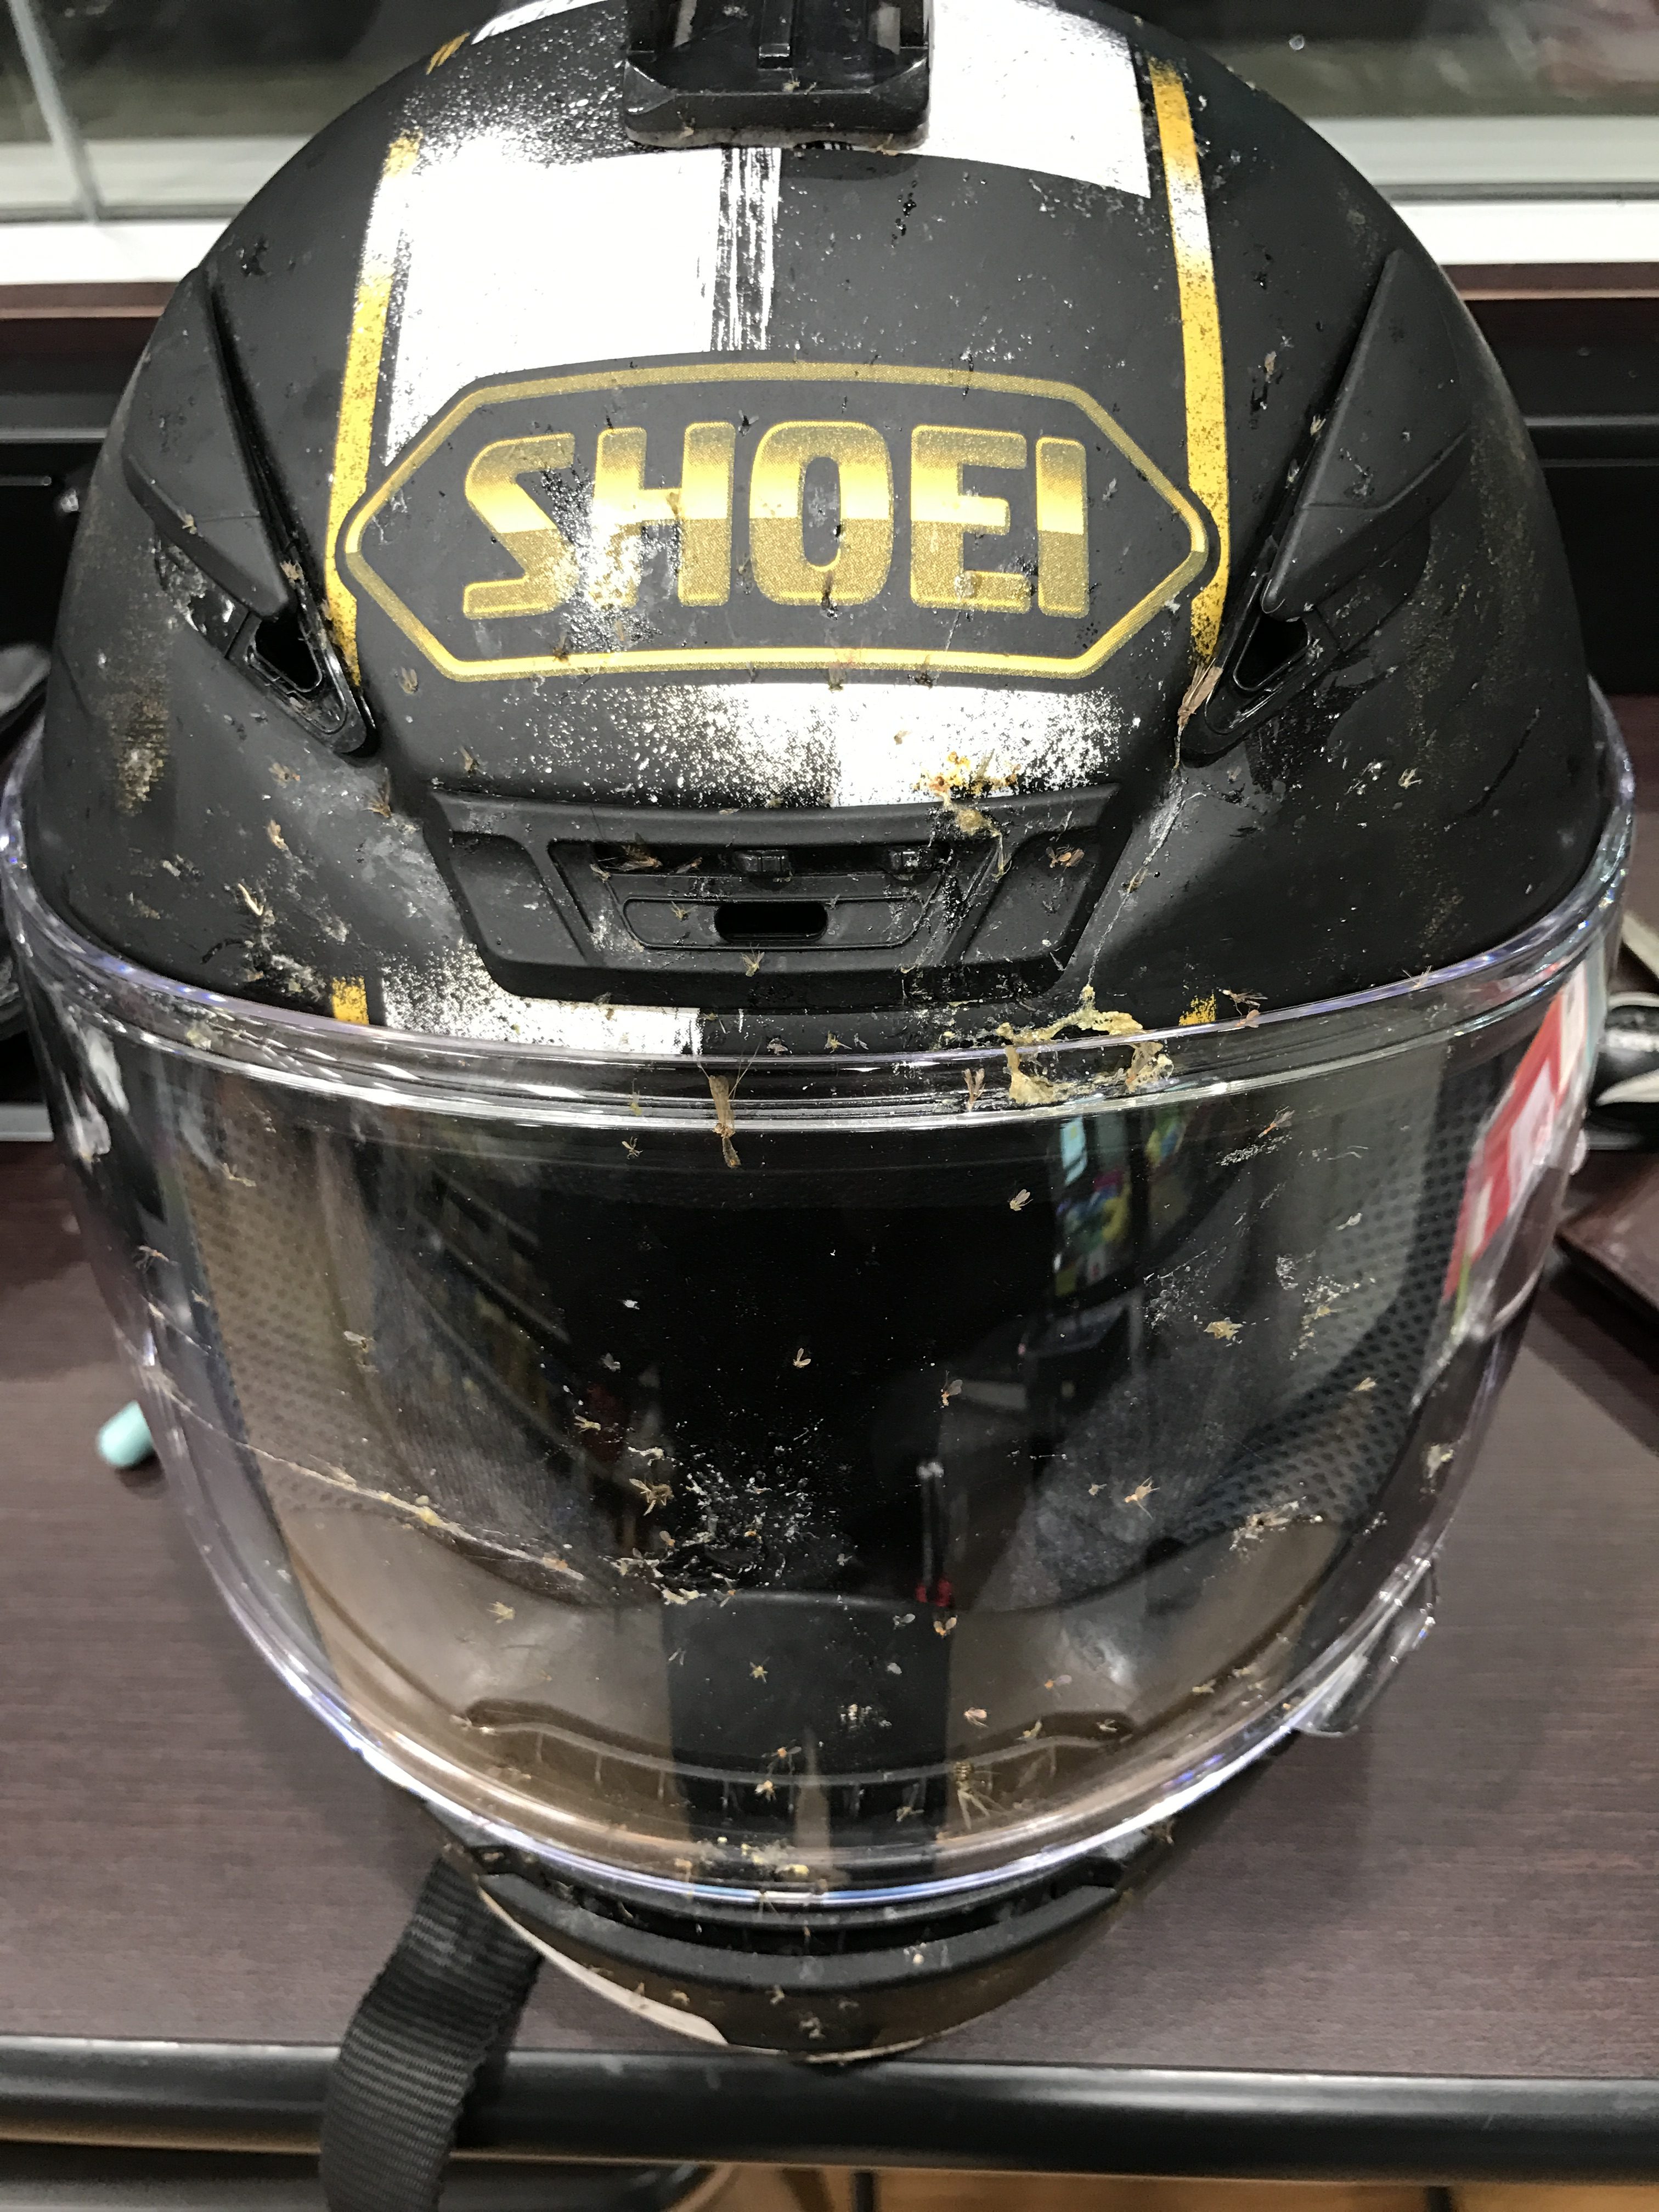
Yup, this was my helmet at the next fuel stop, the glare off the oncoming headlights through these bug splats was not pleasant. As we were riding up towards Te Kuiti I was struggling with the state of my visor. I said to Jon on the headset that I wanted to stop and clean it at a place called Pio Pio, which had a well lit fuel station as we drove through it; but it’s strange what these miles do to you… Despite making a plan to stop I couldn’t do it, instead I said, “Ah, Te Kuiti is only another 17km, let’s keep going…” – there really is a strong drive to get on and keep on going. It had surprised me when I had said it.
The roads from Te Kuiti up through to Hamilton area and Bombay are roads which I travel routinely during winter months when we return from a weekend of skiing at Mt Ruapehu. I know these roads very well in the dark and how to drive them when I’m tired. It’s for that reason that we had planned to go clockwise around the island. Those miles just disappeared and before we knew it we were in Bombay service station.
Nigel, the guy who had ridden us out of Auckland in the morning came down to Bombay to meet us again at midnight. He’s crazy, but a good friend. We stopped, chatted, had another pie, we took another 15 minutes to tell him all about our day. It was nice to be stood up. 🙂 – Bombay is only about an hour away from our ride’s end point and we arrived at 23:53 which was actually our planned departure time from that stop. So we were 15 mins behind when we got there and we stayed for 5 minutes longer than planned. That’s where the total of 20 minutes behind time came from on our whole day out.
As we rode back through Auckland we found that another different area of the motorway was shut, this time we were forced off a couple of times, once was into the city itself. We know it very well, we live here so it was no bother and the roads were very quiet after midnight.
We were in touch with Stella again at this point, noted when we were crossing over the harbour bridge, took a screen shot of our tracking on her iPad and posted a Facebook update out for us.

Boys on the Harbour Bridge
She was waiting to greet us at Warkworth when we rolled in there. My fuel receipt was for 1:35, Jon’s was for 1:33. So just a few minutes over 22 hours and we were back at our start point, our officially recorded distance was 1,621km.
On the forecourt, Stella presented us with some figurine ‘poo emoticon’ awards – she said they were the closest thing she could find to a ‘sore arse’… We congratulated ourselves, shook hands, and then rode the 23km home, where for the first time all day, we struggled to get off the bikes! We came into the house, sat down in the lounge, smiled a lot, talked a lot and had a couple of beers before going to bed.
Filing in the final ‘witness milage’ into my log book. And smiling a lot because we had done it! 🙂
What a ride, what an experience.
The difference in tracking devices
During the ride we had two Garmin GPS devices running and on my iPhone I was using Raah, and Rever.
Rever, out of all of the tracking methods we used during the ride actually logged the longest distance on our ride by a long way. It logged 1,634km in total. Our GPS logged 1,621km which matched our Google Maps planning, and Raah logged 1,606.9km.
I was happy to discount Rever, although it was interesting. We were happy to use the Garmin GPS units’ readings, both were set to log a track point every ~100m.
When we zoomed into Raah’s track and compared it with the track captured by the GPS units it captured a more coarse set of points. When you consider how twisty our route was, this tends to square off the corners creating shorter, straight lines. Over the entire route it accounts for the difference between the logged distances of 1,621km and 1,606.9km.
I’ve attempted to perform the same comparison form Rever and the Garmin, but found that Rever’s track is incredibly fine, and that it could too account for the difference between them. From zooming in on the Rever track it appears that it logs a point every 20m. This is significant.
If you are planning a ride where your margins are close and your route it twisty, then use Rever and a Pro Subscription, you can download a GPX from it, and it might help to save you from thinking that you’ve been short!… These are important learnings.
After the ride
It is exactly three weeks beyond the end of our ride as I write this account. Since we finished life has returned to normal and various things have happened to the bike. The rear pack rack, top bag and camera mounting frame have been removed. My single-seat cowl has been added back on so the rear of the bike is fully back to normal. The padded seat cushion has remained, although for some reason I felt the need to turn it around so that it was facing the ‘correct way’, but it doesn’t fit as well so I’m going to turn it back around again at some point.
I’m still using my tank bag on every ride, I have always liked them. I particularly like the design of this one as it’s so easy to remove it and take it with you then plonk it back on when you get back to your bike. I highly recommend the Givi TankLock system, I’ve been very impressed with it and how the bag doesn’t touch my tank at all. There are no scrape or scratch marks at all from it.
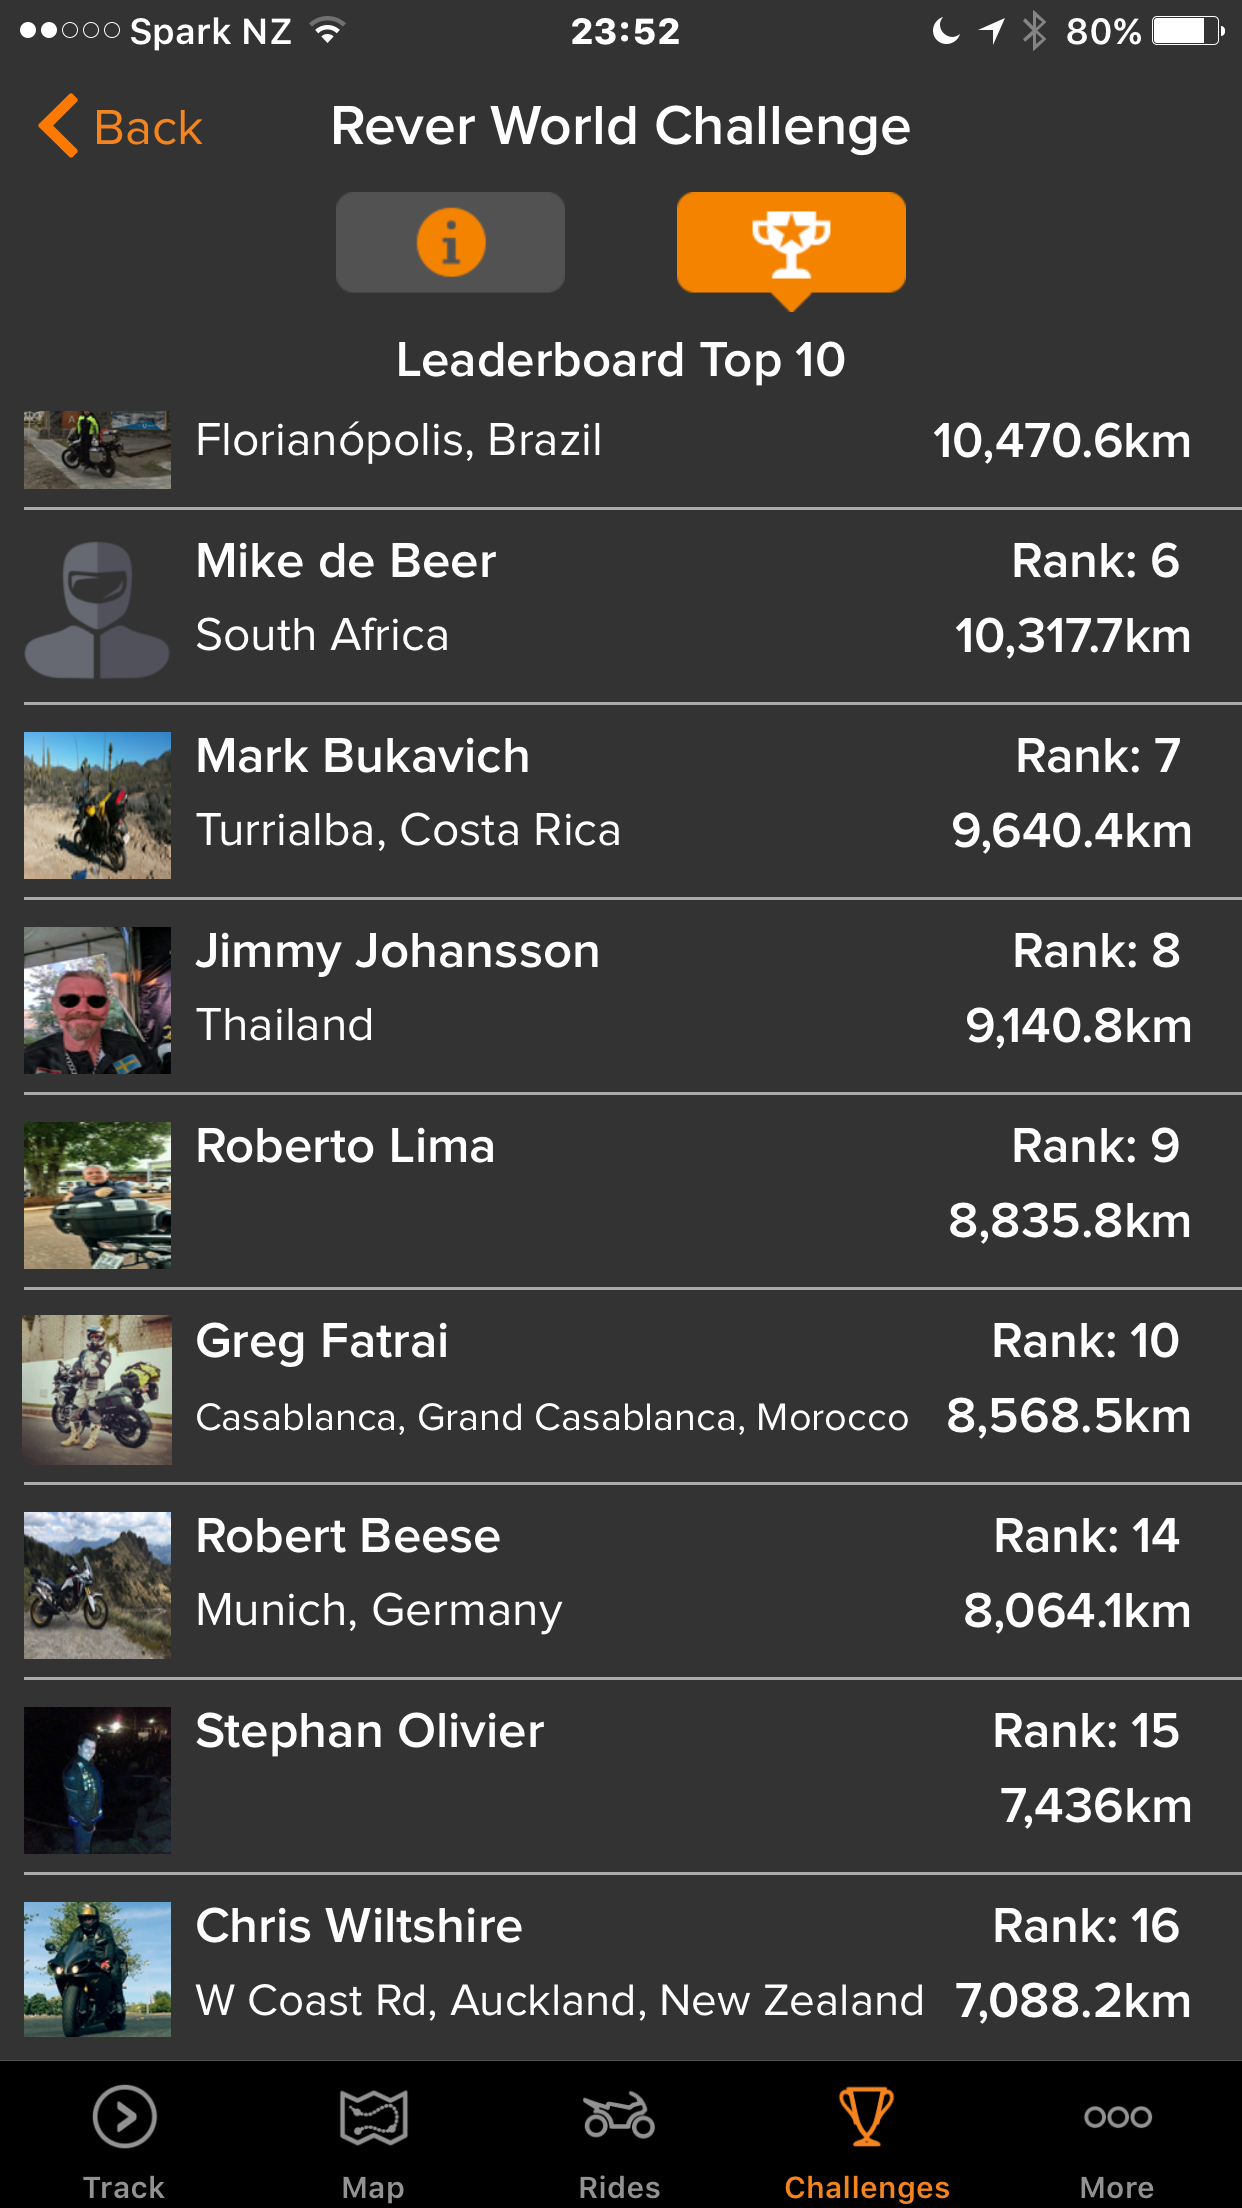
The Garmin GPS and iPhone mount are still on the bike and they get regular use as does the headset. I’m still enjoying tracking my rides using Rever and I’ve entered one of their worldwide competitions for yearly mileage, I’m currently in 16th place.
The auxiliary lights are still in place, which has kind-of surprised me as they are certainly not in keeping with the style of the rest of the bike. However, they’ve been incredibly useful a few times since the ride when I’ve had to ride home after dark. Seeing as I live rurally, they are perfect for the twisty roads. I think they will stay on the bike for a while.
The throttle lock and the cramp buster have a permanent home on my bike, they are such useful little devices and so easy and quick to use. Once you get used to these you won’t want to get rid of them.
The primary USB power system remains on my bike under my pillion seat. Given that I’m regularly using my iPhone with it’s GPS running, I need to supply power.
I’m amazed at how well the tyres on my bike have lasted. My R1 has approximately 153hp at the rear wheel (standard) so they tend to chew through tyres pretty quickly. I knew this and so when preparing for the SS1600 I chose not to use a HyperSports tyre, instead opting for a Sports/Tourer type.
I’ve used Dunlops extensively in the past and like the way that they tend to give you a little notice that they’re about to let go (I don’t mind that feeling, I prefer it hugely to a sudden surprise slide which some others tend to offer) – so I fitted Dunlop SportsMax RoadSmart II tyres in mid-January. They had already been well worn in when we started our ride, and now that we’ve finished, I’ve put close to 7,500km on them and I would say that they’re about 45% worn. They’re wearing well too, by this I mean they’re showing signs of ‘good wear’, the wear patterns and the surface of the tyre show that they’re being worked and that they’re responding well. Here’s my rear, and front tyre currently:

Rear Tyre wear on the Dunlop SportsMax RoadSmart II – Showing really healthy wear in my view.
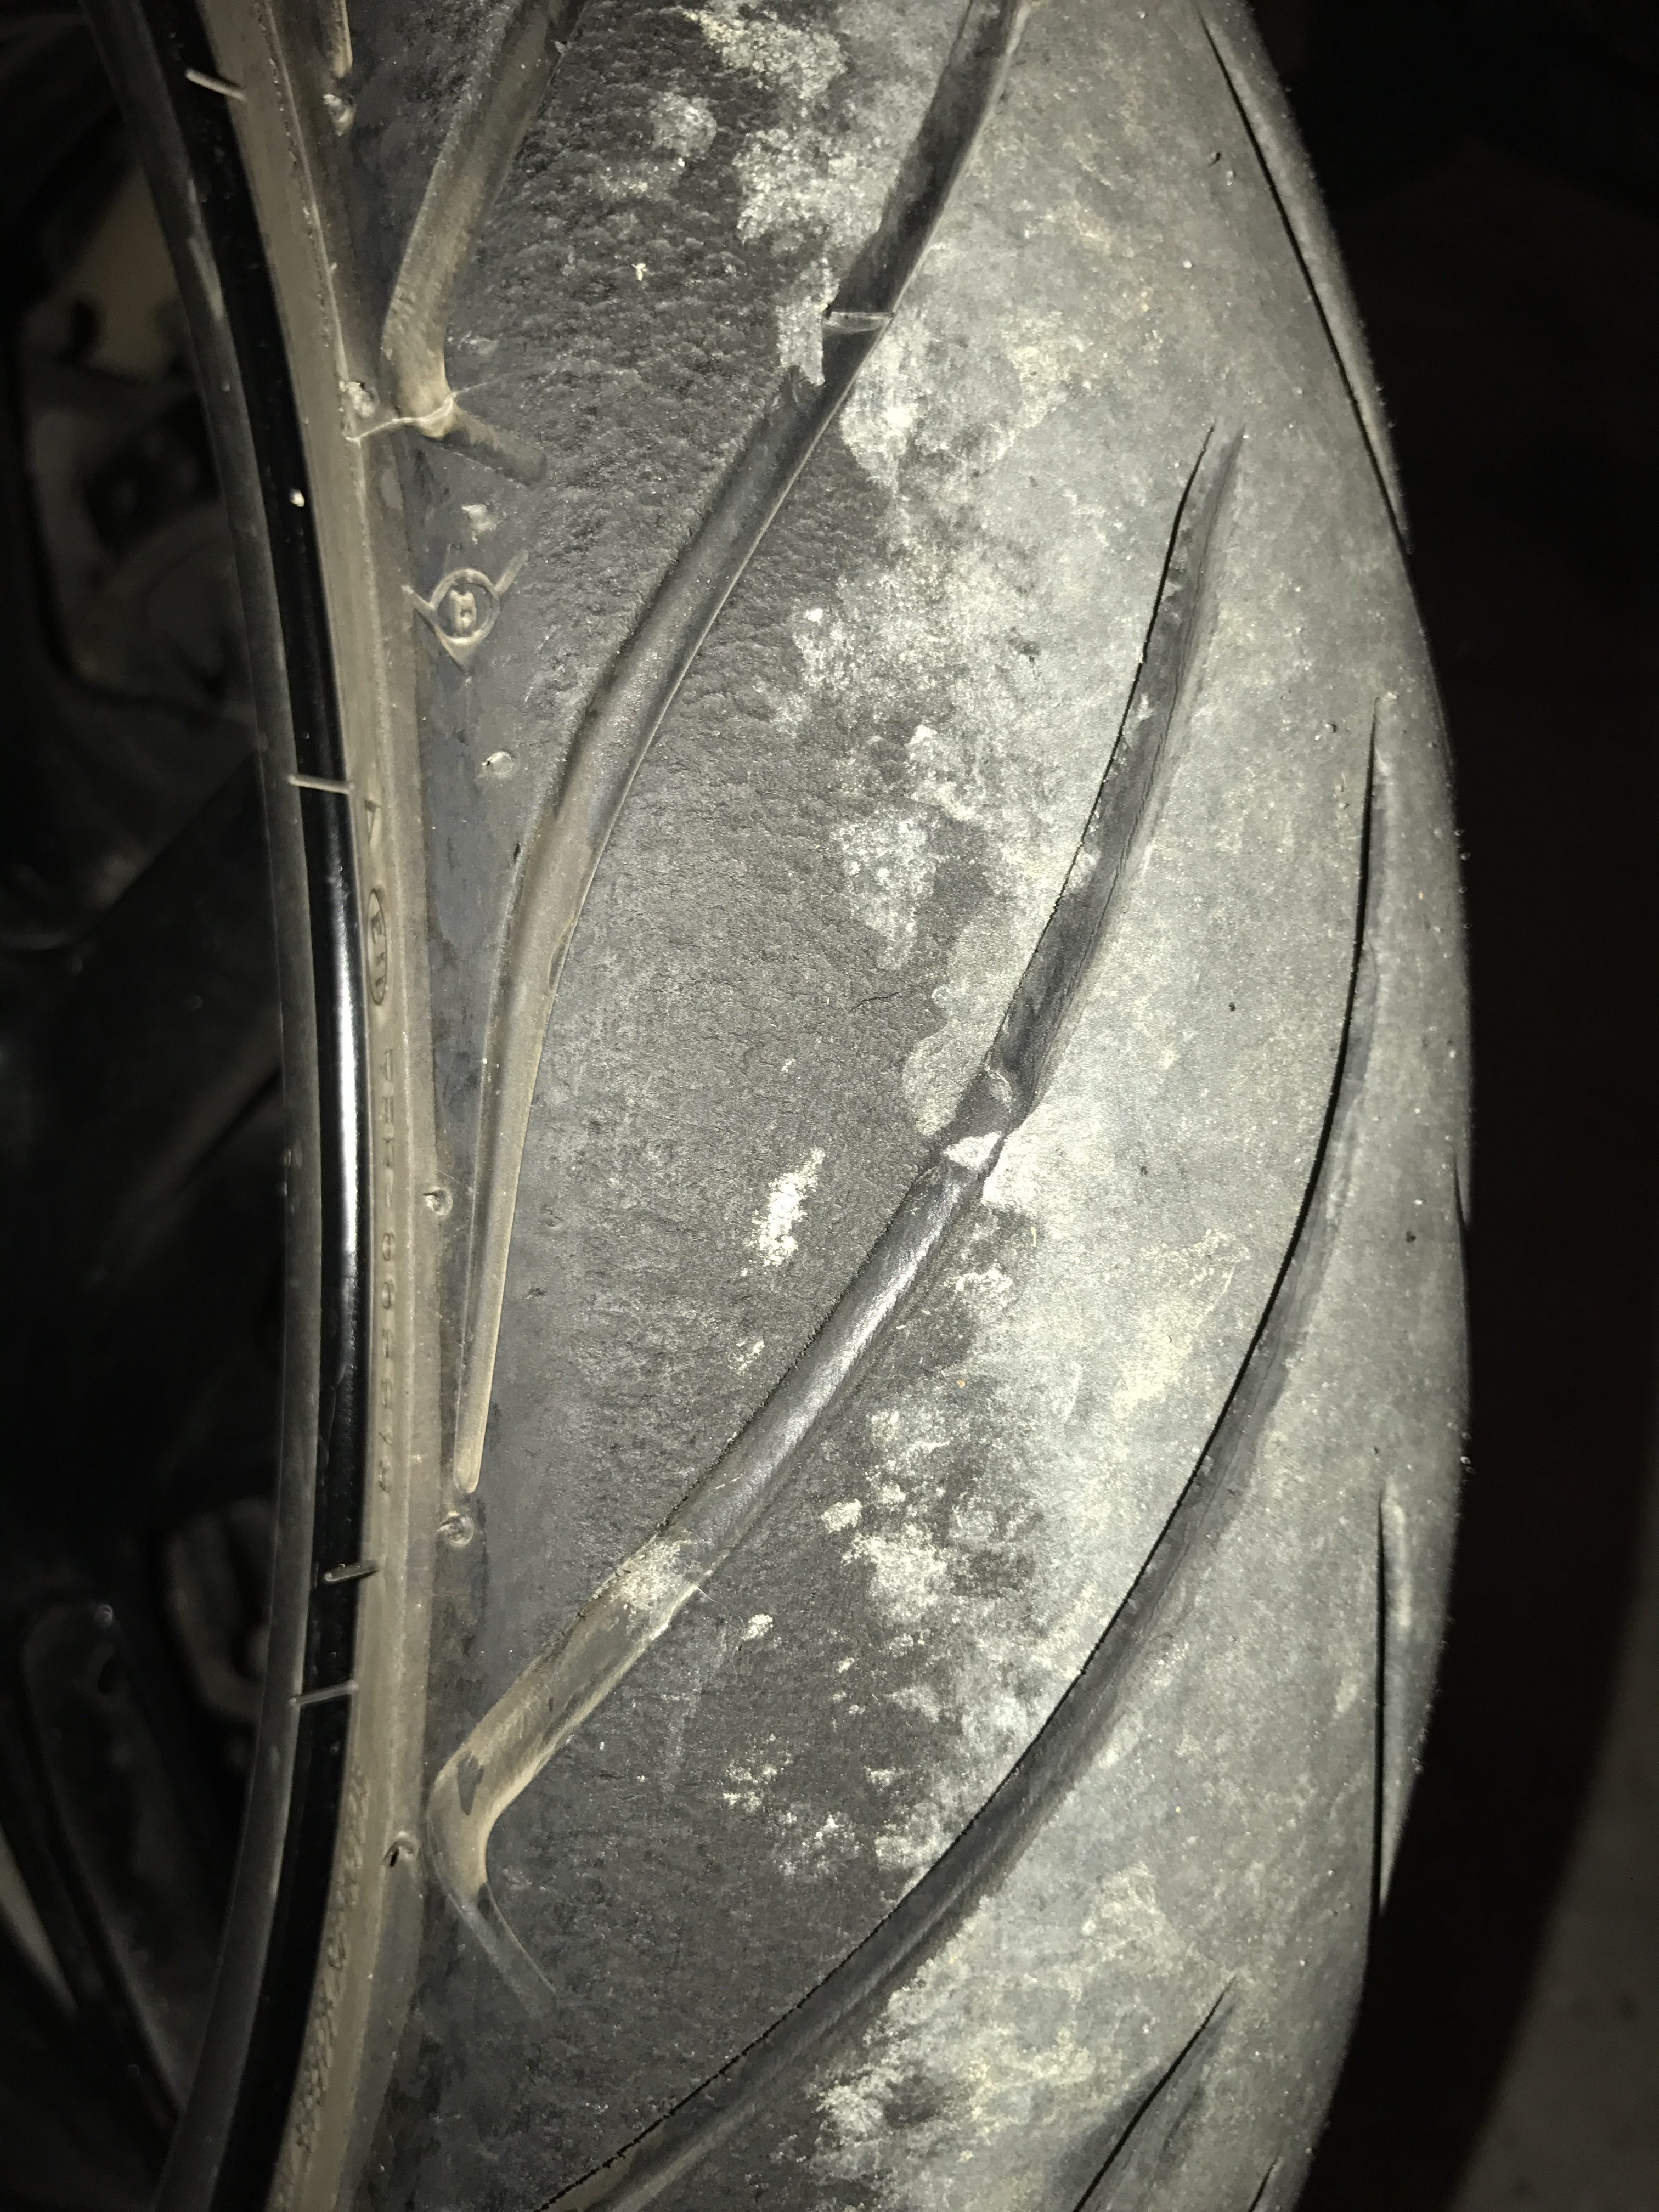
Front tyre wear – Dunlop SportsMax RoadSmart II – showing signs of really good, appropriate wear patterns.
I reckon that’s impressive. I’ve been out for a few ‘quicker rides’ with friends on these too, and they’re not just for the tourist trails, they hold up to taking a bit of stick. I’ll be buying some more of these or their newer cousins, the RoadSmart III’s when these wear out (next year perhaps?).
A debrief?
I called and spoke to Jon, to say Hi and to talk about the ride a little more. After so much focus on planning and doing, when you’ve finally done it you sort of hit a bit of a flat spot. It’s sad when it’s all over and there’s nothing left to buzz about.
We spoke at the time about how much we had enjoyed the actual ride itself and how once on the bikes and focussed on eating through the miles (kms in our case), how it became almost a relentless quest to continued movement, without stopping.
It was easier than either of us had thought; I guess the unknown had caused us to be cautious in our approach. Certainly the planning and preparations came into their own and made the execution part, easier.
Sure, we had sore bums and lower backs, we had aching shoulders, but with our amount of drive – to get on and do it (bolstered by the sponsorship and fundraising support too) it made it easily tolerable.
Being able to talk non-stop throughout the ride was great. It was also important to be able to gauge the state of your riding companion, to adjust the pace and to talk about how your progress compares with the plan.
Our ride honestly went off without any major hitch. I’d have to look hard to come up with something to write about which didn’t happen as it should: ok, my camera turned itself off for a short time. I had left the WIFI on the camera on and my iPhone’s battery was draining, despite being plugged into power, I noticed it and turned the WIFI off. There were more roadworks than we expected, with stop/go’s on the highway. The motorway in Auckland was closed both on the way out and on the way home, so we had to use detours which took us down city roads rather than the highway. I got bug-splats covering my visor at one point at night and it made visibility harder, but then I cleaned it off with some of our visor wipes. I forgot to start my GPS major route when we left. – That’s it.
Would we do it again?
We talked about this specifically on the day after the ride. Neither of us said we wouldn’t do it again. I think the feeling immediately after the ride was that we had done it, and we had done it well, and that we could tick it off our list. (Read: perhaps not need to ever do it again).
However, now that some time has passed and the glory feels like it’s subsiding a little, could we be convinced that we need another one? Absolutely. I’ve already started talking like this ought to be an annual thing. 🙂
Doing a higher class of ride in NZ would be possible, but… There’s not that many roads in New Zealand…
You can *just about* squeeze a Bum Burner 2500km out of the North Island, but I honestly think it would be impossible to do a BB Gold on NZ’s roads without exceeding the speed limits.
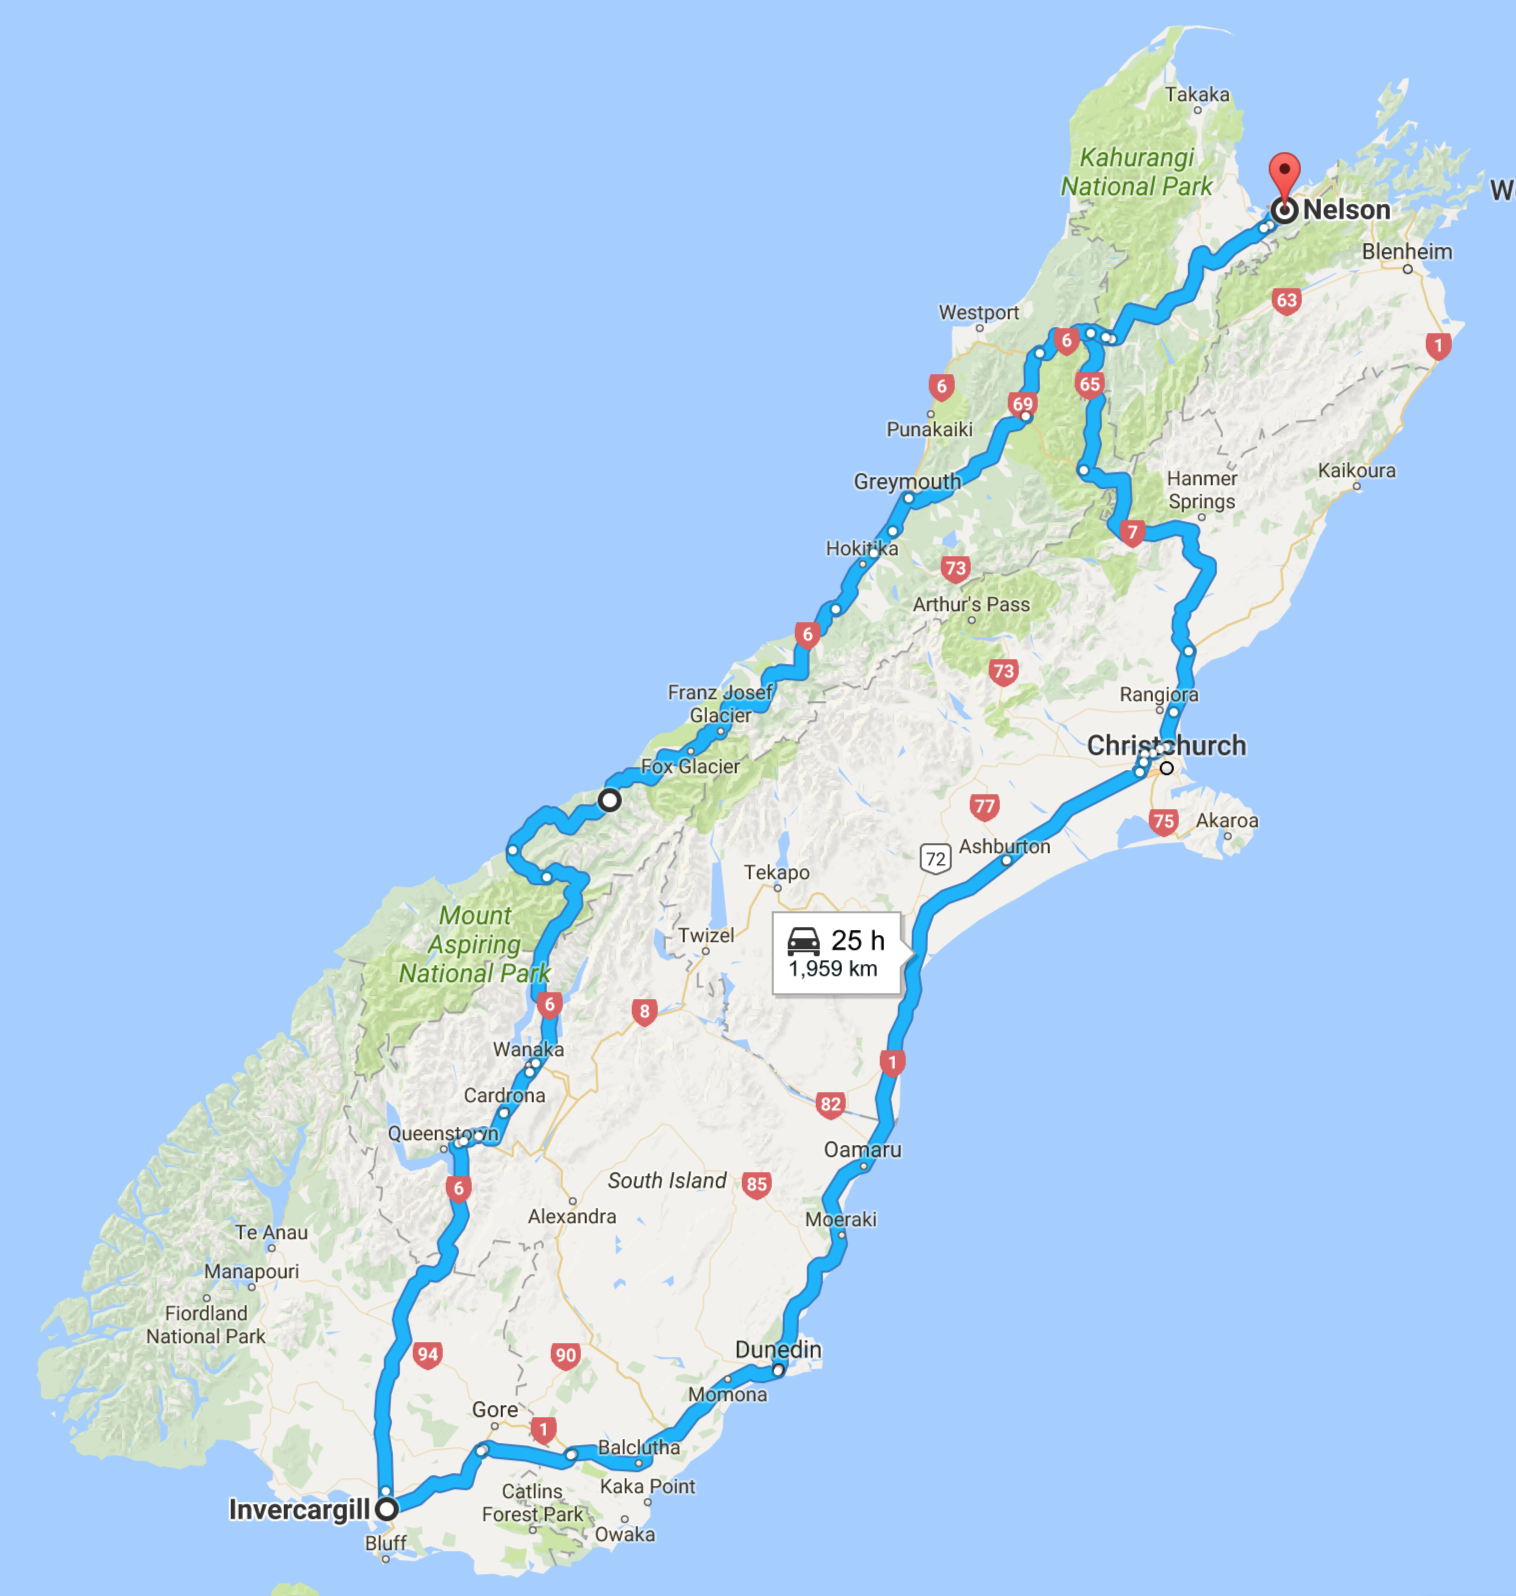
The South Island has a good SS1600 in it. And I think that may have to be next Summer’s mission.
This time around, the challenge was initially our primary motivation. Next time, I would probably view the fundraising as an equally important (and very meaningful) part of the whole experience.
Aran Animal Rescue
Aran Animal Rescue have received a total of NZ$2,018 from our fundraising efforts, needless to say they are very pleased with this as it represents a significant proportion of their annual fundraising contributions. They have already started spending this on a variety of important things which they need, including training for one of their handlers.
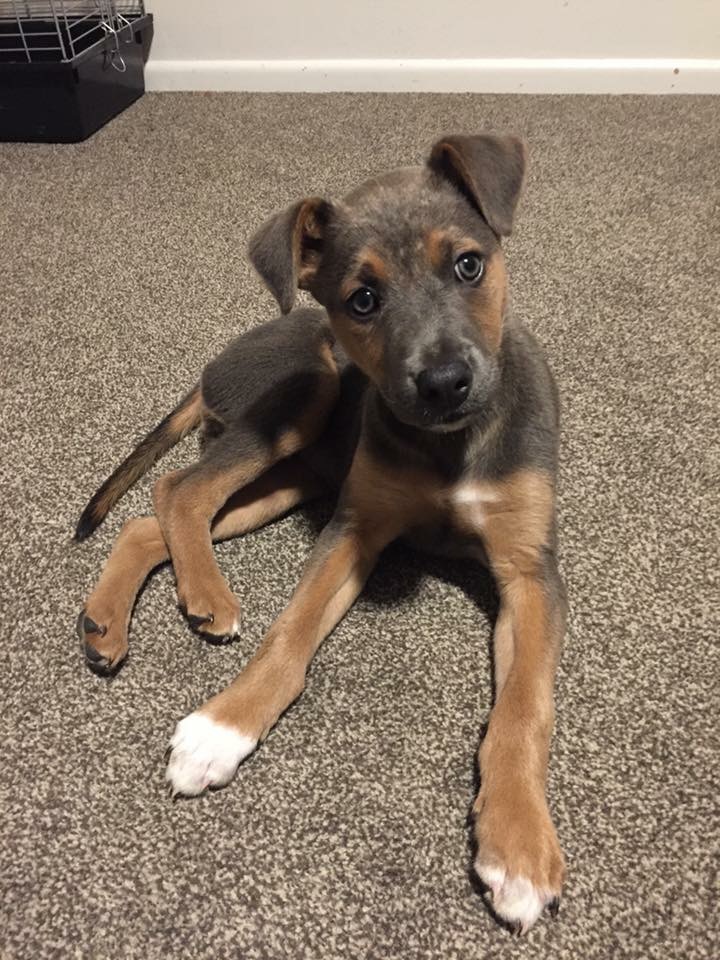
As a thank you gesture, they allowed me to name one of their gorgeous rescue puppies, meet Tia:
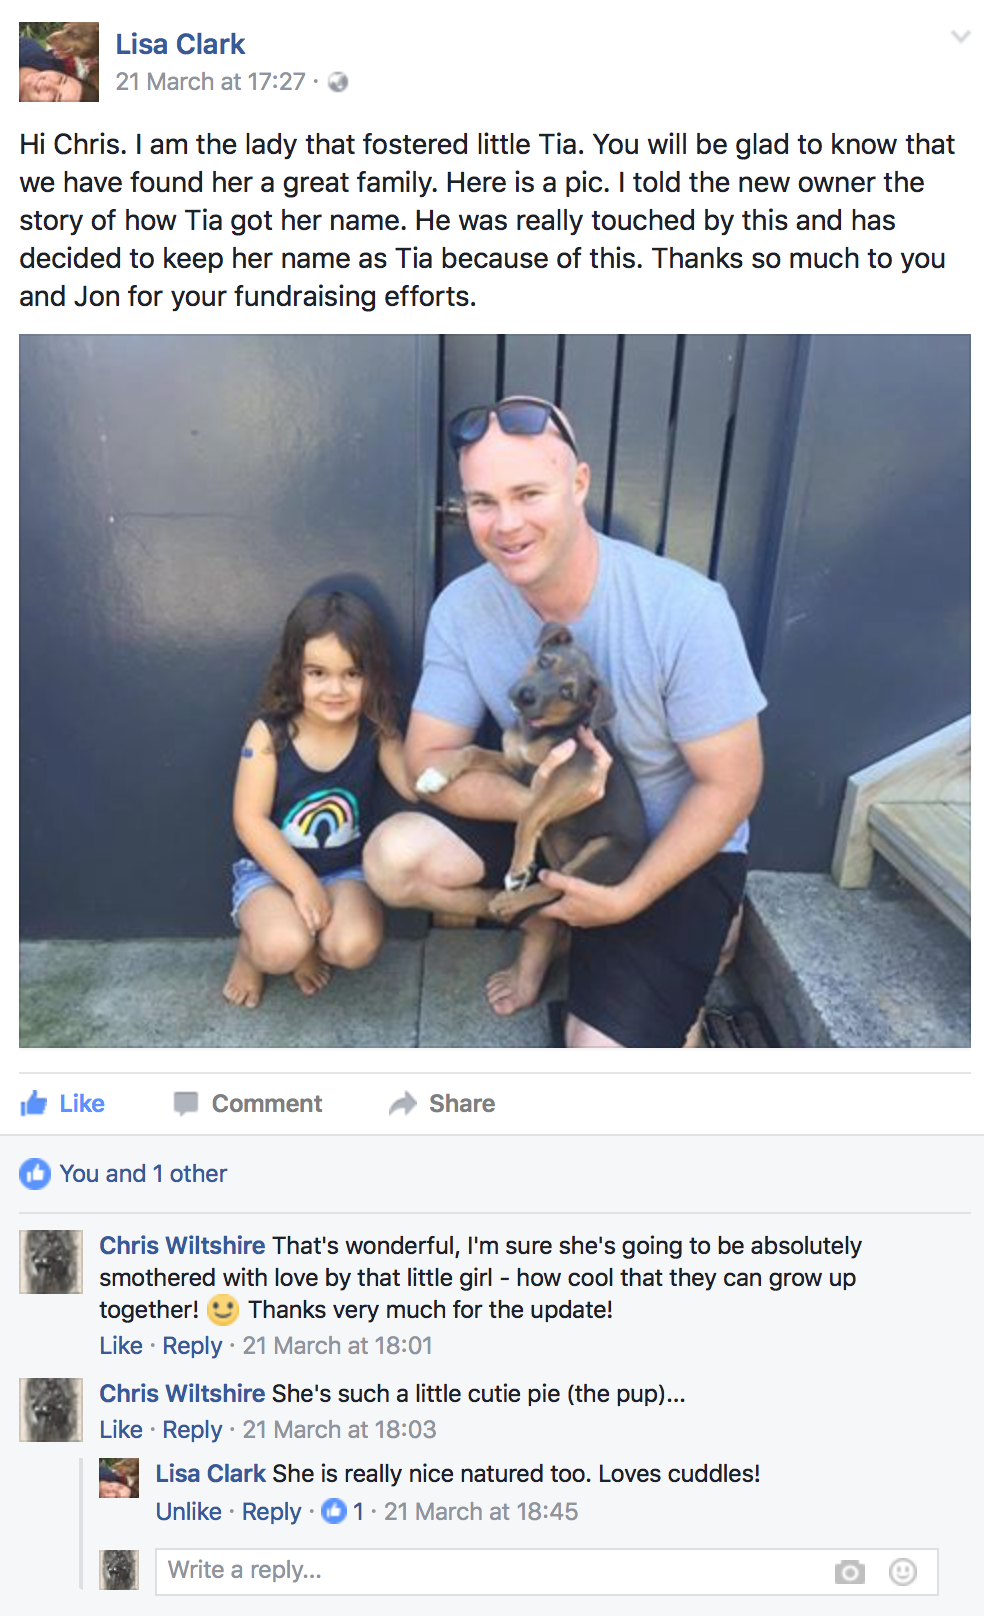
She has since been re-homed and in a further gesture of thanks the new owners were told about my ride and how Tia came about her name. As a result the new owners have decided to keep her name:
Video compilation for our supporters
To open this in it’s own window, using Google’s own video player – click on the following link:
https://drive.google.com/file/d/0B-sfP6TrAhgjNW1zMVBUV2htMnc/view
This video is the content which was captured from the rear camera mount. It’s the whole 22 hours captured, with time-stamps and compressed together into a 6 minute long video. The quality is good enough that you can pause and look for individual frames and extract them as desired. 🙂
The early morning and nighttime footage (dark hours) 3-8am and 8pm-2am were captured using time-lapse photography and re-merged back into video format using GoProStudio software. While it was not shot on a GoPro, it still works for this!… The middle 12 hours section 8am-8pm was taken as continuous video footage then sped up to make up about 2:30mins of the end content.
It was compressed to this exact length purely because of the song which we found to set it all to. In order to get the timing to be as spot-on as we did I had to proportionally adjust each of the three segments to represent the appropriate compressed time period then put them all together. For the speed up / titling work I used Adobe Premiere Pro.
If you’ve ever played with video then you’ll know how much work this is and how many hours of effort it takes to put 6 mins together. In all, this came from approximately 80GB of raw content!
The Legend that is Jon Mitchell
This is best summed up, I think by the post on Facebook relating to what I had just heard from his wife.

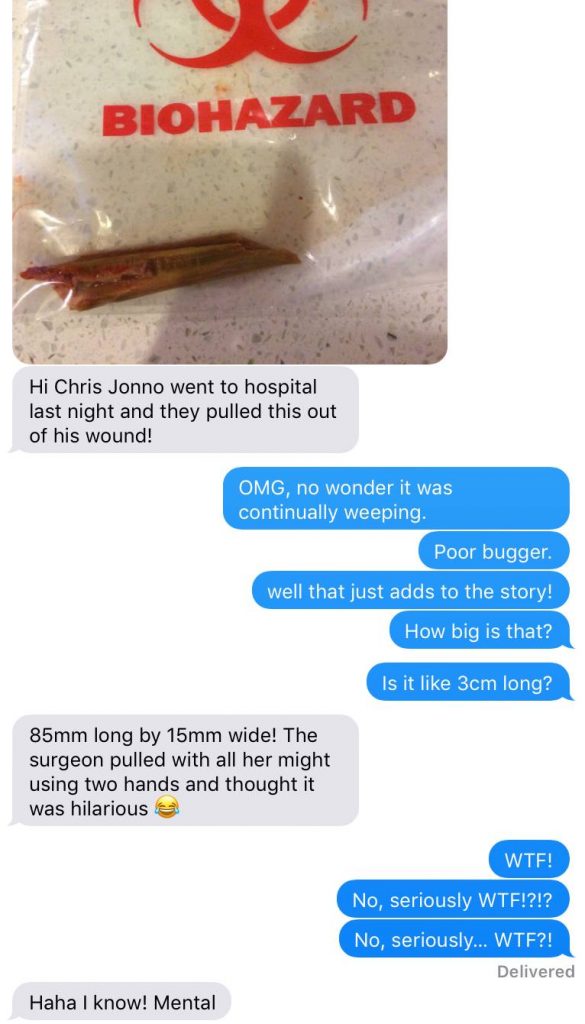
It has been suggested that a new chapter of the Iron Butt Association may need to be formed with a founding member, Jon Mitchell, the first ever ‘Wood Butt Rider‘.
It’s also been said ‘Ohhh! That wood hurt.’ – and many more….
Further update: On Friday 31st March, I heard from Jon again, this time to tell me he’d just come out of hospital again. He had been back in for two days and a further operation under general anaesthetic to remove *two more* pieces of wood from his butt. These were 3.5 cm and 0.5cm long… This brings the total length of embedded butt-wood during his ride to: 85mm + 35mm + 5mm = 125mm, or 5 inches.
We all hope that these are the last fragments and that they’ve got it all out now. Hopefully he can start to recover properly from this.
Follow up from the local paper (Published 27th Mar, 2017)
http://www.localmatters.co.nz/Lifestyle/sport/March+2017/SaddleSore+cracked+in+just+22+hours.html
I was only slightly annoyed that they erroneously called it a ‘Race’. – I’ve been SO careful throughout all of this to continually stress that it is NOT a race!… <sigh /> – Nice to have some follow-up though.
We’ve been awarded our Saddle Sore 1600K!
Update: 3rd April. I’m so excited to have received an email from the IBA verification team tonight which congratulates us!
“Congratulations, your IBA SaddleSore 1600k ride verification has been completed.” – So we’re paying some invoices and then waiting on some international postage to deliver our certificates and SS rider packs. That is so cool. I’m super stoked to be a member of this group of international nutters. Apparently there are just over 60,000 of us worldwide, I have gained some brothers and sisters through this.
I am a very proud member of the IBA, # 66,217